As winter begins to soften and spring projects start to take shape, many stitchers reach for wool appliqué. The soft texture, rich color, and forgiving nature of wool make it ideal for decorative stitching, layered designs, and heirloom-style projects.
But wool appliqué behaves differently than cotton or linen. Its loft, thickness, and layered construction mean the needle you choose can make a noticeable difference in how easily your stitches form—and how polished the finished piece looks.
If your needle feels difficult to pull through layers, or your stitches look larger than you’d like, it may simply be time to switch tools.
Let’s explore how the right needle supports smooth, consistent wool appliqué stitching.
The Stitching Scenario
Hand wool appliqué
Common projects include:
Appliqué quilts
Penny rugs
Decorative pillows or wall hangings
Seasonal table toppers
Folk art stitching projects
These designs typically involve stitching wool shapes onto a background fabric using small, often decorative stitches.
Because wool is thicker than most fabrics—and often layered—the needle must be strong enough to pass through both materials without distorting the stitches.
The Common Challenges
When working with wool appliqué, stitchers often notice:
Difficulty pulling the needle through layered fabrics
Large or visible stitch holes
Uneven stitch size
Hand fatigue during longer sessions
Threads wearing down from friction
The density and loft of wool require a needle that balances strength with finesse.
Why the Right Tool Matters
Several needle characteristics influence how easily you can stitch wool appliqué:
Needle Length Shorter needles allow for better control when making tiny appliqué stitches.
Shaft Strength A slightly stronger needle prevents bending when passing through thicker layers.
Eye Size Your thread should glide smoothly through the eye without shredding—especially when using cotton thread or embroidery floss.
Point Style A sharp point helps the needle pass cleanly through wool and the background fabric without excessive resistance.
When these elements are balanced, stitches become smaller, smoother, and more consistent.
Our Recommendation: Needles for Embroidery on Linen
Appliqué Needles – Sizes 9–11 These short, fine needles are favorites among appliqué stitchers because they allow for tiny, nearly invisible stitches. Their length provides excellent control when stitching close to edges.
Sharps Needles – Sizes 8–10 A versatile option that works well when stitching through slightly thicker wool or layered fabrics.
Embroidery (Crewel) Needles – Sizes 7–9 If you’re using embroidery floss or decorative stitching, a crewel needle’s longer eye accommodates thicker threads comfortably.
Choosing the right size depends on:
Wool thickness
Background fabric
Thread type
Desired stitch visibility
Testing on a scrap piece before beginning is always helpful.
When in doubt, test on a scrap. Or use our handy Needle Wheel!
Pro Tip: Keep Your Stitches Small
For polished appliqué, aim for stitches that disappear into the edge of the wool shape.
Try this simple technique:
Angle your needle slightly under the edge of the appliqué shape
Catch only a few threads of the background fabric
Keep stitches evenly spaced
A fine needle makes this much easier.
Special Considerations for Layered Projects
Many wool appliqué designs include multiple layers of fabric. When stitching through wool and cotton together:
Use a slightly stronger needle if you feel resistance
Avoid forcing the needle through thick spots
Replace needles that begin to bend or feel rough
A smooth, sharp needle protects both your fabric and your hands.
Reader Takeaway: Quick Checklist
When stitching wool appliqué:
✔ Choose a short needle for better stitch control ✔ Use a sharp point to pass through wool cleanly ✔ Match eye size to your thread ✔ Test your needle on layered fabric before starting
Small adjustments help create beautifully neat appliqué stitches.
Looking Ahead
Next month in The Right Tool for the Stitch, we’ll explore needle choices for hand quilting and big stitch quilting—two techniques where needle flexibility and length make a surprising difference.
Until then, enjoy the rhythm of slow stitching and the satisfying texture of wool appliqué.
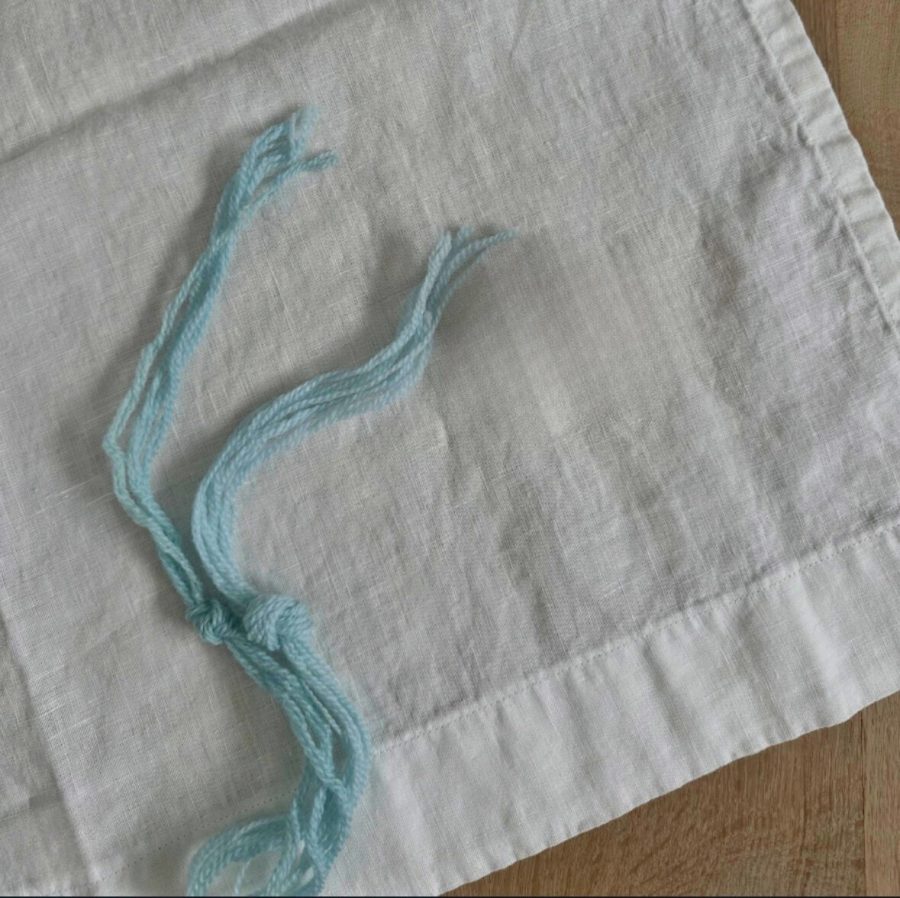
Reflecting on years past, when I was preschool age, my parents and I lived in an old three-story schoolhouse in Venice, Ohio. It sat quietly in the country, across the road from a cemetery, and was partitioned down the middle—our family on one side, a family of six on the other. I remember tagging along with my mother to the feed store, carefully choosing three printed chicken feed sacks that matched just right. She hand-stitched them into a new dress for me—clothing made from what is now considered a collector’s item.
Perhaps living in a schoolhouse and wearing feed-sack dresses was an early hint of what was down the road for me: a lifelong love of stitching, teaching, and encouraging others to create with their hands.
Over the years, I’ve taught countless “newbies” and not-so-newbies alike. My goal has always been the same—to help students feel confident, capable, and excited enough to keep sewing long after the class ends. The Hearts to You Mug Rug project is a perfect vehicle for that mission. It’s approachable, adaptable, and full of opportunities for learning and creativity.
This simple wool appliqué project is designed to build confidence while introducing or reinforcing basic hand-stitching skills. Encourage students to work at their own pace and remember: progress matters more than perfection.
Step 1: Prepare the Base Circles
Using the 5” felted white wool square and the 5” felted red wool square, cut one circle from each.
The white circle will be your top/background.
The red circle will be the base layer.
Tip: If students struggle with cutting smooth curves, provide a paper template or encourage slow, small scissor movements rather than long cuts.
Step 2: Layer and Secure
Place the white circle on top of the red circle, centering it carefully.
Use pins, clips, Roxanne Basting Glue, or a few temporary basting stitches to hold the layers together.
Check that the red shows evenly around the edges for a neat border.
Teaching moment: This is a great time to discuss alignment, balance, and how layering adds visual interest.
Step 3: Cut the Heart Appliqués
From the 2 ¼” x 7” piece of felted red wool, cut two small hearts.
Hearts do not need to be identical—slight variations add charm.
Encourage students to draw heart shapes lightly with pencil if helpful.
Ask: How could you change the shape or size of the hearts to make this project your own?
Step 4: Position the Hearts
Arrange the hearts on the white circle until you’re happy with the placement.
Overlapping hearts create depth and interest.
Once positioned, secure with pins, glue, or a few basting stitches.
Visual learners benefit from seeing multiple layout examples before stitching.
Use visuals and drawings. Sometimes a sketch explains more than words.
Demonstrate for large groups and again for smaller groups when needed.
Provide time for guided practice. Stitch alongside students.
Allow independent practice while monitoring and encouraging.
Vary group sizes and group members. Learning from peers is powerful.
Use pull-out groups for extra help or advanced exploration.
Show and share as you go. Celebrate progress, not just finished pieces.
Use Clues and Encouragement
Word clues: “Just like me, the older I get, the finer I am. The same is true for thread and hand sewing needles. Sewing machine needles are the opposite.”
Visual clues: Place a sticker in the top right-hand corner of a square-up ruler to indicate step one.
Reduce frustration: Encourage breaks, mark with tape, and avoid Sharpie markers on fabric.
Engage Creativity and Reflection
Engage students with questions:
How could you change the design?
Which color do you prefer?
How did you get that corner so sharp?
What would you do differently next time?
Transfer learning: Where else could you use this technique?
Check back: What did you learn today?
Reflect together: What would you keep, eliminate, or change?
Appoint “maestras.” Peer leaders build confidence and community.
Keep it FUN! Joy is the best teacher of all.
Sewing Beyond the Project
The Hearts to You Mug Rug may be a small piece, but it carries big lessons—about patience, flexibility, creativity, and community. When students leave class feeling successful and eager to stitch again, we’ve done our job.
After all, sewing isn’t just about thread and fabric. It’s about stories passed down, skills shared, and hearts stitched into every piece.
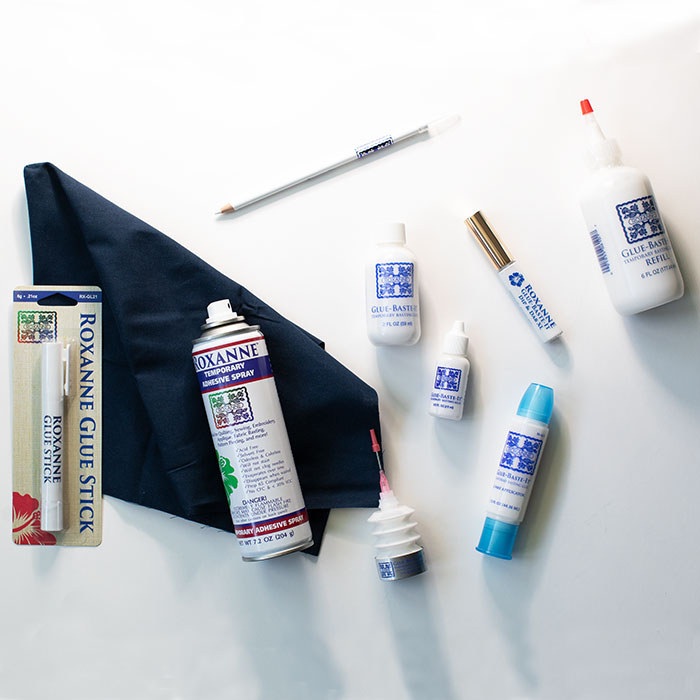
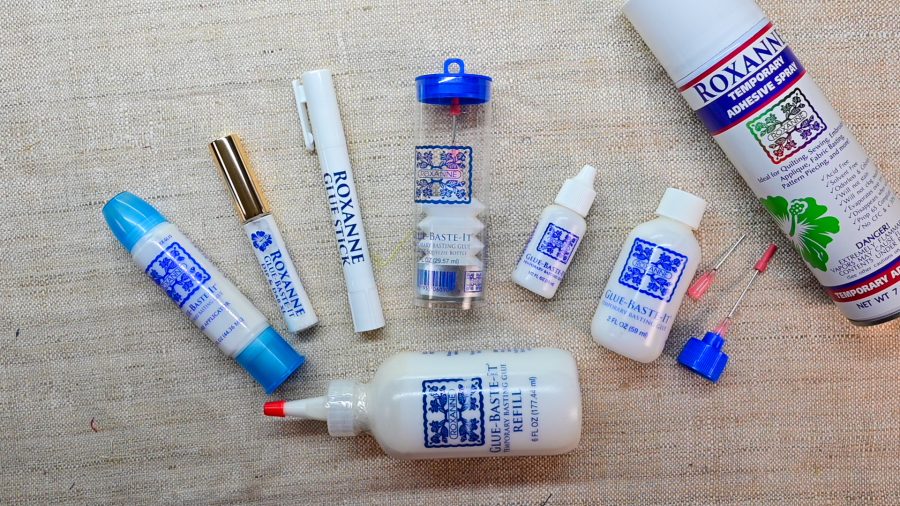
Greetings makers, crafters, and creators! Today, we’re diving into another group of Colonial Needle Company products to cover a sticky subject: glue. Specifically, glue basting with the Roxanne Baste-It family of glue.
Glue basting is a technique where you apply a thin line of water-soluble glue along the seam allowance or cut edges of fabric pieces to hold them in place before sewing. This allows for precise piecing, perfect points, and smooth curves. It is especially useful for boro, finishing quilts, and a manner of appliqué – completely removing the need for pins.
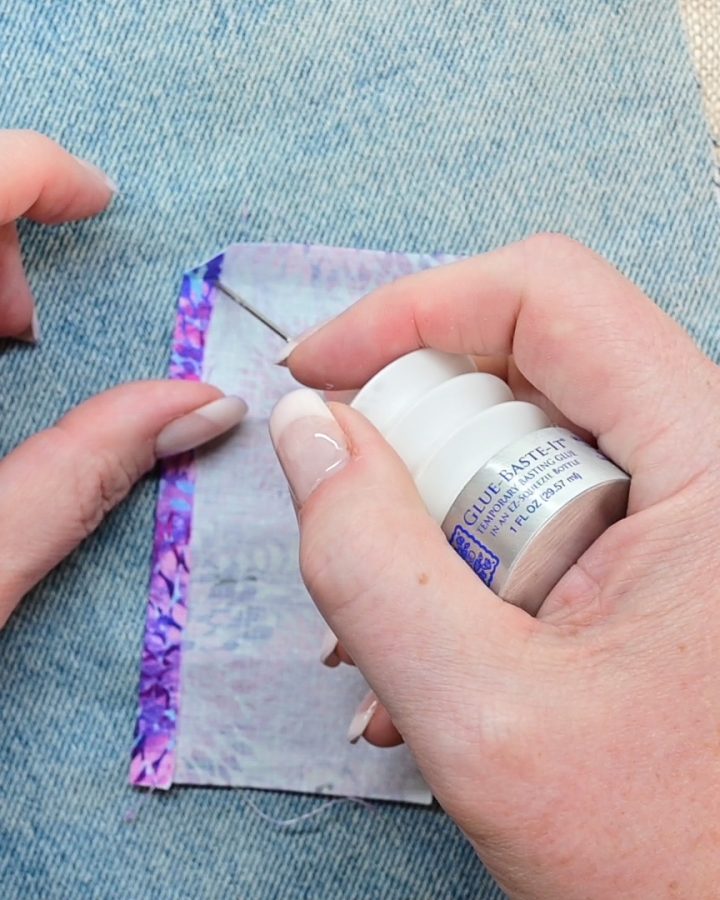
How to use Roxanne Basting Glue in Four Easy Steps:
Simply apply a fine line of glue
Line up the fabric pieces
Press with a hot iron to set (this step is not always required–as you will see in our video)
Then sew as usual.
Key points about glue basting:
Application: Roxanne Baste-It comes in a wide variety of container sizes and shapes to suit any purpose. From the spreadable 2-Way applicator to small pipettes and dab on applicators. And the Roxanne Glue Stick glides on smoooooooooth as silk without gumming up your fabric and needles. You choose which glue is best for your project and where to place it.
Heat setting: Although not required, a hot dry iron can be used to quickly set the glue and further ensure there is no shifting once the placement decisions have been made. Once set, you can easily sew without worrying about shifting seams or fabrics, even when rough handling of the fabric such as for hand quilting, sashiko, and boro.
Portability: Baste-It products come in easy to store and access sizes. You can take your handwork projects with you whether you’re traveling across the city or just to your sofa for the evening
Basting Glue Benefits: Say good-by to pins! Baste-It glues reduce the need for pins and clips, making sewing faster and smoother. Especially hand sewing. No fussing to work around pins and no stuck fingers!
Improves accuracy and precision in piecing, especially for points and curves.
Especially well-suited for appliqué, where you need precise placement of fabric edges.
The Roxanne Glue Stick is our go-to for placing boro patches and visible mending patches prior to sewing down. Watch the boro section of our video for how we create boro inspired fabrics as well as some examples of our work.
Baste-It Glue won’t leave a mark on your delicate creations. All of the Roxanne glues are non-staining and wash away completely with ease!
How we use glue basting for different techniques:
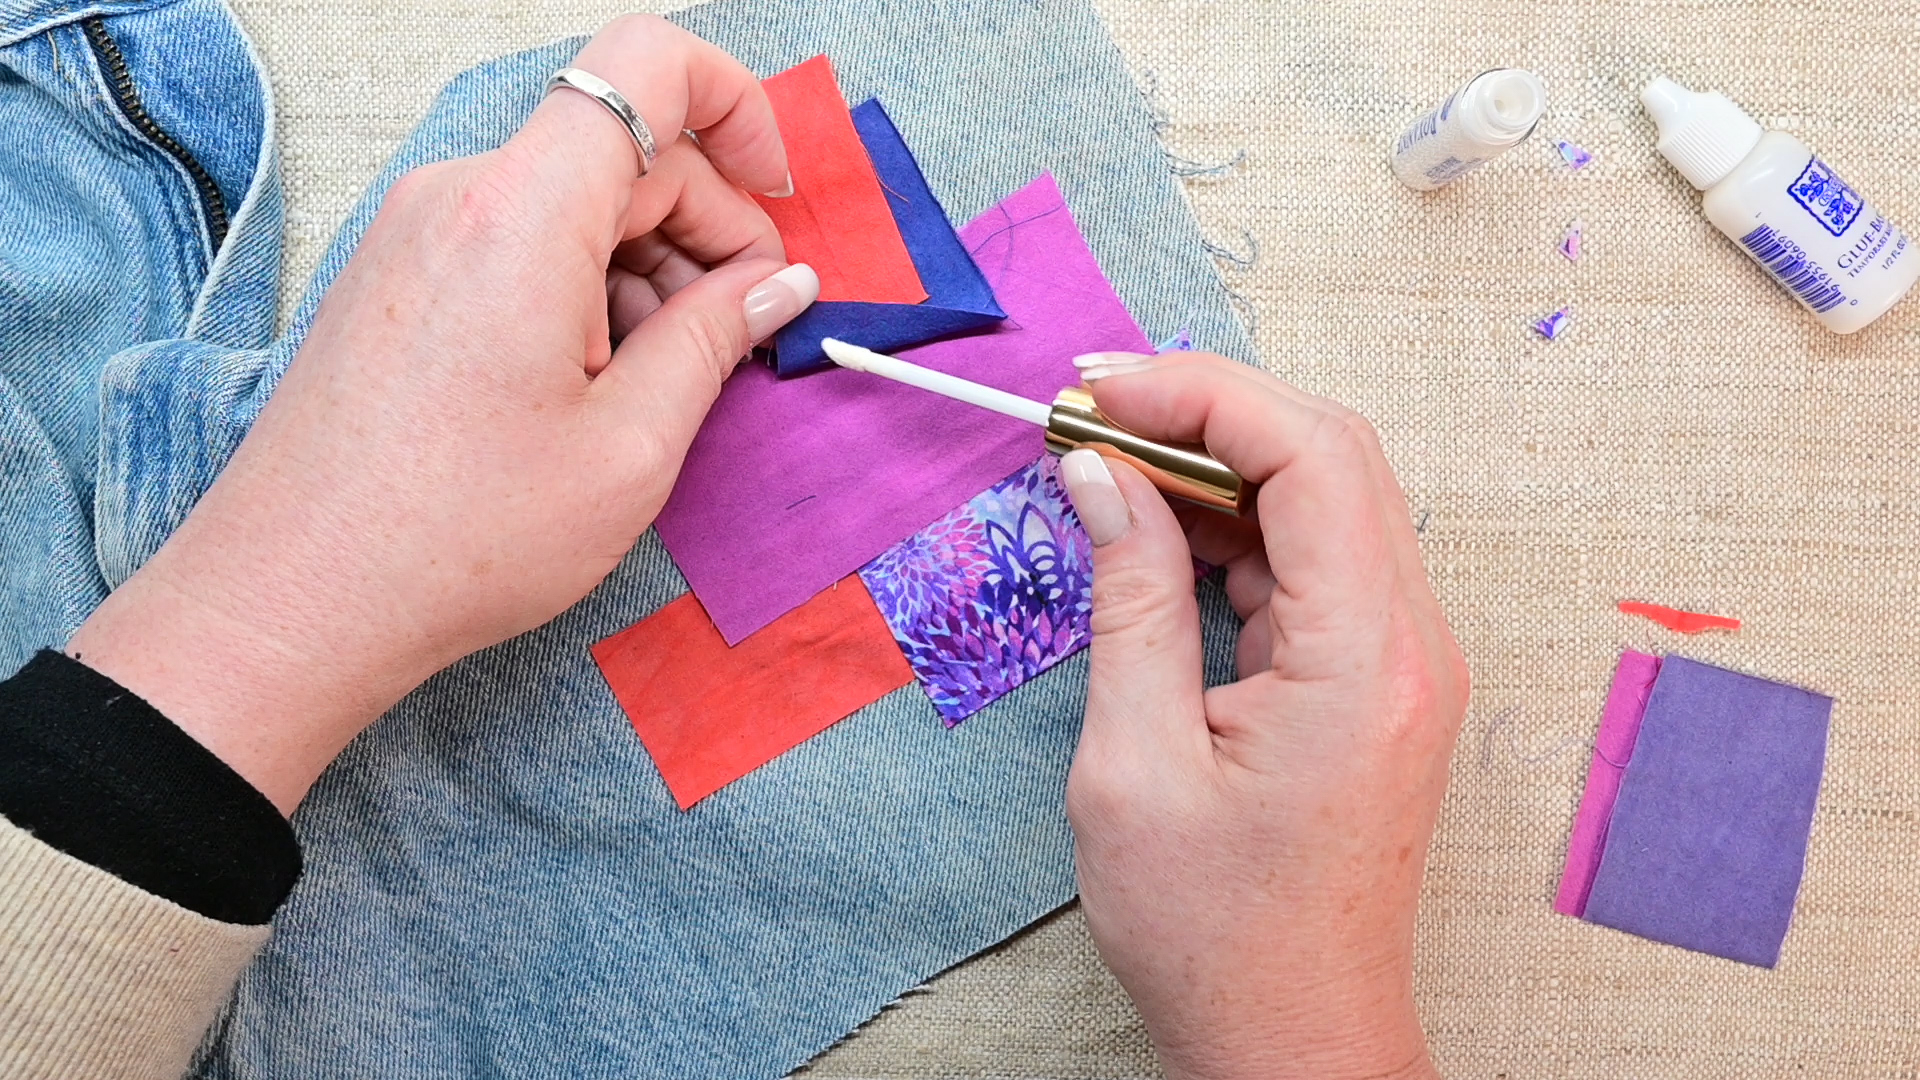
Boro and Visible Mending: Apply a thin layer of glue to the patch and adhere to base fabric, adjusting your placement as necessary. Then stitch down. We love the Roxanne Glue Stick because it glides on smoothly and the patches stay where we place them…until we decide we want them someplace else. Or… someplace else again. But then they stay put!
Quilt Binding and Bias Tape: After sewing on your binding to one side of the quilt, fold the fabric over the edge and apply a layer of glue. Press with a hot, dry iron to set, then hand stitch or machine sew the remaining seam down. No clips or pins needed; you don’t have to worry about that binding shifting. Our video features a no worries technique for making fabric tape with Roxanne Basting Glue.
Curved seams: Apply a thin line of glue along the curved edge, carefully folding and shaping the fabric edge.
Appliqué: Glue the edges of your appliqué piece to the base fabric, ensuring smooth edges and precise placement. Then use your favorite visible or invisible appliqué stitch for attaching. Be sure to watch the video for our tip for sharp corners on those appliqué pieces.
That’s all for now! Let us know if you want a recommendation for which glue is best for your project or share your favorites with us. And remember to check back for more about our fav products from Colonial Needle Company as well as projects and tutorials that show how we use this all-encompassing line of products in our studio.
Keep up with the Colonial Needle Company on their social media channels and YouTube.
You can find us at shannonandjason.com and on our Instagram and Facebook pages we are @embracethecreativechaos.
Which CNC products do YOU have questions about? Let us know and we might just feature your question in a future video or post.
To applique is to apply a piece of fabric on top of another piece of fabric background or on top of a pieced background. This can be done by hand and/or machine, using a variety of methods and techniques. An applique (n.) is the fabric stitched on top of a background, either by hand stitching or using a sewing machine.
What I love about applique:
I love applique for so many reasons! My passion for it is in both the process and the product. I find it awesome, while some find it awful to do. At one time, I belonged to a group of like-minded hand applique stitchers. We could multi-task: sit and stitch and enjoy each other’s company at the same time. I hope to sway some readers to try applique, so this subject probably will probably require more blog posts.
The Economics of applique:
There is actually a little economics history related to applique. Years ago, those who made quilts for function only were probably the first scrap quilt makers. If you had to raise the cotton or sheep, harvest the product, spin the fiber, weave the cloth, make the garment, all while struggling to put food on the table and survive, the most efficient and economical way to make quilts for your family was to join scraps of fabric side by side of whatever was left over from worn out clothing. Over time, when funds were more available, and a quiltmaker desired to make a quilt pretty, she could arrange bits and pieces of fabric together to perhaps design flowers for embellishment and applique them on top of the scrappy pieces. Quiltmakers with even more money and time on their hands added hand applique to their quilt tops. Think crazy quilts, broderie perse.
My journey with applique:
As I enjoy the process – the doing of something (except for dusting and vacuuming), hand applique is a joy for me to do! There are so many ways to hand applique, and my favorite way is needle turn. I remember the moment I saw someone demonstrating it at a local quilt show years ago. She looked so relaxed, so confident, and her work was beautiful. I picked her brain and observed for a while, then decided to try my hand at needle turn applique at home.
In the beginning, I was somewhat self-taught, ironing a freezer paper template on the right side of my applique fabric, tracing around the cut edge with a pencil, then cutting the fabric with a scant 1/4” seam allowance. I left the freezer paper in place as I hand stitched, using thread color that matched the background and tried to conceal my stitches. I quickly learned that matching the color of the thread to the color of the applique fabric was much better. While working and playing in a quilt shop at the time, I offered to teach a hand applique class. When a student asked what kind of needle I used, I promptly replied: “Whatever I can see to thread.” Let’s fast forward from that time, since I have learned so much more about tools and techniques, often times by trial and several errors.
There are a few things that make my needle turn applique look so much better, and much more relaxing and enjoyable to do:
Thread size
Thread kind
Thread Color
Choice of Needle
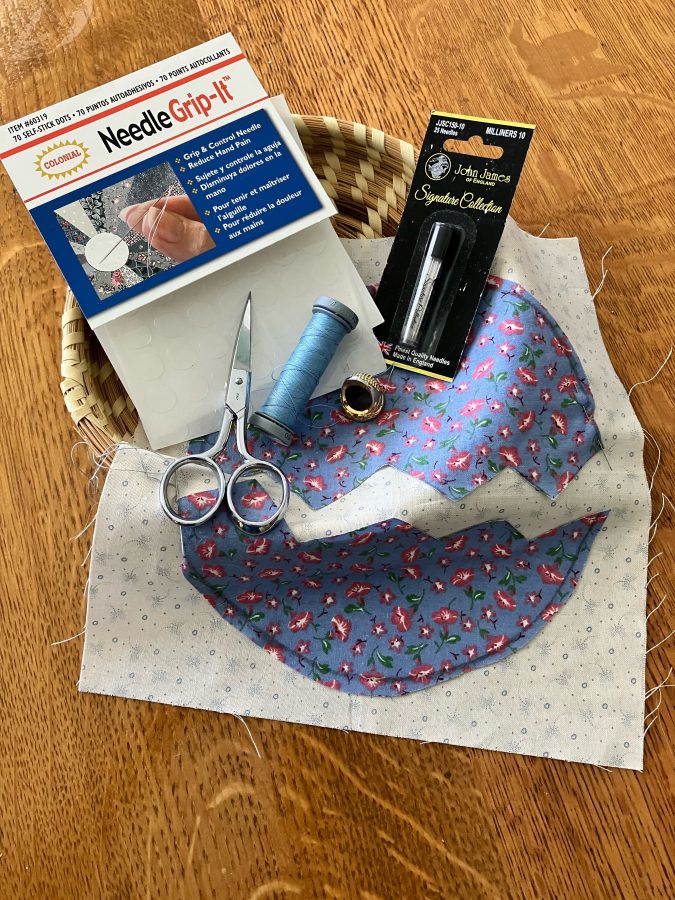
Needle Grip-Its from Colonial Needle Co.
Roxanne thimbles
The invisible stitch
A lighted magnifier
A pillow on my lap
Cookies and coffee…
Let’s break those down:
1. Thread
Presencia 60 weight thread is my thread of choice for needle turn applique. It is made from the finest quality long staple Egyptian cotton, is 3-ply for strength, and virtually lint free. The bigger the number, the finer the thread, which helps make my stitches virtually invisible. I want my hand stitching to last, so 3-ply (three strands of fiber wrapped together) makes this very fine thread so strong. Whenever possible, I unwind a strand of thread and lay it across my applique fabric to check for the best color. Sometimes I audition several colors. My first glance is my best clue to the color that will become one with my applique.
2. Choosing your needle
John James’ Signature Collection Needles are my needles of choice. They are made of the very finest precision engineered steel, making them so strong. With their proprietary finish, these needles glide easily through fabric rather than prodding it out of place. They are available in 4 different kinds: Embroidery – sizes 7, 8, 9; Milliners – sizes 9, 10, 11; Quilting – sizes 7, 8, 9, 10, 11; and Sharps – sizes 7, 8, 9, 10. As with thread sizes, the bigger the number, the finer the hand sewing needle. Machine sewing needles are the opposite.
My needle of choice with my knobby fingers, is a Milliners size 10. It is longer and allows me to sweep the seam allowance under as I go, concealing the drawn line of my applique. I now remove the freezer paper prior to stitching.
*TIP: in tight places like an acute “innie” point, I have a Quilting needle size 7 already threaded. I park my Milliners needle in the background, and make tiny stab stitches with my threaded Quilting needle to invisibly secure those tricky little “innie” points.
You may prefer to begin with a different John James Signature Collection needle or one of the many others offered by Colonial Needle Company. Just as some shoes are comfier than others, see what is the best fit for you and your hands.
3. Needle Grip-Its
Prior to stitching, I secure two little adhesive clear circles of Needle Grip-Its to my needle-holding hand on my forefinger and thumb where I will be gripping the needle. Faithfully using these little magic circles, I have no pain in my hands, and can stitch to my heart’s delight! These tiny adhesive circles stay securely in place during the repetitive motion of gripping and pulling a needle.
4. Roxanne Thimbles
I was happily gifted with a Roxanne Thimble several years ago, and it is the gift that keeps on giving, helping me to painlessly push the needle through fabric, regardless of what kind of hand stitching I am doing. The sideways motion of using Roxanne’s Thimble is better for one’s hands. Getting a correct fit is also important, and quilt shops who carry them are so helpful. Colonial Needle also has a handy info sheet on their website which can be found here.
*TIP: add a Roxanne's Thimble to your gift list, as well as matching Roxanne's Thimble earrings! They are so cute and readily identify you as a hand stitcher.
5. Lighted Magnifier
The lighted magnifier allows me to place light right over my work and more easily see where I am stitching, especially the tip of my needle as I insert it into the background fabric then upward through the underside of the fold.
6. Lap Pillow
The pillow on my lap helps bring my work to a more comfortable position so I can rest my arms and be at ease.
7. And last but not least…
The cookies and coffee, inspire me to take breaks to get up and stretch, walk into the kitchen, and let my little dogs out for a break for them, too.
In Conclusion:
Each of these tools will help your hand applique stitch become nearly invisible, strong, and secure. I think of the fold of the seam allowance of an applique as a cliff, and I am standing on the edge of the cliff. I bring my needle up from the inside of the applique to the back side of the fold, then “jump off the cliff” straight down with my needle into the background. Then travel with the point of my needle under the background a very few threads and come up with the needle just under the fold, the edge of the cliff. If you jump off the cliff/fold to the left or the right with your needle, your thread will show.
*TIP: Instead of scrunching the excess background fabric in my left hand while stitching with my right hand, I roll the excess fabric so that it fits neatly into the palm of my left hand. This keeps my fabric smoother, reduces stress on my hand, and helps prevent me from stitching my background to the wrong places as in my pillow or my clothing. I have learned a lot from my many mistakes.
Oh, the joy of needle turn applique! I feel like an artist, a sculptor, and I can “make the applique my own” by changing a shape as I go. Hand applique helps slow me down, listen to music or a recorded book, watch TV, talk with friends, or just sit quietly, breathe, and put a little love into every stitch. I can take a project with me on a walk along the river, sit down on a bench and stitch whenever and wherever I choose. I enjoy sitting outside in the cool mornings with my little girls, being serenaded by the birds’ songs and stitching by hand.
There are several ways to applique, and I look forward to sharing them with you as well. There is beauty in hand work, a human quality that is beneficial for the hand stitcher as well as for the person who admires or receives the work of one’s hands and heart. Be kind to yourself and savor every stitch. Just as my dad had a box full of hand tools that helped him with his work and play, there are tools that are helpful to those who enjoy hand applique and think of it as Awesome. There is joy and grace in simple things.
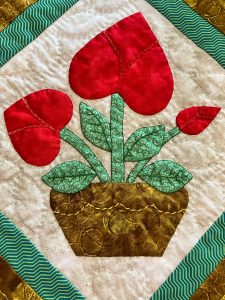
There are so many ways to applique, both by hand and by machine. For many stitchers, the word “applique” is not pleasant. I avoided it when I first began making quilt tops, even though I do love to work with my hands. And…I am somewhat less annoying when I am hand stitching. I well remember the first time I saw a young woman doing needle turn applique at a quilt show several years ago. I was amazed at how easily she shaped the heart applique and made nearly invisible stitches. The appliqued heart appeared to float on the background fabric. I knew that was something I wanted to learn to do. Now, however, there are several things that I especially enjoy about needle turn applique.
Thing 1: For needle turn applique, I spend very little time on preparation for stitching, as opposed to prepared applique techniques. I can more leisurely spend time stitching, and less time turning the seam allowance and securing it with glue, starch and a hot iron or basting thread, etc. Not to be negative about prepared applique, however, there certainly are advantages, about which I will write in blogs to come.
Thing 2: I love using these Milliners Needles from John James in a size 10 for hand applique. The Signature Collection needles are manufactured of the finest steel, polished so they smoothly glide through fabric. The points of these needles are so sharp that they pierce rather than push the fabric, which is so helpful for accuracy, and allows me to continue stitching for a longer period of time. The longer length of Milliners needles allows me to smoothly sweep under the seam allowance. To be more specific, I sweep the seam allowance under the extended thumbnail of my fabric-holding left hand. That thumbnail is a great tool, and I suggest it on my workshop supply lists. A claw-length thumbnail is not necessary, but long enough to secure the seam allowance in place as you use your Milliners needle and 60 weight thread.
Thing 3: There are several things about thread that also help to make your hand applique stitches nearly, if not completely, invisible. Remember: The bigger the number, the finer the thread, and hand sewing needles. Just like us: the more candles on our birthday cakes, the finer we are!! (Machine sewing needles are just the opposite.) My thread of choice for hand applique is Presencia Finca 50-weight or 60-weight, preferably 60-weight if I can get a good color match with the applique fabric. Another memory: when I began hand applique, I used a thread color that matched the background, and no matter how hard I tried, my stitches showed. Then my internal light bulb came on and I tried a thread color to match the applique fabric. BINGO! What a winner of an idea!!
Now here’s another tip about thread color: unwind a length of thread, about 10 inches from the spool and puddle it on the applique fabric, rather than just laying the spool of thread on top of the applique, like we learned in high school Home Economics when making garments. If your applique fabric is multi-colored, make sure that the puddle of thread touches all of the colors. When in doubt, audition/puddle another color of thread, step back, look away, then look again. Make your choice.
One more thing! If your applique fabric has many strong colors, try auditioning Presencia 60-weight thread, color #352. It is a great gray neutral, and just might work well. It is also my thread color of choice for more most of my machine piecing, and 60-weight thread is so fine that it helps with machine piecing accuracy.
Thing 4: The needle threading and weight are the next important things that help your applique appear to float on top of the background. I thread my Milliners Needle from the spool of Presencia 60-weight thread and leave about a 4” thread tail at the eye end of the needle. Pinching the thread at the eye of the needle, I unwind the spool to about the middle of my upper arm (former muscle) and cut the thread straight across with sharp scissors. This end is where I make a tiny quilter’s knot that becomes buried beneath the background or between the background and applique. The eye of these Signature Collection needles is so smooth that your thread will not shred. And, Presencia thread is 100% long staple Egyptian cotton, which is smooth and so strong because it is 3-ply, another huge advantage of using these needles and threads. Especially important as you are also using your time, energy and creative efforts to make something beautiful and lasting.
One more thing before your stitch: adhere an adhesive Needle Grip-It circle to your forefinger and one to the thumb of your needle stitchin’ and pullin’ hand. This is so helpful in relieving stress from the repetitive motion of hand sewing, allowing you to sit and stitch with ease. You won’t even notice the Grip-Its are there!
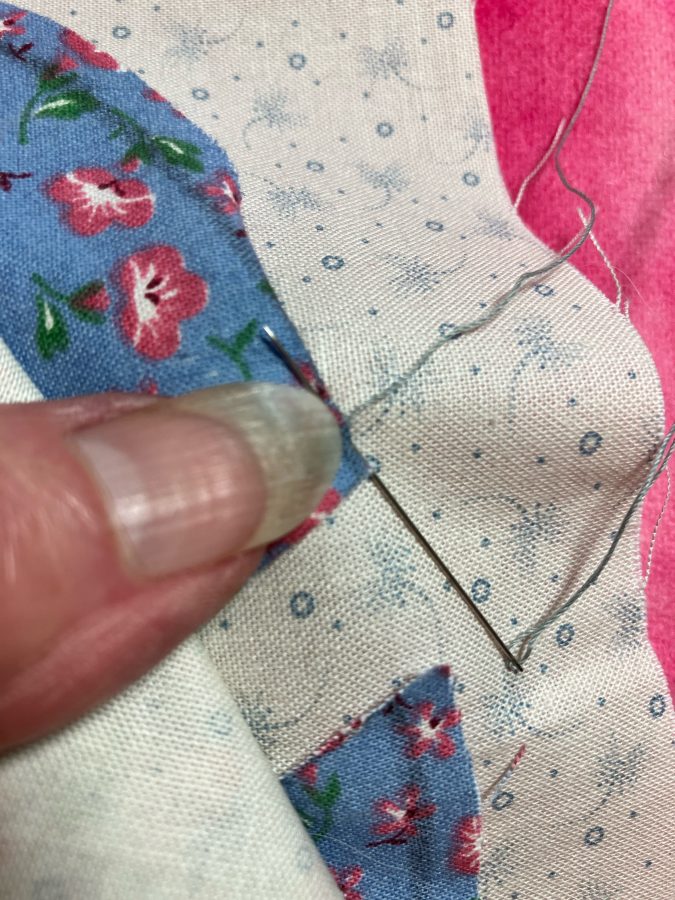
Thing 5: Now for the nearly invisible stitch. Prepare to stitch by making a “puppet” of your background by folding the outer edge, opposite of where you will be stitching, then gently roll the fold until your thumbnail is on top of the seam allowance of the applique. The neat roll of fabric will be nestled in the palm of your hand rather than all scrunched up. This helps prevent unnecessary wrinkles in your fabrics and helps to make your stitches more precise. It also helps relieve stress on your hand. If possible, begin where there is a straight or nearly straight side on your applique, and with your needle, sweep the seam allowance under your less dominant hand thumbnail, making sure that the marking of the seam allowance is just folded under. About 1/4” away from the folded edge of the applique, beneath the background fabric, or between applique fabric and background, come up just on the tiny edge of the fold of the applique, actually more to the back of the fold if possible, and pierce a couple threads of the applique fold with your needle. Slowly, to avoid knotting your thread, pull the thread through the edge of the folded seam allowance, keeping your thumbnail on top of the fold. Give a little tug on the thread near the end, then insert your needle into the background just beneath the fold where your thread came through the applique. Note: if you insert your needle to the left or the right or away from the fold, it WILL show, I promise.
Thing 6: Now, begin the next stitch by gently moving your thumbnail slightly away from the first stitch, and sweep the seam allowance under your thumbnail with the side of your needle. This is where the length of a Milliners Needle is so helpful. Depending on the weave of your fabric, you may need to use the point of the needle to position the seam allowance so that the mark of the seamline does not show. Then, sliding your needle about 1/16” or less beneath the background, come up on the back edge of the folded seam allowance, pierce the back edge of the fold, catching a couple of threads of the applique and slowly pull the thread upward. Tip: if your thread color so closely matches the applique, to find where to piece the background, gently pull the thread away from the applique, extending over the background, making a right angle with the thread to the edge of the fold. Now, tuck the point of your needle just under the fold, slide beneath and come up slightly away from your last stitch. Be patient with yourself if you are a beginning beginner or even an advanced beginner. This is the work of your hands, not computer-generated, which in my opinion, is of great value. Learning, doing, and practicing are so valuable.
Thing 7: Keep going, but take some breaks. I also highly recommend using a lighted magnifier directly over your work and your hands as you stitch. Using a lighted magnifier right over my sewing hands allows me to continue what I love to do, sculpting fabric and making pretty things. My eyes are rested, my hands are not sore, and I am relaxed with the process of hand applique, especially if I rest my work and my hands on a pillow on my lap as I stitch. A pillow for your lap is also on my workshop supply lists. It can be used for a nap as needed…
I have read that we can learn from our mistakes, therefore I have certainly learned a lot. Be kind to yourself, and others. Take someone under your wings and share what you have learned and what works well for you. Thank you for taking your time to read and try these tips, tricks, and techniques. I hope they are helpful.
Applique is an awesome, not awful, word to me. I feel like a sculptor as I swoop and turn under that scant 1/4” seam allowance; traveling down straight folded edges of applique fabric, then creating curves, dipping into innie points and playing with my newest trick for pointy outie points. There are several things I suggest doing in preparation for my joy of sculpting fabric, AKA: hand applique.
Thing 1: Gather your tools. Tools as in fabric cutting scissors: sharp to the point and rather short for better control of where you clip and how far you clip into the seam allowance. And use just those sharp points of your scissors to clip and trim. I learned that the hard way several years ago while hand quilting on a frame on my mother’s quilt. I opened large scissors all the way and clipped the thread as well as the quilt top. That was a good, life-long lesson I learned that day. Sometimes I also use pinking shears to carefully trim the cut edges of the applique, taking tiny bites out of the fabric for ease in turning under the seam allowance and reducing bulk beneath the applique. Practice first with those pinking shears. You can always trim away more, but it is most frustrating to try to turn under a seam allowance that is too narrow and ultimately frays.
Thing 2: One of my favorite tools for hand applique that I gather is a thimble. I especially love using Roxanne Thimbles. A correct fitting is required (Colonial Needle has put some tips together here). When I owned a quilt shop several years ago, I suggested to my customers who were interested in a Roxanne Thimble that they bring some handwork, and spend a little time trying out several sizes by sittin’ and stitchin’ for a little while — somewhat like walking around in a new pair of shoes to make sure they fit prior to purchase. In addition to being very comfortable with a proper fit, Roxanne’s Thimble is ergonomically better for your hands. The side-push of the needle with your finger is better for your hands than pushing the needle with the tip of your finger. Using this thimble allows me the joy of continuing to hand stitch for many years to come. Roxanne’s Thimble also makes a lovely gift for that special friend or family member with a choice of gold plated, silver plated, or sterling. Every time I use mine, I am reminded of a dear friend who gifted me with one- a gift that keeps giving.
Thing 3: Another very small but also very helpful tool are Needle Grip-Its. Press your thumb and fore- finger together where you grip a needle. Then peel a little circle from a sheet in the package and apply the sticky side to the tip of your thumb on your dominant hand. Repeat for your forefinger on your dominant hand. The repetitive motion of gripping, pushing, and pulling a needle can cause pain and swelling in one’s hands. These little unobtrusive circles stick well to your finger and thumb, and help to more easily grip and direct the needle exactly where you desire into the fabric. This also helps with that invisible applique stitch. Needle Grip-Its come packaged in sheets of 70 adhesive dots to easily carry in your sewing basket. They can also be cut into pairs to include in customers’ kits for classes, offering a great opportunity to try before you buy.
Some of my favorite tools to do one of my favorite things: hand applique!
Thing 4: The quality of Presencia Thread for my hand applique assures me that the time and effort I spend making my stitches as invisible as possible is well worth it. Presencia begins with the finest 100% Egyptian Cotton, virtually lint-free, strong, and durable. As I acquire more candles on my birthday cake and my number becomes bigger, I am reminded that the bigger the number, the finer the thread (and hand sewing needles – sewing machine needles are the opposite.) For those nearly invisible hand applique stitches, there are four things that are especially helpful: applique thread size, applique thread color, the needle, and the stitch. I recommend sewing with sizes 50 weight or 60 weight for hand applique. Both sizes 50 and 60 are 3-ply (three fibers plied, twisted into one fine thread) therefore also very strong. For thread color, if possible, unwind a few inches of Presencia Thread from the spool and lay it across your applique fabric. We used to just lay a spool of thread across the fabric to audition thread color, but another lesson learned, thread color on the spool is different from a strand of thread. My personal favorite thread size is 60 weight since it is smaller in diameter than 50 weight.
Thing 5: I love so many needles that Colonial Needle Company has to offer. Over the years, I have also learned that fitting the needle to the thread and the project is most important. I used to sew with whatever needle I could see to thread, with whatever thread was available. With time comes wisdom! I really enjoy using the John James Signature Collection Needles, especially their Milliners and Quilting Needles for needleturn applique. The Milliners are long, very fine, strong, and help to easily pierce the folded edge of my applique as well as the background fabric. Because the needle is so sharp and made in England of the finest quality steel, I can easily pierce the fabric rather than push and distort where I want the applique. The length of the Milliners Needle helps me to turn under the seam allowance then hold the fold with the thumbnail of my other hand. With needleturn applique, I can spend my time and effort stitching, rather than preparing the appliques, although I must admit that friends who do prepared hand applique do beautiful work. The process of needleturn is what I love so much! Sometimes I enjoy a change, and use the John James Signature Collection Quilting Needle. It gives my hands a break, kind of like changing from tennis shoes to slip-on shoes mid-day. John James Signature Collection Needles also are available in Embroidery and Sharps Needles. They are packaged in the USA in crystal clear tubes of 25 needles, enough to keep you supplied for quite a while and to share with friends.
Thing 6: Just to mention a few other things I keep handy in preparation for hand applique: I highly recommend a good light source directly over your work. My light source is also magnified, helpful due to all those birthday candles…I also stitch with a pillow on my lap which helps to bring my sewing up to a level that is comfortable for me, and helps me rest my hands as well as more accurately position my needle and scissors. A pincushion for fine straight pins is a better option than the arm of my “nest” chair where I sit and stitch. A needle threader is helpful, and I will have a suggestion on tips for threading a needle in blogs to come. I enjoy hand sewing so much that I neglect getting up and moving around, so setting a timer is a good reminder for me if I am listening to an audio book or the serene sound of silence while I sew. If watching TV, I challenge myself to stand and stretch during commercials.
I try to keep several containers, baskets and boxes prepared with a collection of tools and WIPS (Works in Progress) for grabbing and going out the door, or putting in my car the evening prior to an appointment or meeting. One never knows when one will need to savor just sittin’ and stitchin’. Most of us can multi-task anyway- listen and stitch. Needleturn applique helps me to be somewhat less annoying while listening to a speaker, while waiting for a delayed appointment, or for taking to the park when I have some time to spare between appointments. It also offers me the opportunity to meet new people, share interests, and perhaps even acquire converts to hand sewing. It’s all good, and gets better with the best and right tools and tips.