Back in February, we had the pleasure of meeting the Colonial Needle Company team at Sew Expo. We chatted about reviewing their products and made it crystal clear—we’re all about honesty, no punches pulled so if we like a product, we will shout it from the rooftops and use it.
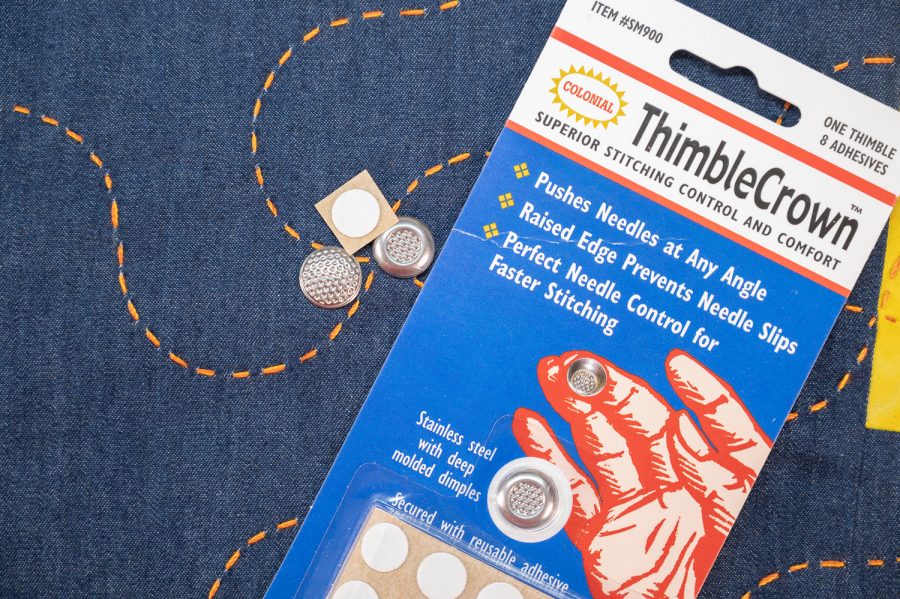
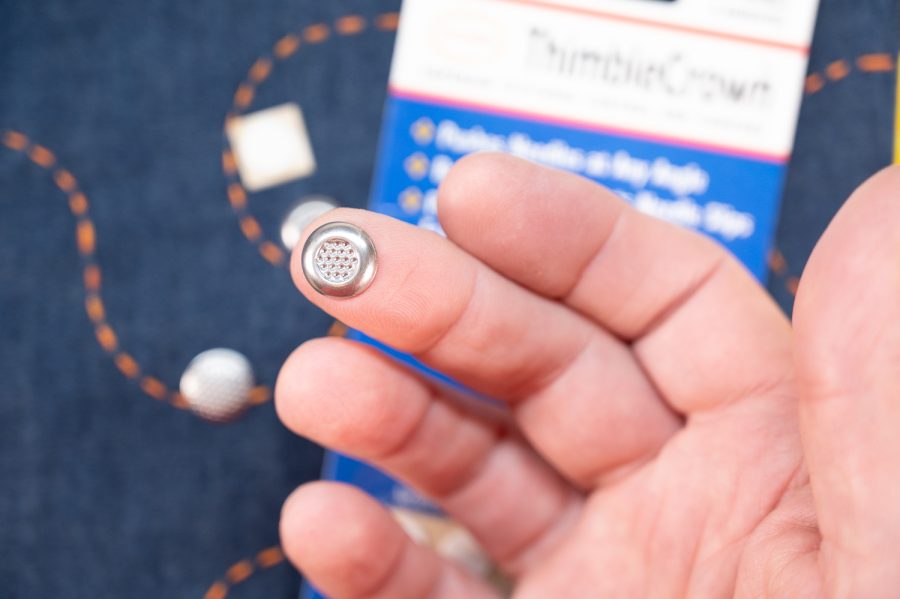
On the bustling Sew Expo show floor, they handed us packs of needles, various sewing tools, and what looked like tiny metal disks with dimples and sticky tabs. We’re all about toys for the sewing studio, but our first thought about those metal disks? “Okayyyy, not sure how this will play out, but let’s give it a whirl.”
Fast forward to May, and Jason, with his big mitts (no offense, J!), was tearing up the house looking for a thimble for sewing a label onto a quilt. Most thimbles on the market aren’t built for his large fingers. Then, lightbulb moment—we remembered those Thimble Crowns from Colonial Needle. We pulled them out of the box, applied the sticky dot, slapped one on Jason’s finger, and off he stitched. It was anyone’s guess how it would turn out.
So, real talk. For a long time, we have joked about starting a blog titled “That’s the dumbest thing I’ve ever seen… and now I can’t live without it.” If that blog existed, the Thimble Crown would be a star. Seriously, what a game changer!
Fit like a glove—err, crown—boosted his nimbleness and let him crank out even finer stitches (and trust us, his stitches were already A+). It upped his needle game, gave him more comfort, and let him tweak its position to suit his sewing style.
Shannon quickly jumped on board using the dimpled crowns for embroidery, quilting, and general hand sewing as well as EPP. See, Shannon has nails, she will not sacrifice her manicure to a full covering thimble. These little wonders were the PERFECT solution for her manicured fingers because they stay in place without interfering with the nails. Also, she tends to stitch using the side of her finger to push the needle and this little Crown Thimble stayed securely in place even on the inside edge of her middle finger. You can imagine this was an amazing little tool for rocker stitch quilting. Yup… she’s sold on them now too. Completely.
Both of us tested the Thimble Crowns on our middle fingers, knuckles—heck, even our palms for lighter sashiko stitching. It’s ace for most of our hand stitching gigs: basic sewing, embroidery, quilting, mending, you name it. Honestly, not sure how we coped without one all these years.
Colonial Needle offers a range of these thimble tips for different sewing jobs. Check ’em out and give ’em a whirl. Next up for us? We’re trying the Under Thimble and Thimble Dimplefor some hand quilting. We’ll keep you posted!
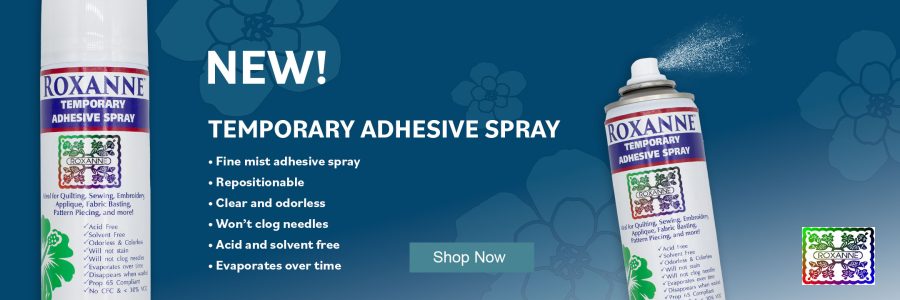
I am so eager to share with you one of my favorite NEW tools: Roxanne Temporary Adhesive Spray from Colonial Needle Company. It can be found on their website here, at major suppliers, and hopefully, quick as a bunny at your favorite quilt and fabric shops. There are so many wonderful uses and applications for this fabulous adhesive spray…so where to begin?!
What is Roxanne’s Temporary Adhesive Spray?
Roxanne is a well-known brand of quilting products, including glues, needles, and notions. The qualities of their Temporary Adhesive Spray are many. This spray adhesive is acid free, odorless and colorless meaning it will not stain fabric or fibers. For those of you with pricey or precious vintage sewing machines, it will not clog your machine or needles. As a tool, Roxanne’s spray assists in positioning and holding fabrics for quilting, sewing, and other fiber-related activities, yet it is temporary and disappears when washed. It is almost like another pair of hands assisting you to smoothly position and hold layers in place for the next step.
Roxanne Temporary Adhesive Spray will be loved and adored by quilters who are layering, seamstresses, home décor sewists, embroidery enthusiasts, applique and piecing passionists (that’s a word, right?), craft designers and artists, pattern piecing persons, and so many more! If you enjoy working and playing with fabric, fibers, threads, roving, yarn, etc., you will find that Roxanne’s newest product will fill your needs for fun and ease of use. The time saved with its use will allow you to spend more time playing and creating. As a firm believer in the importance of process, the doing part of a project for me is such an important part of the joy of creating; almost as important as showing off my finished product!
How do you use Roxanne’s Temporary Adhesive Spray?
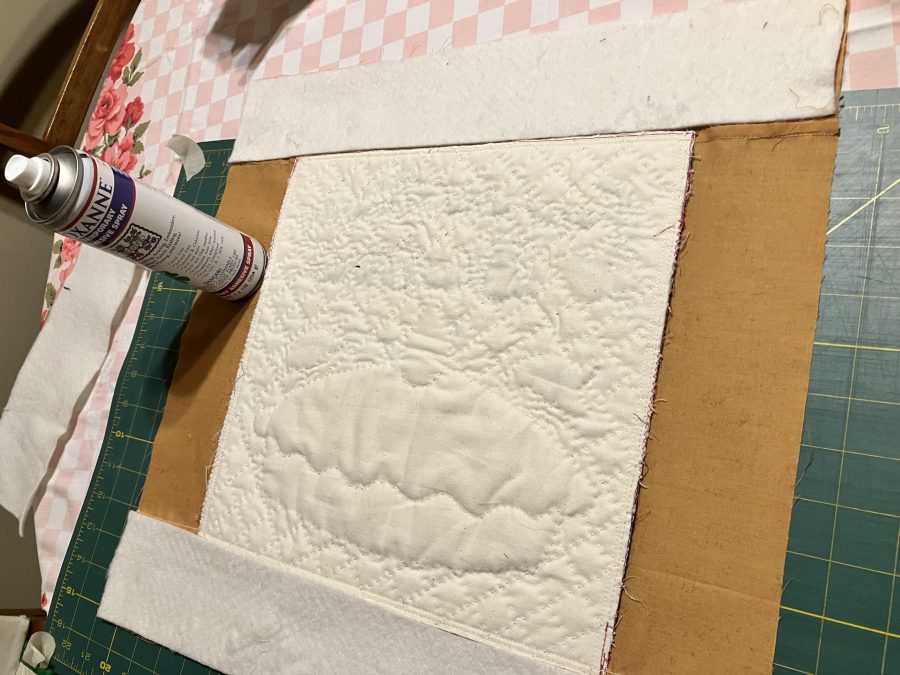
For years, I have been safety pin-basting backing, batting, and tops together for hand or machine quilting. I do not have time on my hands, but my hands have many years of time on them, and basting a quilt this way is not one of my favorite things to do. My hands and fingers become sore. However, what a joy to layer a quilt now with Roxanne’s Temporary Adhesive Spray!
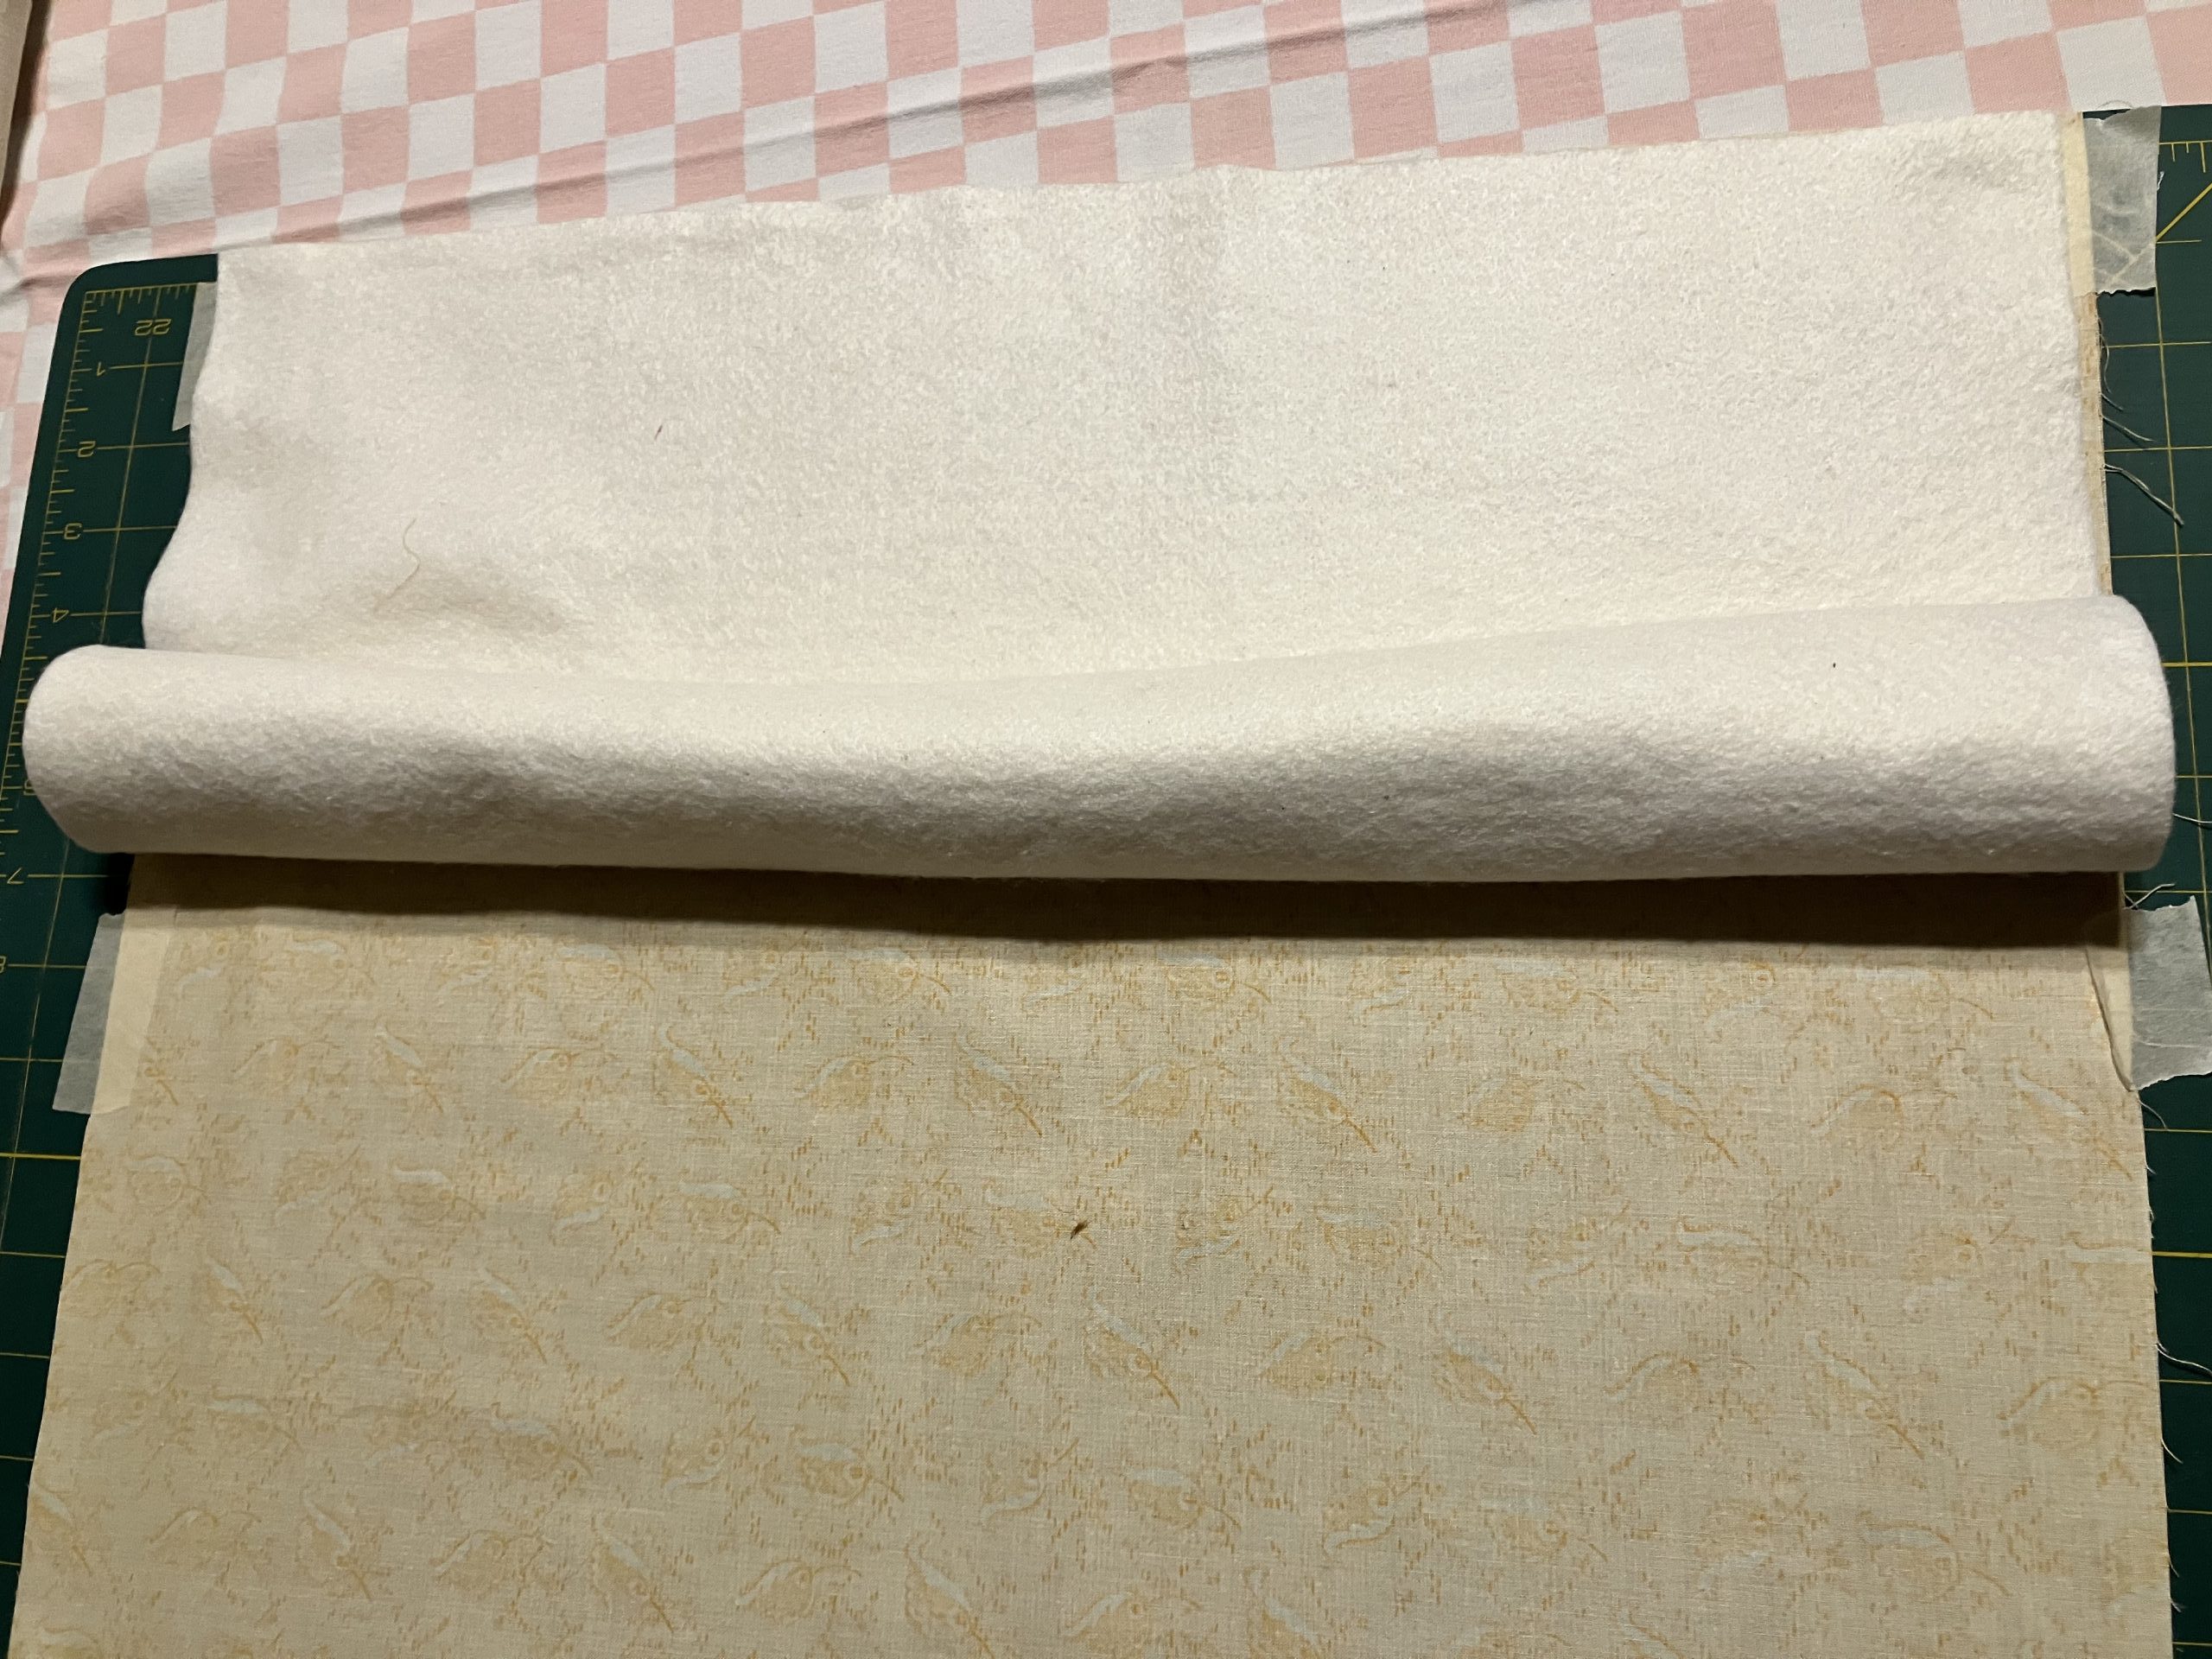
Prepare by rolling the batting loosely from one end toward the other.
Repeat with the quilt top, and lay both aside nearby.
Secure the quilt backing layer to a clean flat surface, wrong side up, with masking tape.
Lightly spray with Roxanne Spray.
Position the batting at one end of the backing, and unroll the rest of the batting toward the other end, smoothing lightly with your hands as you unroll.
Next, lightly spray the batting, then lay the quilt top at one end of the batting.
Unroll the quilt top toward the bottom edge of the batting, smoothing and pressing lightly, flat as a tortilla, and smooth as an ice-skating rink!!
Quickly and beautifully flat for hand or machine quilting!
All odor-free, easy-peasy and no sore fingers or hands!! After a few minutes to dry, I am confident that neither my machine nor hand quilting needle will get tacky while stitching.
TIP: If you are generous with the spray and it winds up on your table or a surface, not to fret! A light spray with water and swipe with a clean dry cloth will remove the light tackiness.
What are some other benefits of using RX Adhesive Spray?
When machine or hand quilting, I sometimes get those undesired little pleats or tucks on the back side of my quilt whenever I approach a previous line of stitching. At times I need to manipulate the layers, or needle-down in my machine, lift presser foot, and give little tugs back and forth to remove bubbles on top, and hopefully prevent gathers on the backing. However, with Roxanne’s Temporary Adhesive Spray, I happily keep stitching when approaching quilting stitches, no bubbles on top and no ruffles on the back! My machine quilting has improved so much and in such a short period of time. Time saved basting layers together and quilting add up to the probability of getting more projects finished and more begun. Win~Win! More play time and improved finished product, means I am one happy quilter and excited about sharing what I have learned and experienced with this wonderful product from a name we know and trust to do what we love to do.
What else can you do with Roxanne’s Temporary Adhesive Spray?
Here’s how Roxanne’ Spray helped me easily add borders to an old incomplete project:
Adding batting with Roxanne spray to new borders.New Borders!
A wool applique enthusiast, I also discovered Roxanne’s Spray works beautifully to layer wool to batting for quilting.
Wool background layered with Roxanne Spray on batting
Another of my older needle turn applique projects needs help, so I plan to unstitch some of the applique on Sunbonnet Sue, spray lightly, reposition Sue’s dress and sunbonnet, and needle turn applique back in place.
In an upcoming blog, I want to share ways I have used Roxanne glues, needles, and notions. I guess you could say I am a fan of Roxanne products. Oh, wait, I happen to know where some vintage fan blocks are, and can hardly wait to applique them to backgrounds with Roxanne’s Spray. Then, I’ll turn them into a quilt, and move on to another fun project! Yes, I am very excited about this new product.
Go ahead, thank Roxanne for adding more playtime, fun, and pleasure to your fabric and fiber projects. You can thank me later.
I have moved twice in the last two years, which is very positive, yet very stressful. Moving involves so much. Of course there’s the packing and storing, but there’s also the topsy-turvy life style as one adjusts, and dealing with mountains of paper work and address up-dates, etc. But, take a deep breath…it is all well worth the effort in so many ways. Change of any kind can be stressful, but change can also offer opportunities for seeing and doing things in new creative ways.
Sometimes the most difficult part of beginning something new for me, whether it is a new recipe, new sewing or gardening project, etc., is the starting part: Thing 1! But I have been so eager to sew during my “moving experiences” that I finally decided yesterday was the day to begin and I would treat myself periodically with positive reinforcement of cookies, ice cream, of sips of coffee from a favorite mug. Many times, I have to make a mess in order to bring order to that mess. Does anyone else identify with that process?
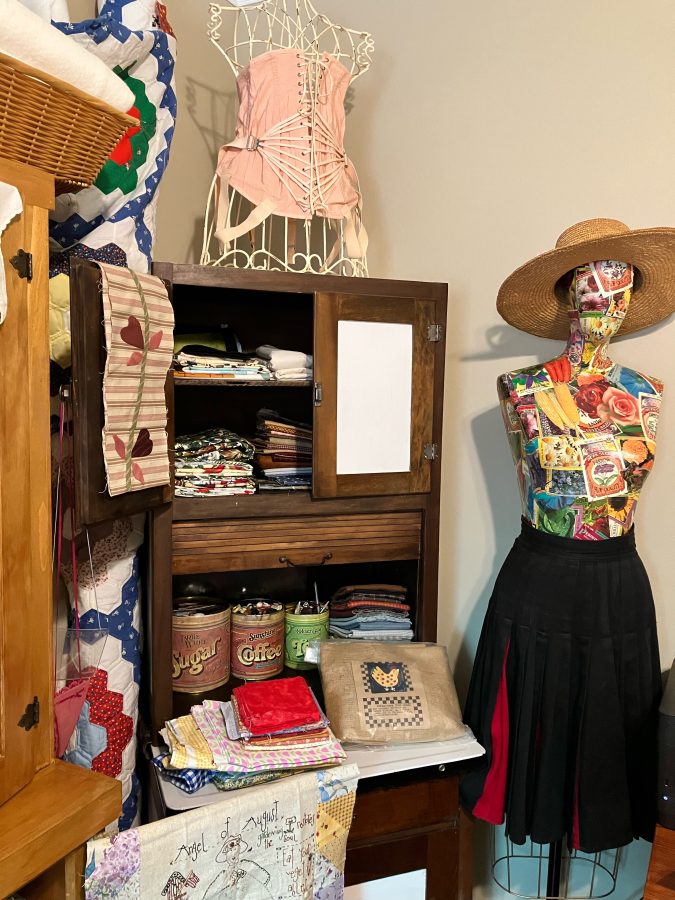
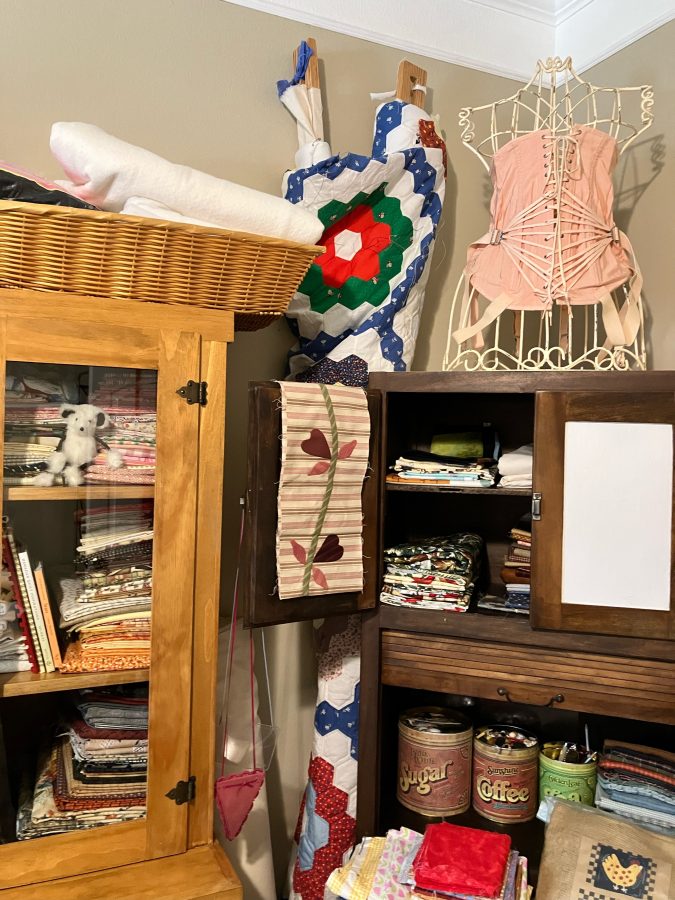
Thing 1 involved moving some pieces of furniture that I have acquired over the years that are great sources of memories as well as unique and fun for storage. In my mind, if I can move something one inch, I can move it across the room (given time and a treat or two). My vintage Half-Hoosier cabinet fit nicely placed diagonally next to my life-size mannequin, Lucy. Lucy wears one of my old high school cheerleading skirts and a straw hat. By now, you have probably guessed that my style of choice is wonky eclectic.
Sitting on top of this charming roll-top Half-Hoosier is a vintage wire dress form wearing an authentic vintage tightly laced and buckled corset. Propped against the other side of my new/old fabric stash cabinet is Grandmother’s Flower Garden, hand-pieced by my beautiful mother. It is layered and ready to continue hand quilting on the frames handmade by my dear sweet dad. I can hardly wait for warmer weather and sittin’ and stitchin’ outside on my covered patio on this beautiful quilt. I’ll be sitting on a vintage shoe store bench, acquired by bartering (for wool this time), while my fur baby Sadie Sue keeps me company and chases squirrels in the back yard.
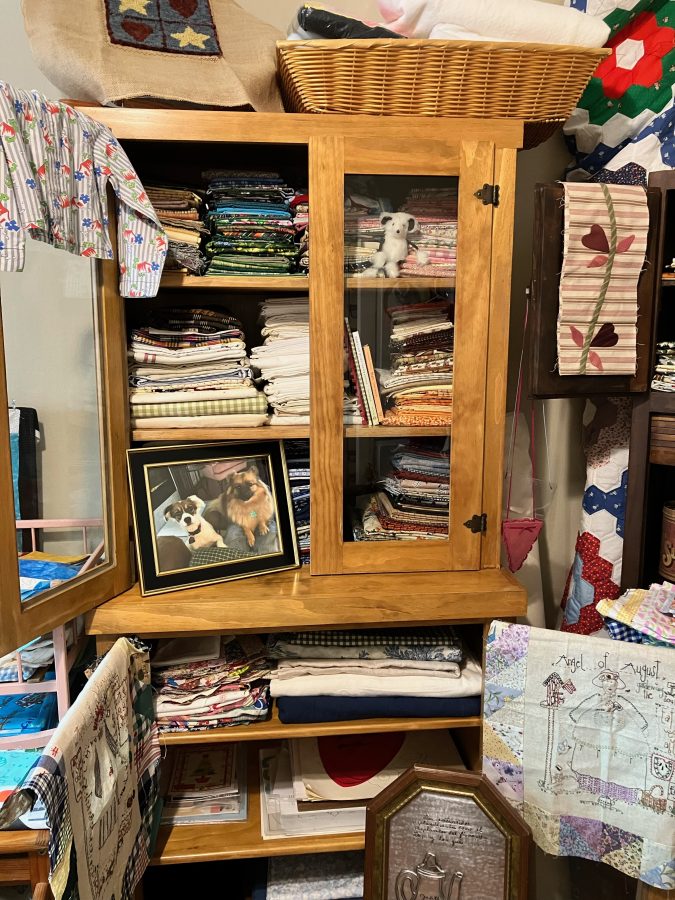
That is just one corner of my sewing room. The rest is still a work in progress. However, as I am sometimes attention deficit, I also began working on stashing some of my fabric stash on barrister’s shelves between books. Fabric and books…what’s not to love?! These shelves are in the living area, so I multi-tasked last evening, arranging fabric and books while watching a movie on tv. By the way, the word “stash” is both a noun and a verb. (Sorry, the retired teacher identity just popped out.)
I had set up my sewing machine cabinet last week but was rudely interrupted by the great need to do some not so much fun things, like vacuuming. So now I am ready to sew, even though there is more arranging to do. I have a wonderful closet with lots of shelves in my now-to-be-called Studio, but that closet is off limits for a while for reasons yet to be revealed.
Once I get started on a project, the next hurdle is stopping. But I am having so much fun creating my own personal creative space, even spilling over into other rooms of my new little home as well as outside! My precious little companion during all this moving is sweet precious Sadie Sue, a Jack Russell/Border Collie rescue and wonderful companion. She shadows and herds me, and is so much a part of my creative space and Studio. Time to feed Sadie Sue her cooked breakfast. She is also so patient with me. More to come as more is accomplished in my moving experience while I am itchin’ to stitch!
To applique is to apply a piece of fabric on top of another piece of fabric background or on top of a pieced background. This can be done by hand and/or machine, using a variety of methods and techniques. An applique (n.) is the fabric stitched on top of a background, either by hand stitching or using a sewing machine.
What I love about applique:
I love applique for so many reasons! My passion for it is in both the process and the product. I find it awesome, while some find it awful to do. At one time, I belonged to a group of like-minded hand applique stitchers. We could multi-task: sit and stitch and enjoy each other’s company at the same time. I hope to sway some readers to try applique, so this subject probably will probably require more blog posts.
The Economics of applique:
There is actually a little economics history related to applique. Years ago, those who made quilts for function only were probably the first scrap quilt makers. If you had to raise the cotton or sheep, harvest the product, spin the fiber, weave the cloth, make the garment, all while struggling to put food on the table and survive, the most efficient and economical way to make quilts for your family was to join scraps of fabric side by side of whatever was left over from worn out clothing. Over time, when funds were more available, and a quiltmaker desired to make a quilt pretty, she could arrange bits and pieces of fabric together to perhaps design flowers for embellishment and applique them on top of the scrappy pieces. Quiltmakers with even more money and time on their hands added hand applique to their quilt tops. Think crazy quilts, broderie perse.
My journey with applique:
As I enjoy the process – the doing of something (except for dusting and vacuuming), hand applique is a joy for me to do! There are so many ways to hand applique, and my favorite way is needle turn. I remember the moment I saw someone demonstrating it at a local quilt show years ago. She looked so relaxed, so confident, and her work was beautiful. I picked her brain and observed for a while, then decided to try my hand at needle turn applique at home.
In the beginning, I was somewhat self-taught, ironing a freezer paper template on the right side of my applique fabric, tracing around the cut edge with a pencil, then cutting the fabric with a scant 1/4” seam allowance. I left the freezer paper in place as I hand stitched, using thread color that matched the background and tried to conceal my stitches. I quickly learned that matching the color of the thread to the color of the applique fabric was much better. While working and playing in a quilt shop at the time, I offered to teach a hand applique class. When a student asked what kind of needle I used, I promptly replied: “Whatever I can see to thread.” Let’s fast forward from that time, since I have learned so much more about tools and techniques, often times by trial and several errors.
There are a few things that make my needle turn applique look so much better, and much more relaxing and enjoyable to do:
Thread size
Thread kind
Thread Color
Choice of Needle
Needle Grip-Its from Colonial Needle Co.
Roxanne thimbles
The invisible stitch
A lighted magnifier
A pillow on my lap
Cookies and coffee…
Let’s break those down:
1. Thread
Presencia 60 weight thread is my thread of choice for needle turn applique. It is made from the finest quality long staple Egyptian cotton, is 3-ply for strength, and virtually lint free. The bigger the number, the finer the thread, which helps make my stitches virtually invisible. I want my hand stitching to last, so 3-ply (three strands of fiber wrapped together) makes this very fine thread so strong. Whenever possible, I unwind a strand of thread and lay it across my applique fabric to check for the best color. Sometimes I audition several colors. My first glance is my best clue to the color that will become one with my applique.
2. Choosing your needle
John James’ Signature Collection Needles are my needles of choice. They are made of the very finest precision engineered steel, making them so strong. With their proprietary finish, these needles glide easily through fabric rather than prodding it out of place. They are available in 4 different kinds: Embroidery – sizes 7, 8, 9; Milliners – sizes 9, 10, 11; Quilting – sizes 7, 8, 9, 10, 11; and Sharps – sizes 7, 8, 9, 10. As with thread sizes, the bigger the number, the finer the hand sewing needle. Machine sewing needles are the opposite.
My needle of choice with my knobby fingers, is a Milliners size 10. It is longer and allows me to sweep the seam allowance under as I go, concealing the drawn line of my applique. I now remove the freezer paper prior to stitching.
*TIP: in tight places like an acute “innie” point, I have a Quilting needle size 7 already threaded. I park my Milliners needle in the background, and make tiny stab stitches with my threaded Quilting needle to invisibly secure those tricky little “innie” points.
You may prefer to begin with a different John James Signature Collection needle or one of the many others offered by Colonial Needle Company. Just as some shoes are comfier than others, see what is the best fit for you and your hands.
3. Needle Grip-Its
Prior to stitching, I secure two little adhesive clear circles of Needle Grip-Its to my needle-holding hand on my forefinger and thumb where I will be gripping the needle. Faithfully using these little magic circles, I have no pain in my hands, and can stitch to my heart’s delight! These tiny adhesive circles stay securely in place during the repetitive motion of gripping and pulling a needle.
4. Roxanne Thimbles
I was happily gifted with a Roxanne Thimble several years ago, and it is the gift that keeps on giving, helping me to painlessly push the needle through fabric, regardless of what kind of hand stitching I am doing. The sideways motion of using Roxanne’s Thimble is better for one’s hands. Getting a correct fit is also important, and quilt shops who carry them are so helpful. Colonial Needle also has a handy info sheet on their website which can be found here.
*TIP: add a Roxanne's Thimble to your gift list, as well as matching Roxanne's Thimble earrings! They are so cute and readily identify you as a hand stitcher.
5. Lighted Magnifier
The lighted magnifier allows me to place light right over my work and more easily see where I am stitching, especially the tip of my needle as I insert it into the background fabric then upward through the underside of the fold.
6. Lap Pillow
The pillow on my lap helps bring my work to a more comfortable position so I can rest my arms and be at ease.
7. And last but not least…
The cookies and coffee, inspire me to take breaks to get up and stretch, walk into the kitchen, and let my little dogs out for a break for them, too.
In Conclusion:
Each of these tools will help your hand applique stitch become nearly invisible, strong, and secure. I think of the fold of the seam allowance of an applique as a cliff, and I am standing on the edge of the cliff. I bring my needle up from the inside of the applique to the back side of the fold, then “jump off the cliff” straight down with my needle into the background. Then travel with the point of my needle under the background a very few threads and come up with the needle just under the fold, the edge of the cliff. If you jump off the cliff/fold to the left or the right with your needle, your thread will show.
*TIP: Instead of scrunching the excess background fabric in my left hand while stitching with my right hand, I roll the excess fabric so that it fits neatly into the palm of my left hand. This keeps my fabric smoother, reduces stress on my hand, and helps prevent me from stitching my background to the wrong places as in my pillow or my clothing. I have learned a lot from my many mistakes.
Oh, the joy of needle turn applique! I feel like an artist, a sculptor, and I can “make the applique my own” by changing a shape as I go. Hand applique helps slow me down, listen to music or a recorded book, watch TV, talk with friends, or just sit quietly, breathe, and put a little love into every stitch. I can take a project with me on a walk along the river, sit down on a bench and stitch whenever and wherever I choose. I enjoy sitting outside in the cool mornings with my little girls, being serenaded by the birds’ songs and stitching by hand.
There are several ways to applique, and I look forward to sharing them with you as well. There is beauty in hand work, a human quality that is beneficial for the hand stitcher as well as for the person who admires or receives the work of one’s hands and heart. Be kind to yourself and savor every stitch. Just as my dad had a box full of hand tools that helped him with his work and play, there are tools that are helpful to those who enjoy hand applique and think of it as Awesome. There is joy and grace in simple things.
I love the peace and serenity of our back yard; serenaded by birds and the rustle of leaves in the trees, early in the morning before lawn mowers get cranked up. Even on gray rainy days, the sound of raindrops on the roof provides a sense of peace and tranquility while I sip morning coffee and stay snug and dry under the extended roof over the back porch. I look up from my hand stitching when Sable and Sadie race and chase after squirrels that they will never catch, as those annoying little fluffy- tailed critters leap from tree to tree, taunting our furry little girls.
Making quilts for children also provides a wonderful sense of peace and fulfillment for me. A dear friend and I love to make charity children’s quilts. There are children in need, and we want to help provide the comfort of a quilt for as many children as we can. Debbie has a very large sewing room at her house, so she cuts the tops and backings, layers with batting, pin-bastes the layers together, and marks a diagonal grid with Roxanne’s marking pencils for machine quilting. She passes the quilts to me and I machine quilt and stitch the binding to the top. Debbie and I hand stitch the folded edge of the French fold bindings while binge-watching streamed TV in the evenings.
I love the process of doing something (except for the process of vacuuming and dusting.) I need a bumper sticker that tells the person behind me that “I would rather be sewing,” or “I would rather be shopping for fabric.” What would you rather be doing? What would your bumper sticker say about you?
Back to enjoying process…
I find that machine quilting the grid on these children’s quilts is so peaceful. Most of the tops are whole cloth, 36” x width of fabric, although some are lap size larger. Debbie creatively and artistically extends panels and darling children’s prints for tops by piecing, adding borders, turning plain-Jane fabrics into something fun for a child. Debbie is also a master at piecing scraps and strips together to make the bindings. Piece by piece, we hope to provide comfort and peace for children. This process provides a sense of peace for us as well. As I machine quilt the layers, I sometimes listen to audio books borrowed from our local library. At other times, I listen to music on my laptop. And sometimes, I simply savor the peace and quiet of the hum of my machine.
The peace acquired by hand stitching bindings is enhanced by the newest John James Signature Collection Needles from Colonial Needle Company. I had an opportunity to try the John James Signature Collection Milliners, size 10, for needle turn applique, one of my passions. What a joy! This needle is so sharp and glides so smoothly—easily piercing the turned edge of fabric rather than pushing or distorting it, which provides more accuracy and much greater ease of stitching. These needles are so user friendly that some of my “I don’t do hand applique” friends may even take up the art, joy, and passion of hand applique.
Threading the new John James Signature Collection Milliners, size 10, with Presencia 60-weight thread was also easy. Presencia 60 weight thread is 3-ply, long staple, so very strong while also very fine, perfect for hand applique and hiding those stitches. The length of this John James Signature Collection Milliners also made it perfect for swooping under and turning the seam allowance. One more thing I highly recommend is using two Needle Grip-Its to more easily grip the needle. Adhere one to your forefinger and one to your thumb tip on the hand with which you grip the needle. The repeated motion of gripping and pulling a needle can result in pain in hands and fingers over time. These great grips enable me to stitch for hours pain-free, also adding to my peace of mind whether I am doing hand applique or hand stitching a binding on a quilt.
One more thing…
I also tried stitching bindings with the newest John James Signature Collection Sharps, size 10. What a joy to easily pierce the backing, glide through the batting, and pierce upward to catch the fold of the binding. These needles are also strong, sharp, glide easily, and enhance my time of peace and quiet while listening to the sounds of chirping birds or a best seller book, peaceful music or the sound of silence. I’m eager to try these new John James Signature Collection Needles on hand piecing, too.
The process of sewing and creating is both peaceful and exciting for me. I enjoy the doing part of a project, not just the finished product. Using the best tools enhances both the process and the product. I highly recommend these new John James Signature Collection Needles. Just when you thought needles could not get any better ~ they did, they do, and they are!!
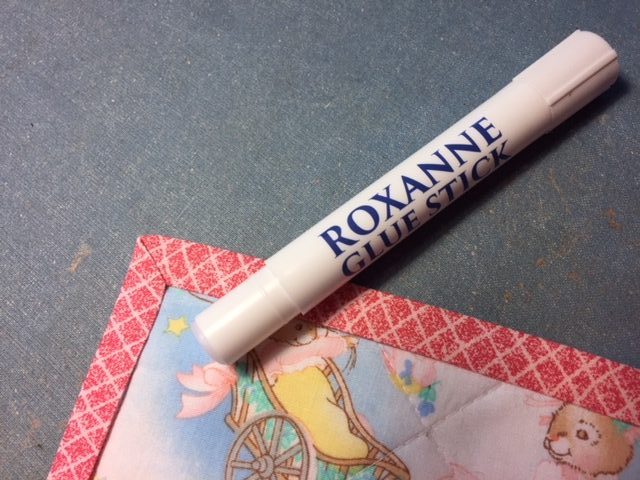
It is the end of January, and I have already broken, amended, and forgotten most of the New Year’s resolutions I made. That is nothing new. However, using one of the best new tools of the quilters’ trade, Roxanne’s Glue Stick has stuck with me (pardon the pun).
Roxanne’s Glue Stick has so
many wonderful qualities. To begin with, it adheres quickly and well. I love
the process of making a project, quilt, table runner, mug rug, etc. However,
sometimes I have a deadline, dear hubby is down to his last clean pair of
socks, there is enough dog hair on the floor to make another 4-legged critter,
and it’s time to prepare lunch while breakfast dishes are still drying. So, I
need a product that is efficient and helps me cross off some of the things on
my To Do List for the day. I do not like to sit around waiting for glue to
stick, the way dear hubby waits around for paint to dry.
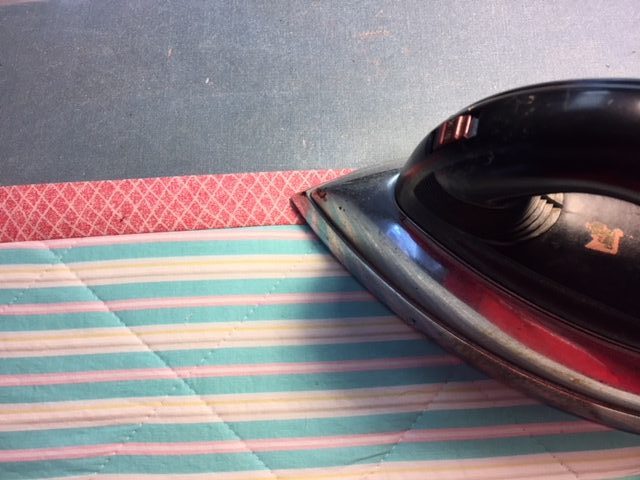
Roxanne’s Glue Stick helps me to be more efficient with my time, and complete the many baby quilts on which I am working that need bindings and labels. I stitch French fold bindings to the backing layer of baby quilts, then press the binding away from the quilt.
Stitch French fold binding to back of quilt, then press binding away from quilt.
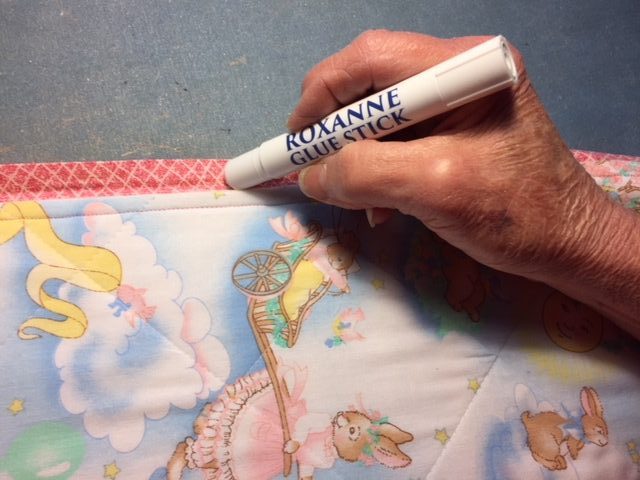
Next, I turn the quilt to the top side, and press the binding fold just over the stitching line, about a 10” length of binding at a time. It glides on sooo smoothly, another great attribute.
Turn quilt to right side and apply Roxanne’s Glue Stick to binding.
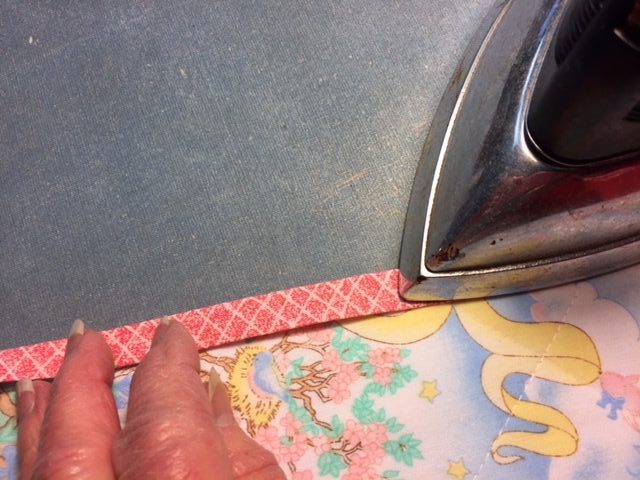
Then, with a hot dry iron, I press the binding fold over the cut edges of the quilt to just cover the stitching line again – continue applying glue and pressing the binding around the quilt.
Fold binding over cut edges of quilt, placing fold of binding at line of stitching. Press. Hand or machine stitch binding in place.
Works so well when you get to the mitered corners, too. Then hand or machine stitch.
Roxanne’s Glue Stick does not
gum up your hand or machine needle, making hand or machine stitching a breeze. When
pressing my binding and label with an iron, the glue is dry right away, and hand
or machine needles will not be gooey. I certainly do not want to gum up the
innards of my sewing machine which I baby as much as my car. The fabric is easy
to pierce with a needle when the glue is dry. I also recommend John James Gold
n’ Glide Applique needles for hand stitching.
At times, I need to
reposition fabric after using Roxanne’s Glue Stick. This can easily be done. I
glued a label, pressed, and then discovered it was in the wrong corner. I just
lifted a corner and peeled back the label. The same was true for a section of
binding that I positioned in a wonky way. Fabric is not steel; it stretches and
eases in. The glue also washes out, leaving no residue.
Roxanne’s Glue Stick is soooo
easy to use. It glides smoothly over fabric, does not lump or clump. The glue
is clear, so I do not have to be concerned about color from the glue stick
fading through to the right side of fabric when using for applique. I use a
task light directly over my work, and can see a shine of the glue where I place
it.
Roxanne’s Glue is a great tool for mitering corners on binding. Apply glue and press with hot dry iron.
Since Roxanne’s Glue Stick is a “new” product, introduced at Houston International Quilt Market last fall, I am eager to use on projects that are currently taking back seat to my baby quilts. But making baby quilts is so much fun, and they provide so much comfort for little ones. However, using Roxanne’s Glue Stick to quickly hem dear hubby’s new jeans will allow me to check “hem jeans” off my To Do List, and get back to the joy of making baby quilts!