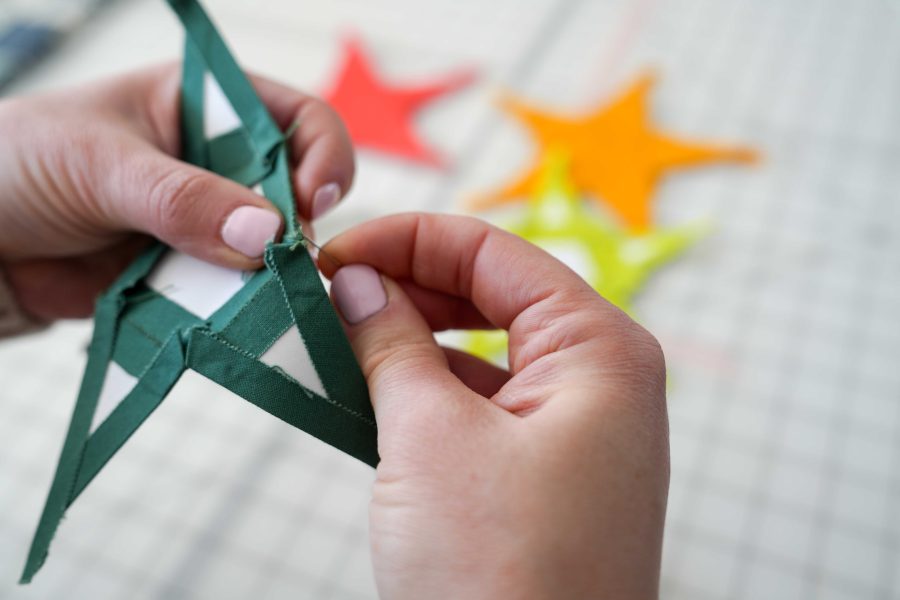
Summer is the perfect season to take your stitching beyond the sewing room. Whether you’re relaxing on the porch, traveling to a retreat, waiting at the airport, or enjoying a quiet afternoon by the lake, portable projects make it easy to fit creativity into life’s little moments.
But stitching away from home comes with its own challenges. Limited space, changing lighting, and carrying only the essentials mean that every tool in your project bag needs to earn its place.
The good news? A thoughtfully packed stitching kit—and the right needles—can help you stitch comfortably wherever your summer takes you.
The Stitching Scenario
Portable hand stitching
Portable projects often include:
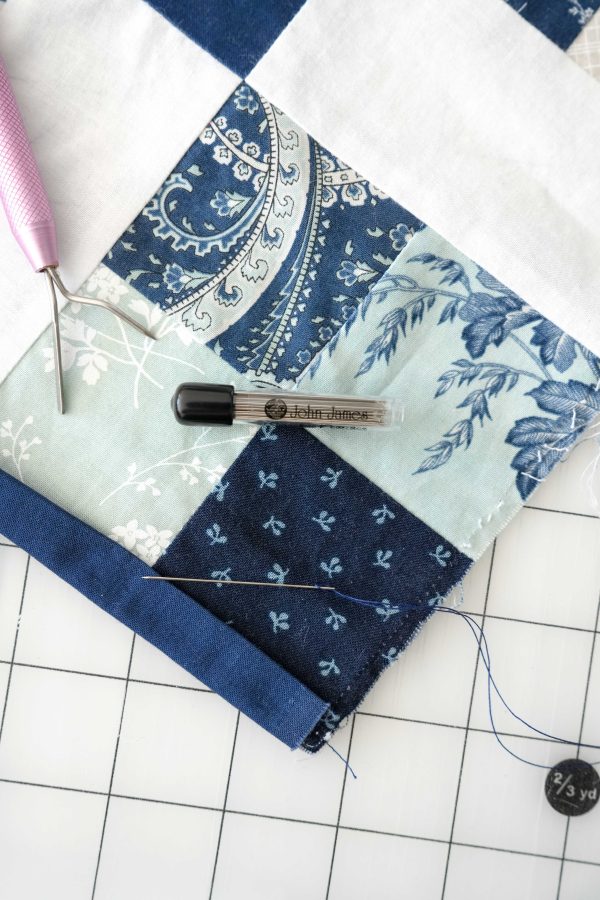
English Paper Piecing (EPP)
Cross stitch
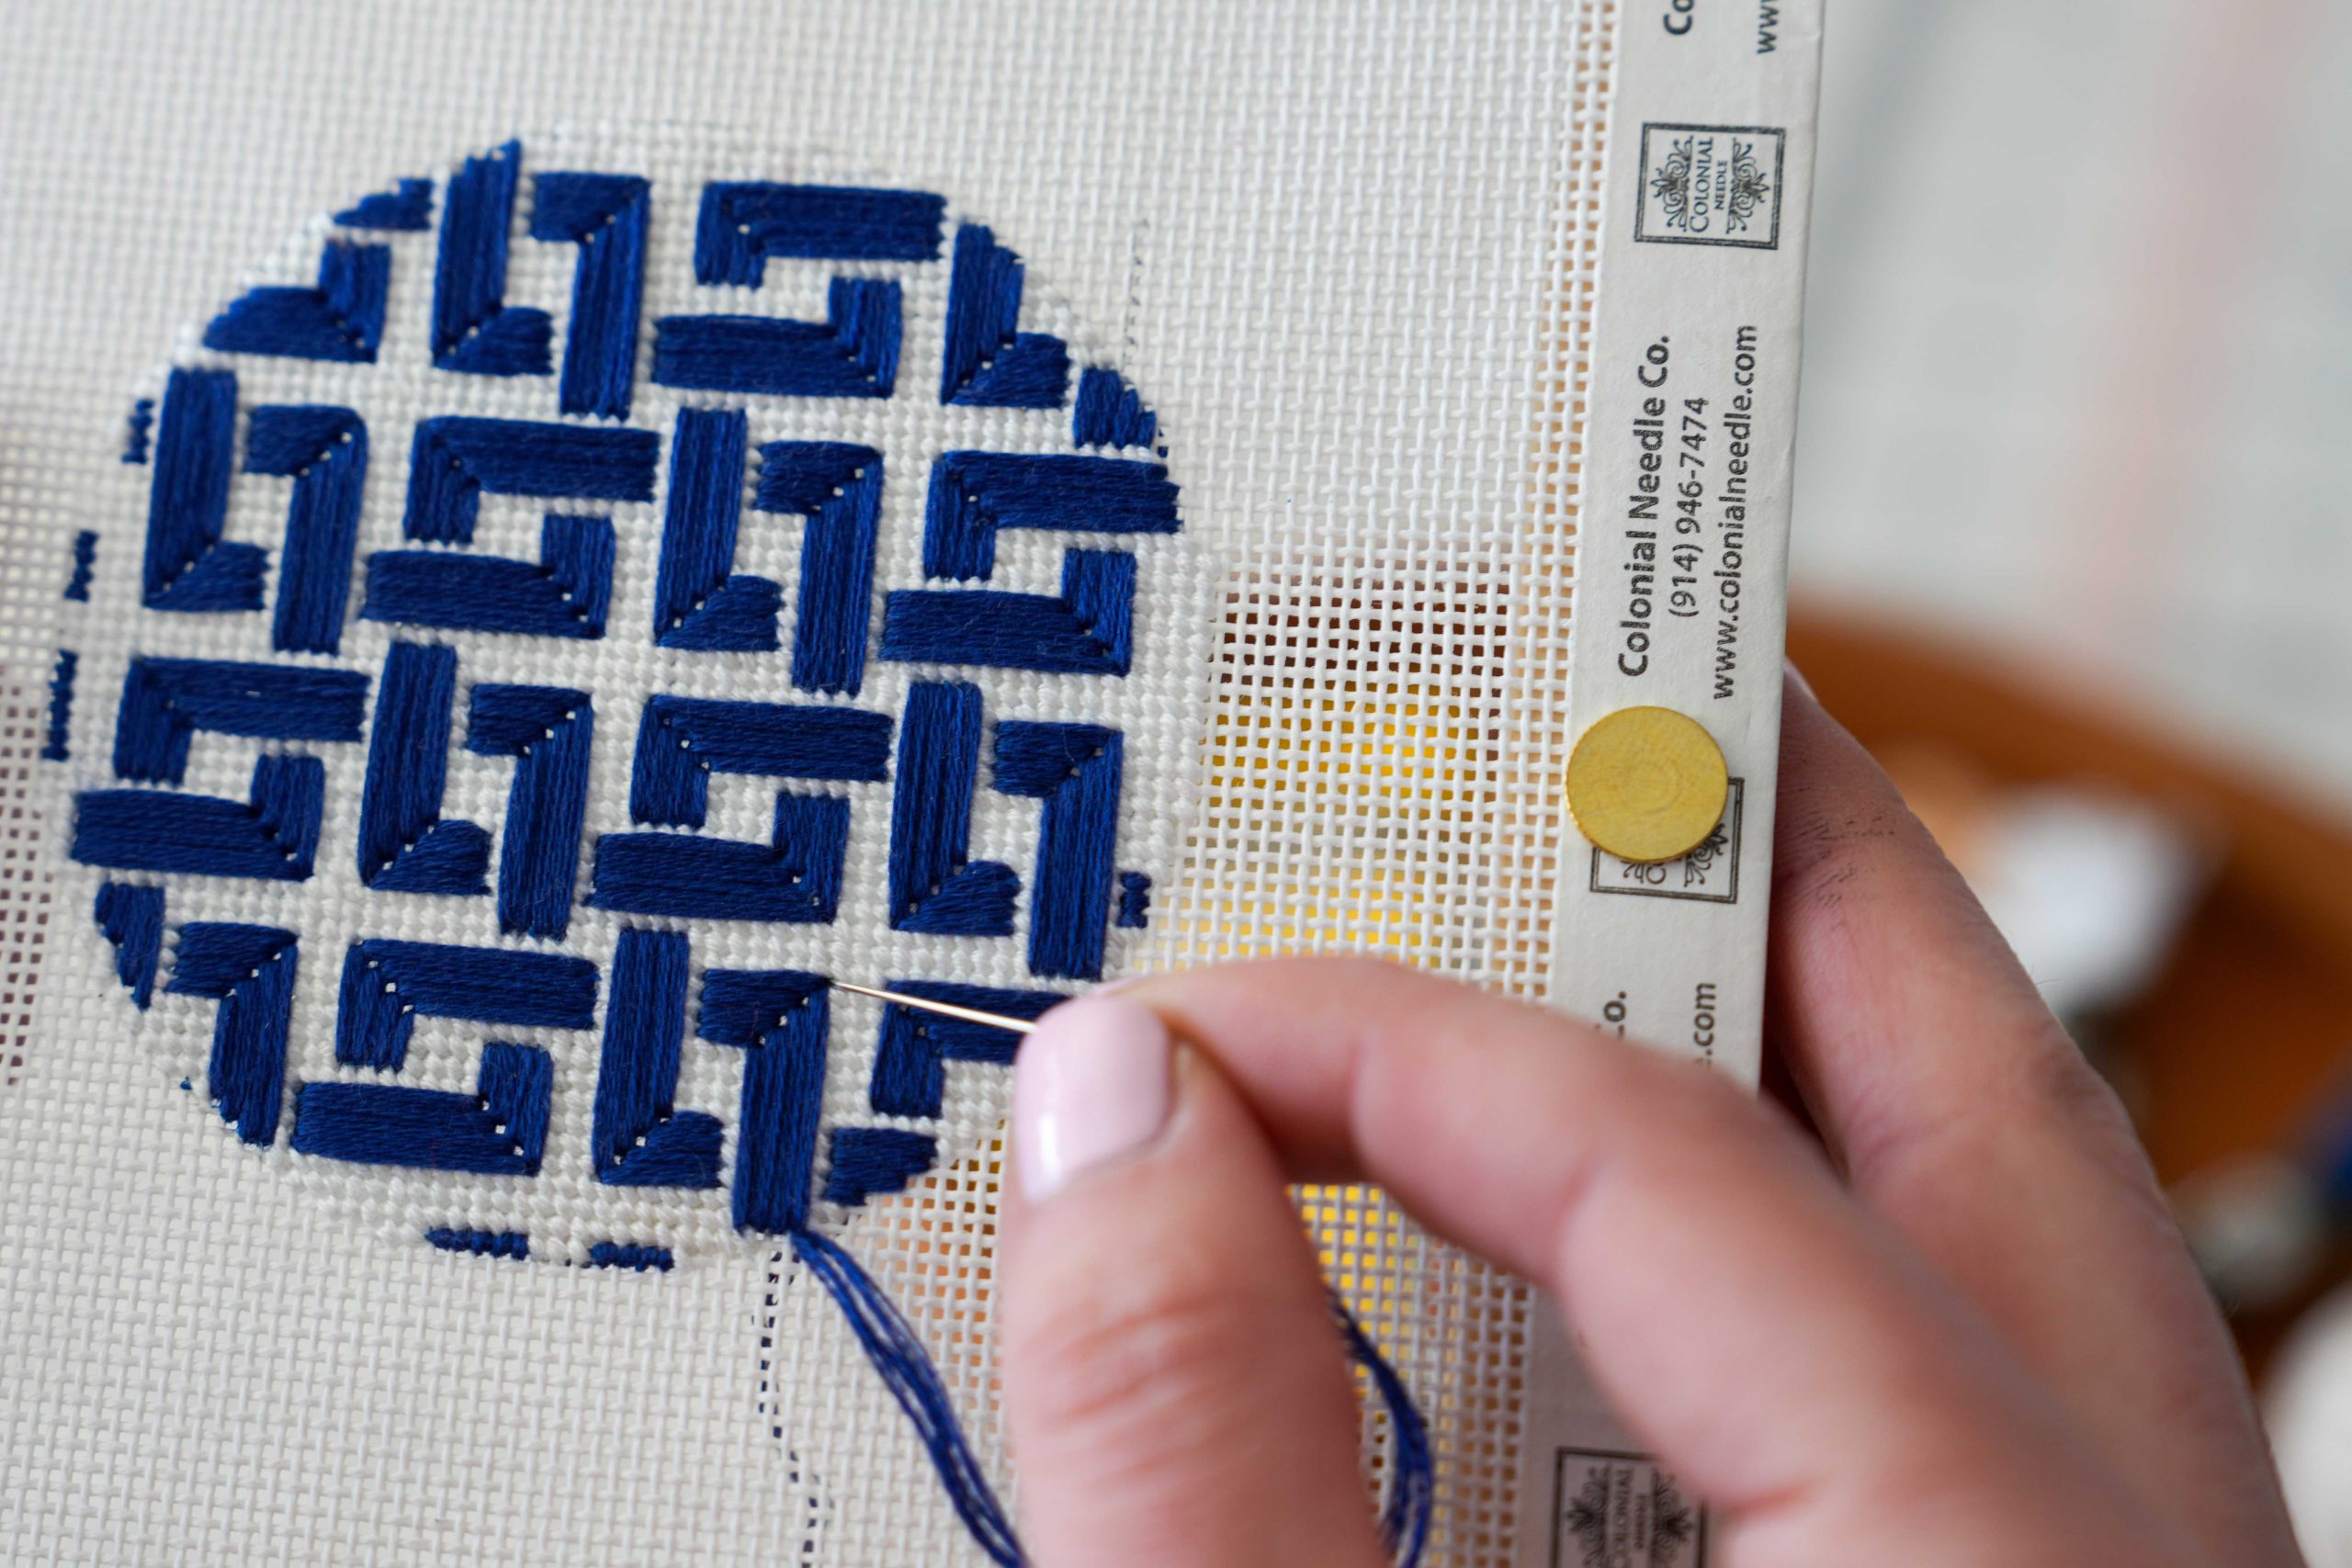
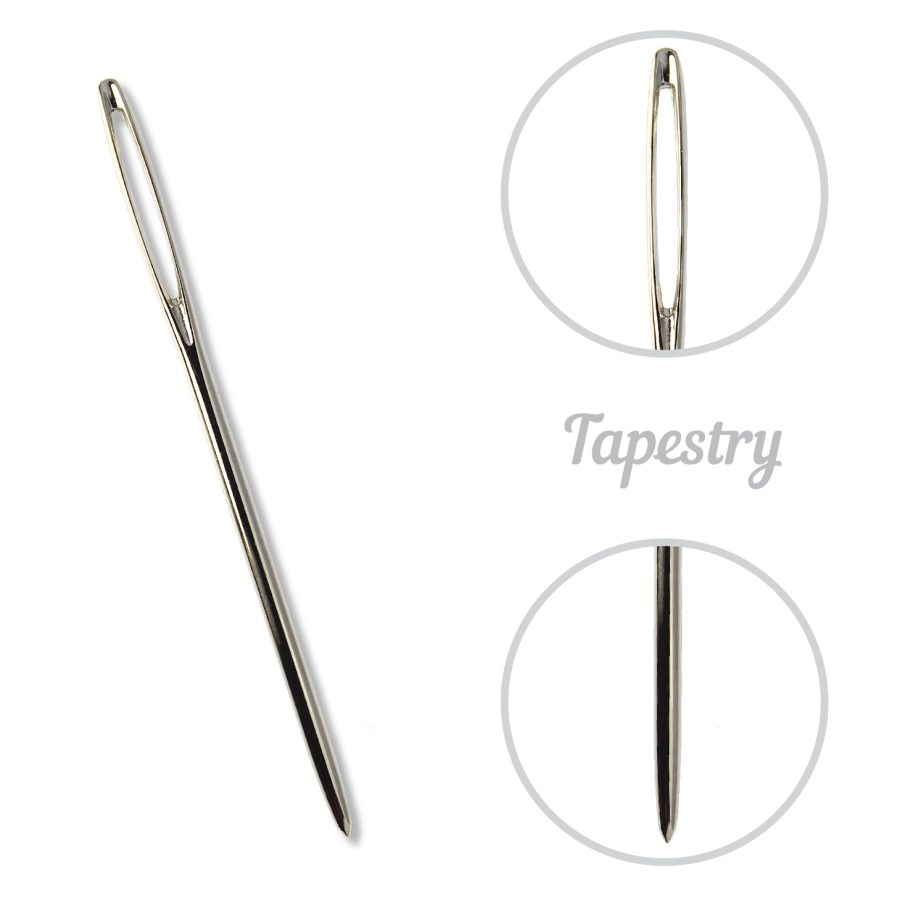
Needlepoint
Embroidery
Wool appliqué
Hand quilting
Slow stitching
Small mending projects
These projects are ideal for travel because they’re compact, relaxing, and easy to pick up whenever you have a few spare minutes.
The Common Challenges
When stitching on the go, you may encounter:
Forgetting the needle you need
Carrying too many supplies
Lost or damaged needles
Poor lighting
Limited workspace
Thread tangles inside your project bag
A little planning can make stitching away from home just as enjoyable as stitching in your favorite chair.
Why the Right Tool Matters
When you’re packing light, versatility becomes just as important as performance.
Instead of carrying every needle you own, consider choosing a small assortment that covers the projects you’ll actually be working on.
Think about:
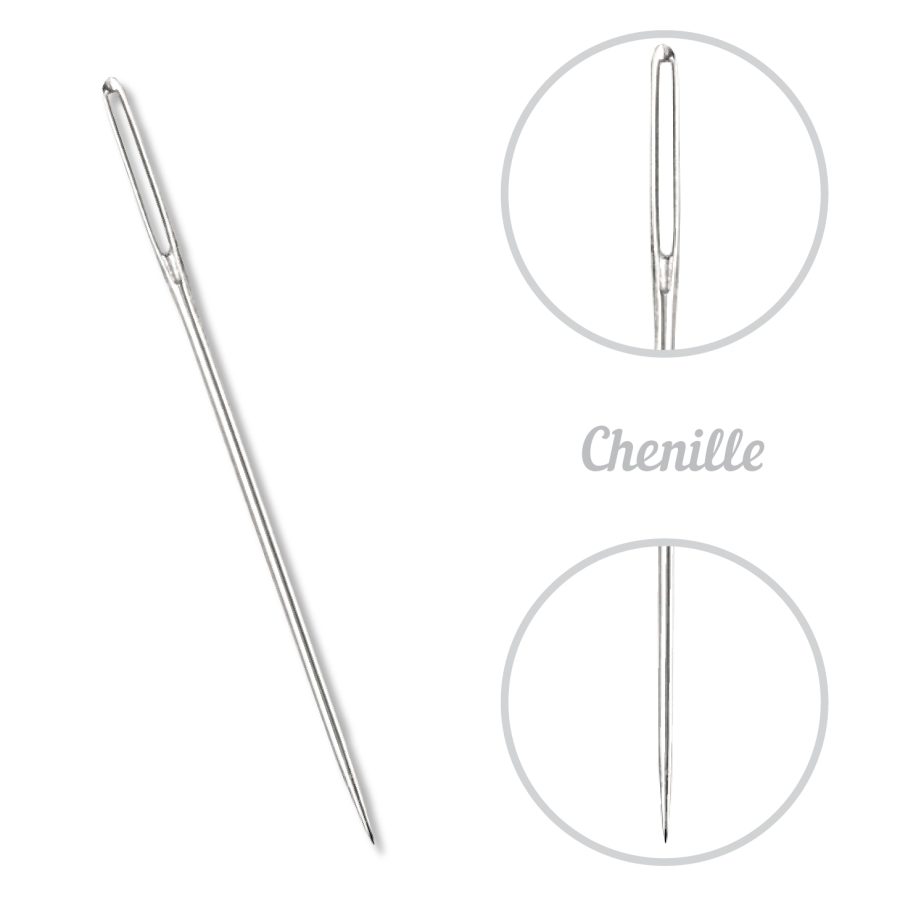
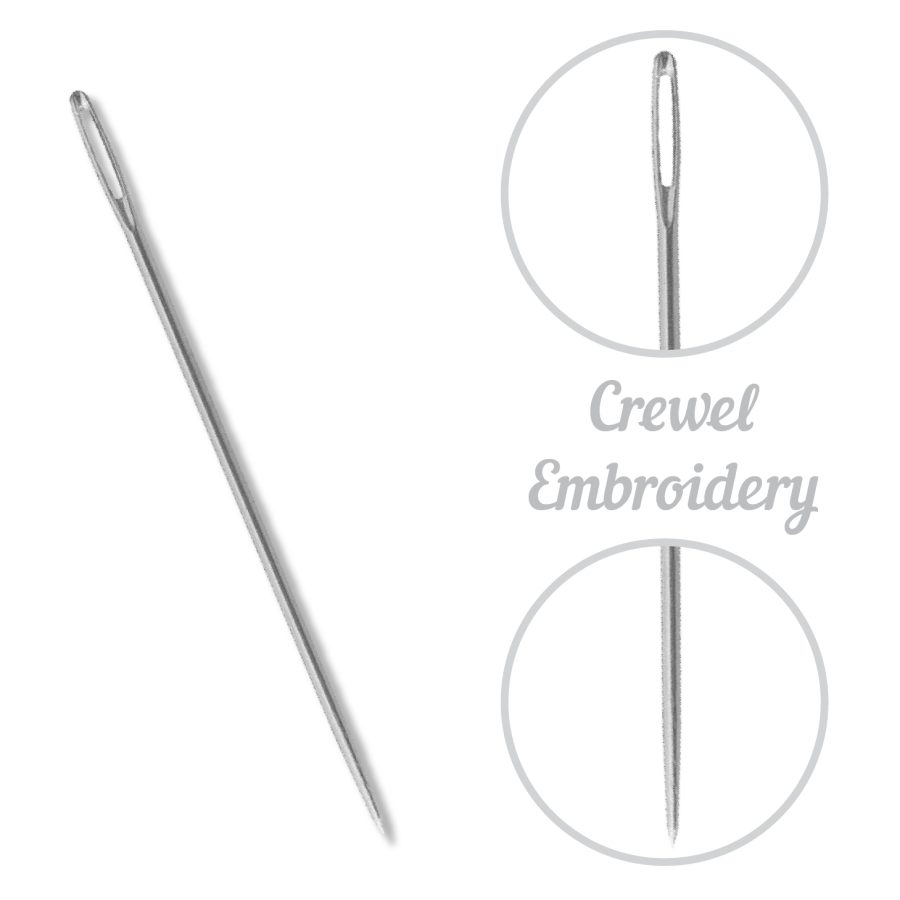
Needle Type
Will your project call for a tapestry, chenille, embroidery (crewel), or sharps needle?
Needle Size
Packing a few sizes gives you flexibility if you switch projects or thread weights.
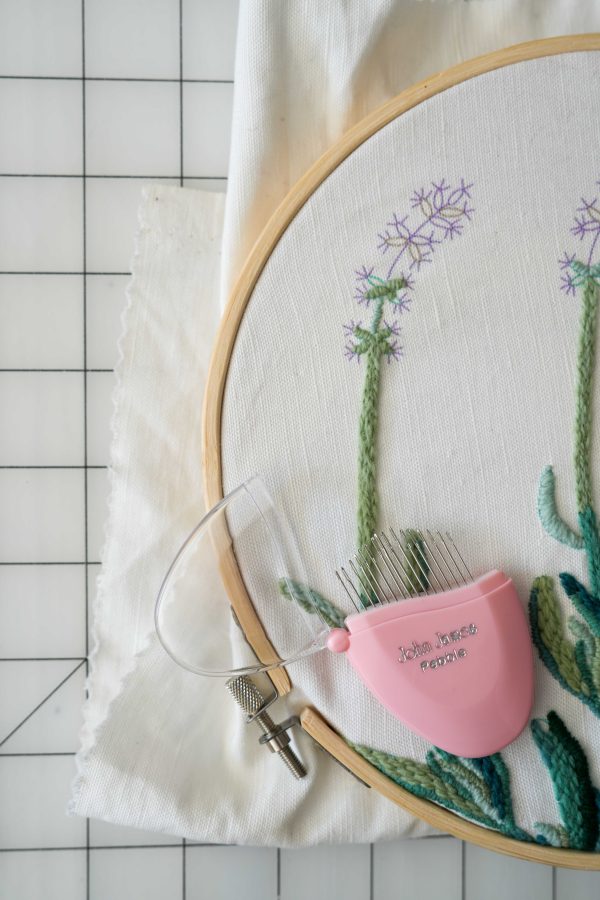
Storage
Keeping needles organized protects both your supplies and your fingers.
A compact needle case makes it easy to find exactly what you need—without digging through your project bag.
Our Recommendation: Building a Travel Needle Kit
Rather than packing dozens of needles, consider carrying a small assortment that handles most portable projects.
Having a small variety means you’re ready for nearly any stitching opportunity that comes your way.
Pro Tip: Pack for the Project You Might Stitch
Many stitchers pack for the project they’re working on today—but vacations and retreats often inspire us to start something new.
Including one or two extra needle types takes very little space and gives you the flexibility to switch techniques if inspiration strikes.
Special Considerations for Travel
Whether you’re flying across the country or spending the afternoon at your local park, organization makes all the difference.
A few travel-friendly habits:
✔ Store needles securely in a compact case ✔ Bring pre-cut thread lengths ✔ Include a needle threader if needed ✔ Keep a small magnetic holder nearby to prevent lost needles
The less time spent searching for supplies, the more time you can spend stitching.
Reader Takeaway
For your next portable stitching project:
✔ Pack only the needles you’ll realistically use ✔ Include a variety of needle types ✔ Keep them organized in a protective case ✔ Plan for flexibility—not perfection
Sometimes the best stitching happens in the unexpected moments.
Looking Ahead
Next month in The Right Tool for the Stitch, we’ll explore the long, elegant needles designed specifically for Sashiko and Japanese running stitch—and why they create such beautiful rhythm.
Until then, safe travels, happy stitching, and don’t forget to tag us when you pack supplies for your favorite project!
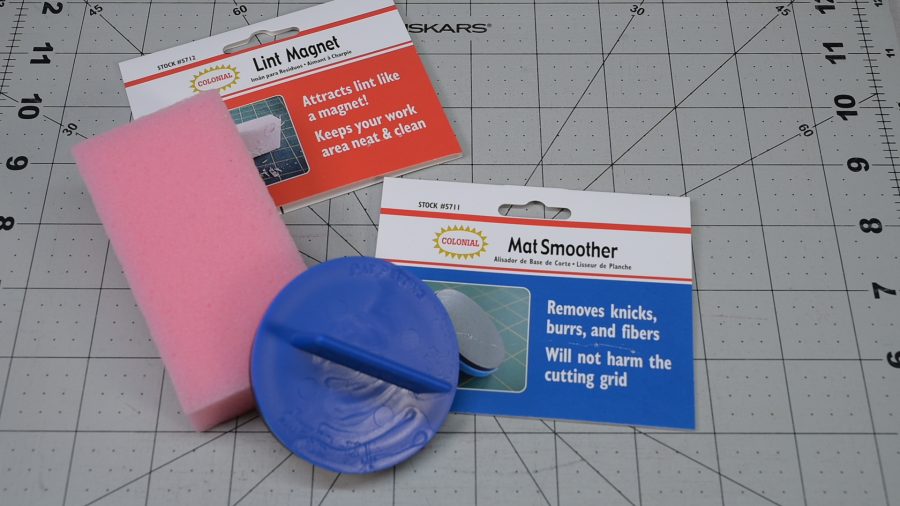
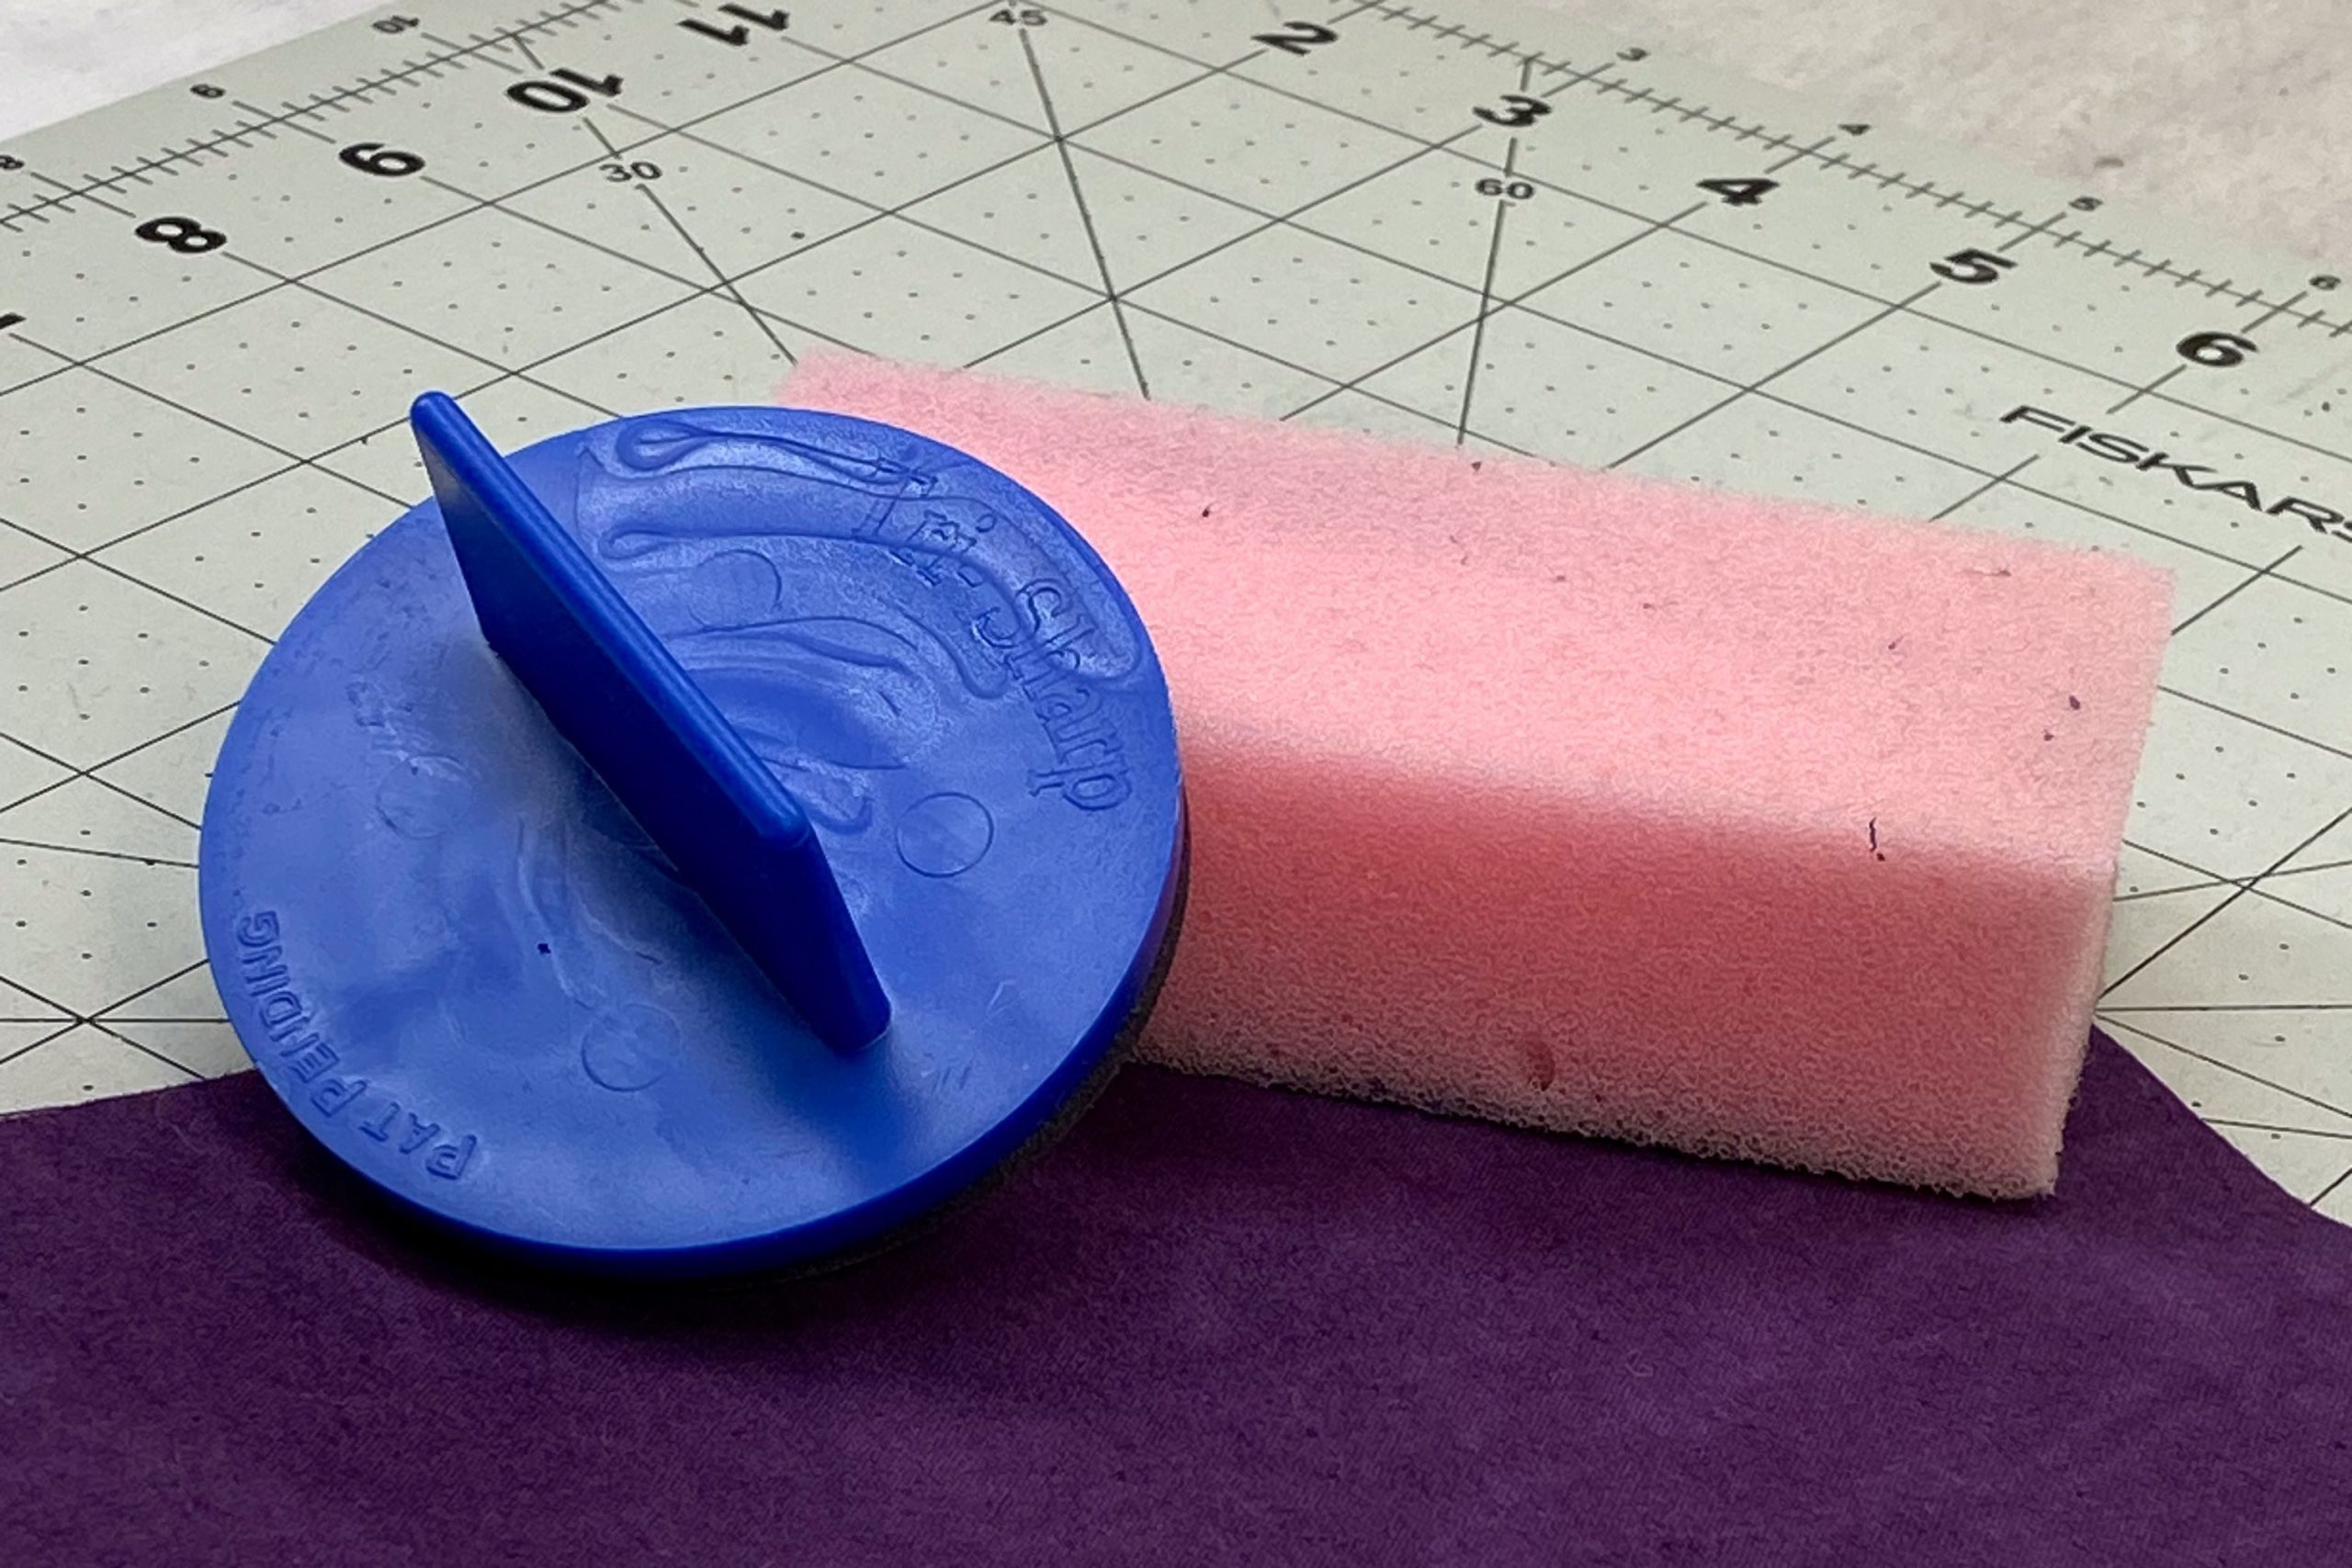
Hey there folx! Shannon & Jason here and this month we’re going to be completely honest with you here for a moment: When the folx at CNC told us to try these out, we thought both of these tools were gimmicks. A little scrubbing tool to “restore” cutting mats? And a reusable sponge to replace our lint roller? Yeah, sure okay. When a mat gets grooved and scarred from years of rotary cutting, utility knives, and general studio chaos, you flip it, rotate it, and eventually replace it. When fabric gets covered in thread lint, you grab whatever sticky roller is closest. That’s just how it works. Right?
Turns out, we were spectacularly wrong about both of them.
The Problem We Didn’t Know We Could Fix
Our big industrial cutting mat – the beast we bought from years ago for the main worktable – had seen some things. We use that surface for everything: fabric cutting, yes, but also scoring paper, trimming mat board for textile art pieces, cutting reclaimed plastic for our Unconventional Boro work, you name it.
The center section, the high-traffic zone where 90% of our cutting happens, had developed serious grooves. Not just surface scratches but deep channels filled with fabric fibers that made our rotary cutters skip mid-cut. You know that feeling when your blade skips a few threads or slips forward because it hit a scar in the mat? Yeah. That was happening multiple times per project. Truly maddening.
We’d already flipped and rotated the mat once and that was a task and a half that we did not look forward to repeating. The next step was replacement, which for an industrial-sized mat is not a small expense.
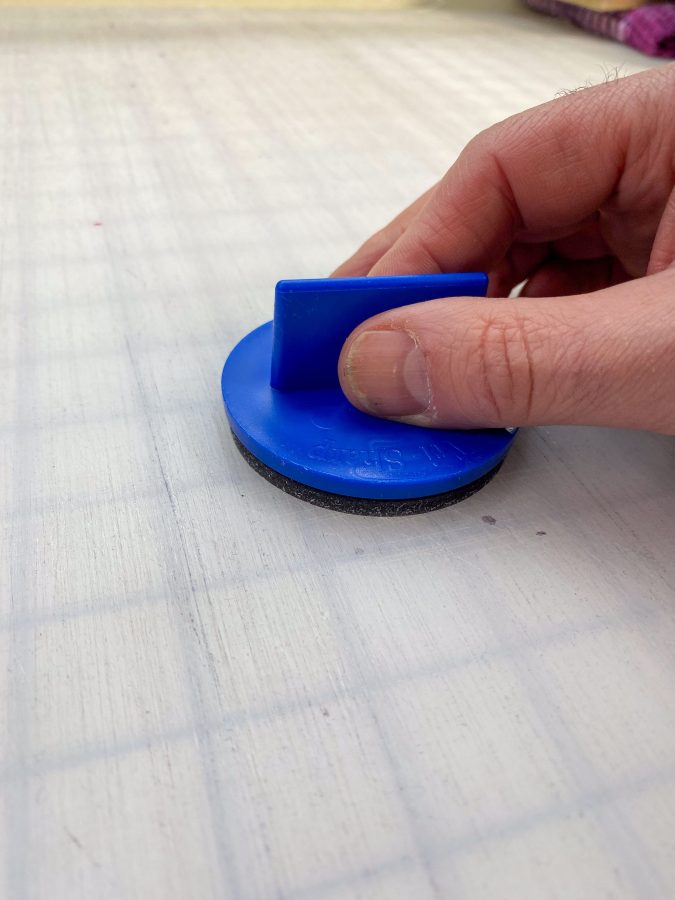
And then the folks at Colonial Needle said, “Just try the Mat Smoother first.” (They are always doing that kind of thing to us!)
We were skeptical. But we tried it anyway (because what did we have to lose) and, if it didn’t work… well then, we’d have to go back to the flip or replace plan. Turns out (as with the other tools the folx at Colonial Needle Co. show us)…
It worked.
Not just “a little better” worked. Not “bought us a few more months” worked. The Mat Smoother lifted out the trapped fibers from those grooves, allowing the self-healing surface to actually close back up under the motion of the mat smoother. The skipping stopped. The blade glided smooth and true and the cuts were clear again. No skipped threads. The mat we thought was done for is still in heavy rotation a year later.
The “Unsexy” Tools That Save Money
Here’s the thing about the Mat Smoother: it’s not flashy. It doesn’t make your projects prettier or faster. It doesn’t unlock new techniques or creative possibilities.
But it saves you money. Real money.
How it works: The Mat Smoother isn’t sanding down your mat — it’s gently buffing out the fabric fibers, thread bits, and debris that get trapped in the cuts. Self-healing mats are designed to close back up after each cut, but they can’t do that if the grooves are packed with lint and fiber. The Mat Smoother massages those fibers out (always use circular motions with light pressure), and suddenly your “dead” mat is smooth again.
We use it on:
The big industrial mat when the center section starts to feel gritty
Our smaller side-table mat by the sewing machine (that one gets messy FAST from trimming threads and seam allowances)
Any mat that’s starting to show visible fiber buildup
Pro tip: If you’re working on a white mat (like we do for photo and video shoots), dark fabric fibers can get embedded in the surface and cause color cross-contamination when you lay down lighter fabrics. A quick pass with the Mat Smoother before switching from dark to light fabric prevents that transfer. Once we learned that little trick, we use it every time we shoot a class or photograph a project or step-out.
The Lint Magnet: The Unsung Hero of Photo Prep
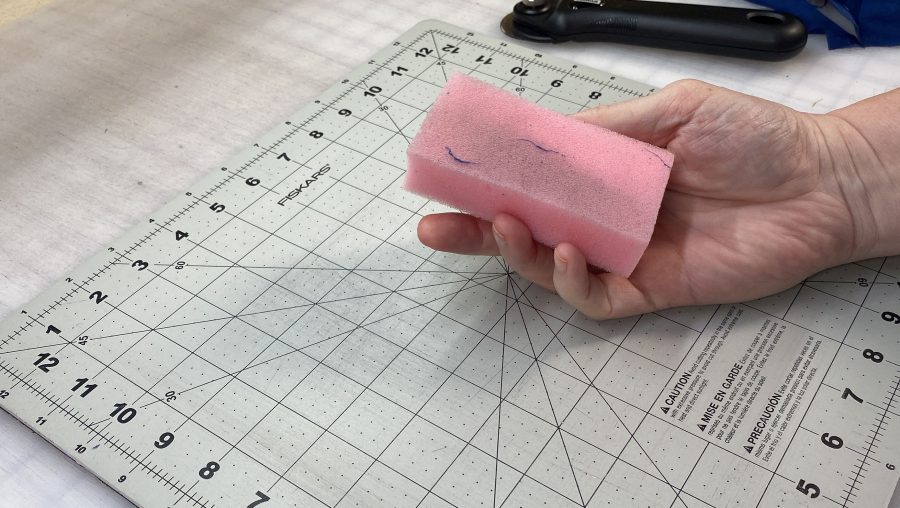
And then there’s the Lint Magnet, which we also thought we didn’t need. We had lint rollers. We had tape. We had a vacuum with a brush attachment. What more could a sponge-like thingamabob possibly offer?
Turns out: a lot.
Side Note: Yes, we’ve learned to just trust the Colonial Needle Co. folks and use the tools they recommend. We learn!
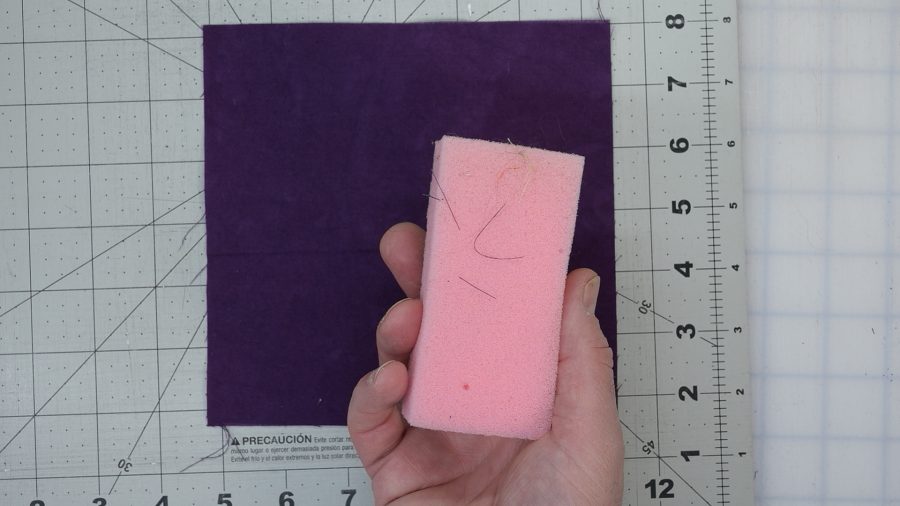
The Lint Magnet doesn’t just move lint around or pick up surface fuzz, it lifts embedded threads and fibers from fabric without leaving residue, without using sticky sheets you have to replace, and without the aggressive pull of a lint roller that can distort delicate textiles.
We use it constantly for:
Cleaning up the big white cutting table between photo shoots (because every thread shows up on white, and we film and photograph a LOT of content)
Removing thread lint from dark sashiko fabric after stitching (white thread on indigo? Every speck is visible)
Prepping wool and felt projects before photography
Quick cleanup of our sewing machine’s exterior surfaces (because yes, those get fuzzy too)
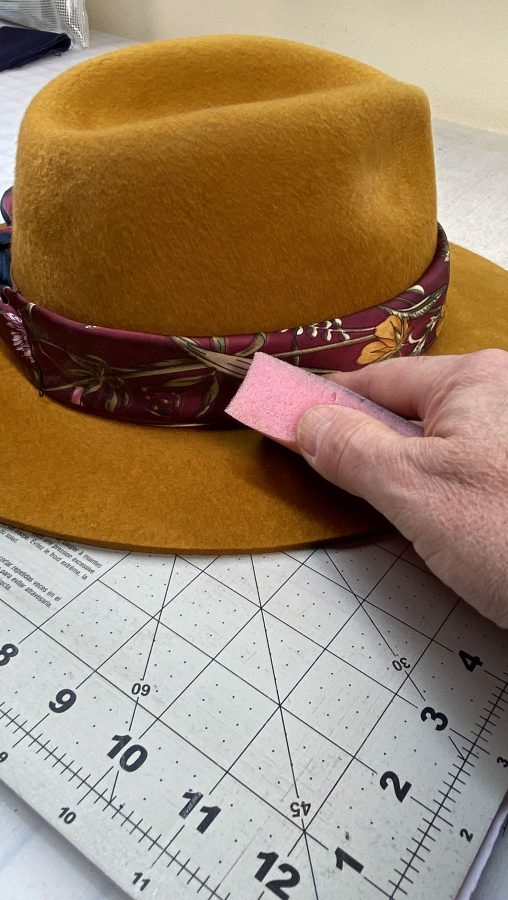
And then there’s the bonus use we stumbled onto recently that we did not see coming: felt hats. If you have a collection of felt hats — and apparently, we do — you already know they attract absolutely everything. The Lint Magnet handles them perfectly. No pulling, no distorting the felt, and no sticky residue that attracts more “stuff,” just clean hats. It’s now a permanent part of our hat care routine before we walk out the door.
The best part? It’s reusable. No disposable sticky sheets filling the trash. Just rinse it when it gets saturated, let it dry, and it’s ready to go again.
It’s one of those tools that falls squarely into our category of “things we thought we didn’t need until we tried them and now we know just how terribly wrong we were and are glad we don’t have to do without them.” It’s a long category title, but we can admit when we’re wrong.
Why Maintenance Actually Matters
Here’s what we’ve learned about studio maintenance over the years: it’s not about keeping things Instagram-perfect, it’s about protecting your investment in your craft.
Clean mats mean:
Your rotary blades stay sharper longer (less friction = less dulling)
Your rulers don’t slip on gritty surfaces
Your cuts are accurate because the blade isn’t skipping over embedded fibers
You’re not wasting money replacing mats that just needed a good cleaning
Lint-free fabric means:
Your finished projects look professional (no white fuzz on your black wool coat)
Your photo and video content is cleaner (trust us, every speck shows up on camera)
You’re not fighting cross-contamination between light and dark fabrics
These aren’t glamorous tools. They won’t make your Instagram feed pop. But they’ll save you money, extend the life of your expensive surfaces, and prevent the low-key frustration of cutting on a mat that fights you every step of the way.
The Bottom Line: Maintenance Makes the Maker
A few years ago, if you’d told us we’d be writing a love letter to a mat cleaning and smoothing tool and a lint sponge, we would have laughed.
But here we are.
The Mat Smoother saved our big industrial mat from early retirement and extends the life of our cutting mats all over the studio. The Lint Magnet keeps our photo prep from turning into a 20-minute lint-picking session — and our felt hats looking sharp. Together, they’re the maintenance duo we reach for every time we reset the studio.
If your cutting mat is feeling gritty, if your rotary blade is skipping, if you’re considering replacing a mat that’s “just worn out” — try the Mat Smoother first. If you’re spending more time picking lint off dark fabric than actually stitching it, the Lint Magnet will change your life. And if you have felt hats, well. You’re welcome.
They’re not exciting. But their value is in how well they work. And sometimes, that’s exactly what you need.
Watch the video demonstration on YouTube to see these tools in action on our battle-scarred mats and lint-covered fabrics.
What’s your studio’s “high-traffic” zone? Is your cutting mat more scarred or smooth? Share a photo and tag us — we want to see those Mat Smoothers saving the day!
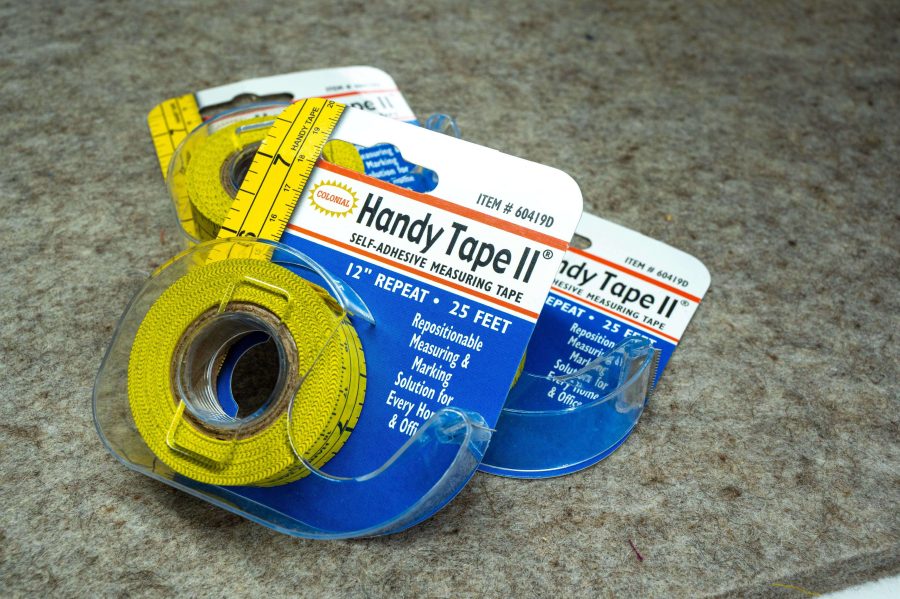
We Have Five Rolls of Handy Tape in Our Studio. Here’s Why:
You know a tool has become indispensable when you stop putting it back in the drawer because you might need it close at hand at any given moment. We have Handy Tape everywhere. One roll lives on the peg board over the cutting table, another lives in the top drawer of the sewing machine cabinet, and there’s one in the studio “miscellaneous supplies” box. Oh… then there’s one in the utility drawer in the kitchen for gallery wall projects and there’s one that’s currently sitting on Jason’s desk because we used it to wrap a present a few days ago instead of regular tape. Yes, you read that right. We used Handy Tape to wrap a gift. So yeah… we have it on hand pretty much everywhere. That’s how useful this stuff is.
What Even Is Handy Tape?
On the surface, Handy Tape is exactly what it sounds like: a measuring tape with a low-tack adhesive backing that sticks to things. Fabric, walls, tables, your sewing machine, even skin (more on that later). But calling it “sticky measuring tape” is like calling a rotary cutter “a round blade.” Technically accurate but missing the entire point.
Handy Tape is the third hand you’ve been wishing for when you’re trying to measure something by yourself, mark guidelines without permanent lines, or create temporary grids that actually stay put while you work. It’s repositionable, it doesn’t leave residue, and once you start using it, you’ll find yourself reaching for it in situations that have nothing to do with measuring. Like wrapping presents. (We’re still a little surprised by that one ourselves.)
How We Actually Use It (The Real List)
The Temporary Design Wall
This is probably our most-used application. We hang a flannel sheet on the wall (flannel because quilt blocks stick to it), then apply strips of Handy Tape to create a grid or border. Suddenly we have a design wall where we can space out quilt blocks, test different layouts, rearrange components of a textile art piece, and see the whole composition without committing to anything permanent.
The tape sticks to the flannel, the blocks stick to the flannel, and everything stays put while we audition different arrangements. When we’re done, we peel off the tape and the flannel sheet is clean.
Why this matters: Most design walls are either expensive foam boards or permanent installations. Either way, they take up valuable space that, personally, we don’t have. This solution costs about $12 and packs flat when you’re not using it.
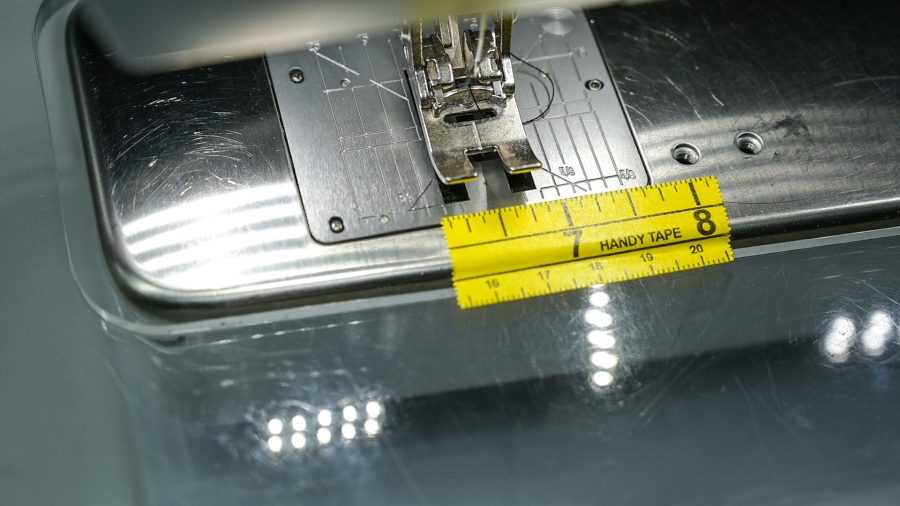
The Sewing Machine Seam Guide
We have guides etched into our sewing machine’s stitch plate. They’re fine. They’re also tiny, hard to read, and easy to lose track of when you’re chain-piecing at speed. And if you sew on a machine that has seen some years of use, those lines can be worn down and faded making them all but useless. Handy Tape applied directly to the machine in front of the stich plate stitch plate creates a bold, high-contrast guide that’s impossible to miss. Just line up one of the marks on the tape with where your needle is set, and follow the clear, bold Handy Tape lines. And the low-tack backing makes it easy to reposition Handy Tape or remove it entirely without leaving sticky residue.
Bonus: It’s much easier to see on camera than etched metal lines. When we’re recording workshops or tutorials, we don’t have to zoom in and out constantly to show measurements. The tape is visible, clear, and stays exactly where we put it.
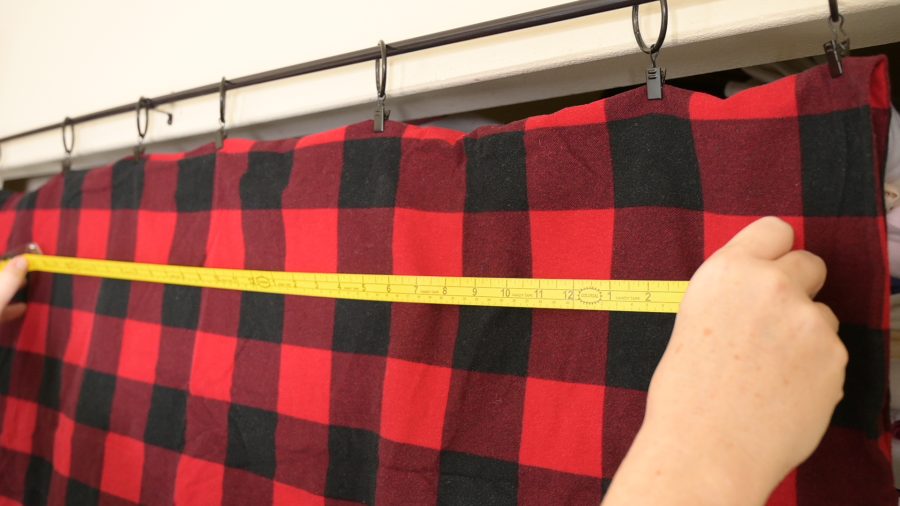
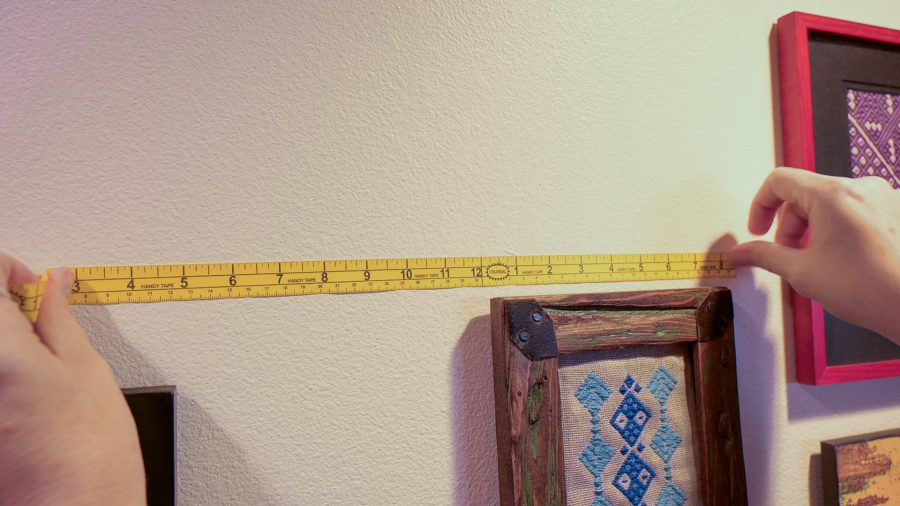
The Solo Measuring Solution for Awkward Spaces
Try measuring a doorway by yourself with a regular tape measure. One end wants to snap back. You’re holding it at arm’s length. You’re squinting to read the numbers while simultaneously trying to keep tension on the tape.
Now try it with Handy Tape: stick one end to the door frame, walk it across, stick the other end down, read the measurement. Done.
We’ve used this for:
A large living room window (trying to figure out curtain yardage or curtain rod length)
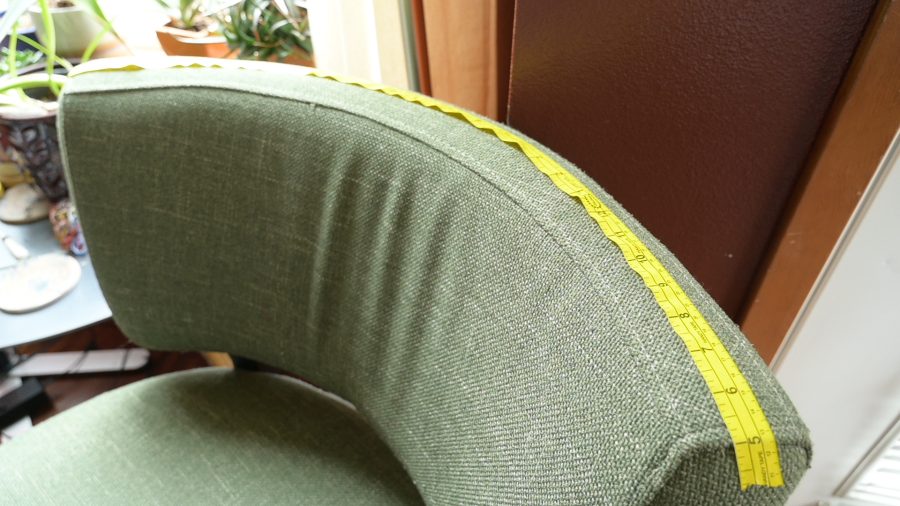
A curved chair back we were reupholstering (impossible with a rigid measuring tape or cloth tape)
Walls when we’re planning furniture placement and art placement
Any situation where you need a third hand but you’re working alone
The curved chair was a revelation. Regular measuring tapes bend but they don’t stay in place. Previously, we would use a separate roll of tape to hold our cloth tapes in place but Handy Tape does it all quickly and efficiently. We laid Handy Tape on the curve and had our measurements without the gymnastics.
Gallery Wall Spacing (No More “Oops” Holes)
Hanging multiple pieces of art or textile work in a grid is an exercise in spatial geometry and crossed fingers. Measure wrong, and you’ve got unnecessary holes in your drywall. Handy Tape lets you plan first, drill later. Stick strips to the wall to map out where each piece will go. Step back. Adjust. Move things around. When the spacing looks right, mark your hook or nail spots, hang your pieces, and peel the tape away.
No guessing. No regrets. No spackle.
Body Measurements (The Solo Solution)
Here’s a use case we discovered by accident and now recommend all the time:
Taking your own body measurements is awkward. Getting someone else to take them for you is either impossible (you live alone) or uncomfortable. Not everyone wants hands-on help, and not everyone has a person available who knows how to measure correctly. And it’s not like we’re going to run to the neighbor’s and ask them to hold the tape for us. GAH!).
Handy Tape sticks lightly to fabric and skin without leaving residue or pulling uncomfortably. Wrap it around yourself – bust, waist, hips, whatever you’re measuring – stand straight, mark the overlap point with a marker, remove the tape, and count the inches. It’s like having a tailor’s assistant who doesn’t ask questions and doesn’t judge your measurements. We give this advice constantly now. It’s especially helpful for people who sew their own garments but don’t have a sewing buddy nearby to help with fitting.
The “Not Actually Measuring” Uses
And then there are the times we use Handy Tape for things that have nothing to do with measuring at all.
In place of washi tape for mixed media art: The measuring tape marks add visual interest, and the low tack adhesive means it repositions easily on paper and fabric without tearing.
Wrapping presents: This happened just a few days ago. The tape dispenser was sitting next to a roll of washi tape we’d been using. We needed to wrap a gift. We grabbed the Handy Tape instead because it was right there. It worked perfectly. We’re not even mad about it.
Scrap bin organization: We stick strips to the top of our scrap bin lids so we can instantly check if a piece of fabric is large enough for a project without digging out a ruler or clearing off the cutting mat.
Teaching tool for workshops: When we’re demonstrating spacing for sashiko grids or blanket stitch edges, we apply Handy Tape directly to the fabric. Students can see the measurements clearly on the overhead video regardless of the classroom lighting situation. IYKYK
The Bottom Line: It’s Not Just a Measuring Tape
Here’s what we’ve learned after going through multiple rolls of this stuff:
Handy Tape isn’t solving one problem. It’s solving the “I need a measurement guide that stays put, doesn’t damage anything, and works in situations where regular tools don’t” problem.
It’s the tool you didn’t know you needed until you try it once, and then suddenly you have five rolls scattered around your workspace and house because you keep finding new uses for it. Fair warning: order a few extra rolls because others will discover just how handy Handy Tape is and yours will mysteriously disappear. Just sayin’…
Handy Tape may not be the flashiest gadget in your toolbox, but it’s one of those quiet workhorses that makes everything else easier. Measure solo. Mark temporarily. Create grids that actually stay where you put them. Wrap the occasional gift when the regular tape just isn’t special enough.
Why You Should Never Struggle to Thread a Needle Again
We’ve all been there: you’re in the flow of a beautiful Sashiko piece or a delicate EPP project, and then… you have to re-thread. Suddenly, you’re squinting, snipping thread ends, and losing your “stitching zen.”
At a recent workshop, we realized that while most of us know what a needle threader is, many of us aren’t using the right one or we weren’t taught how to use them. Since our friends at Colonial Needle Company sent us their full lineup to test, we’re breaking down which threader belongs in your kit and how to use them for both hand and machine sewing.
Meet the Lineup
Not all needle threaders are created equal. Depending on your project, you might need a different “wand”:
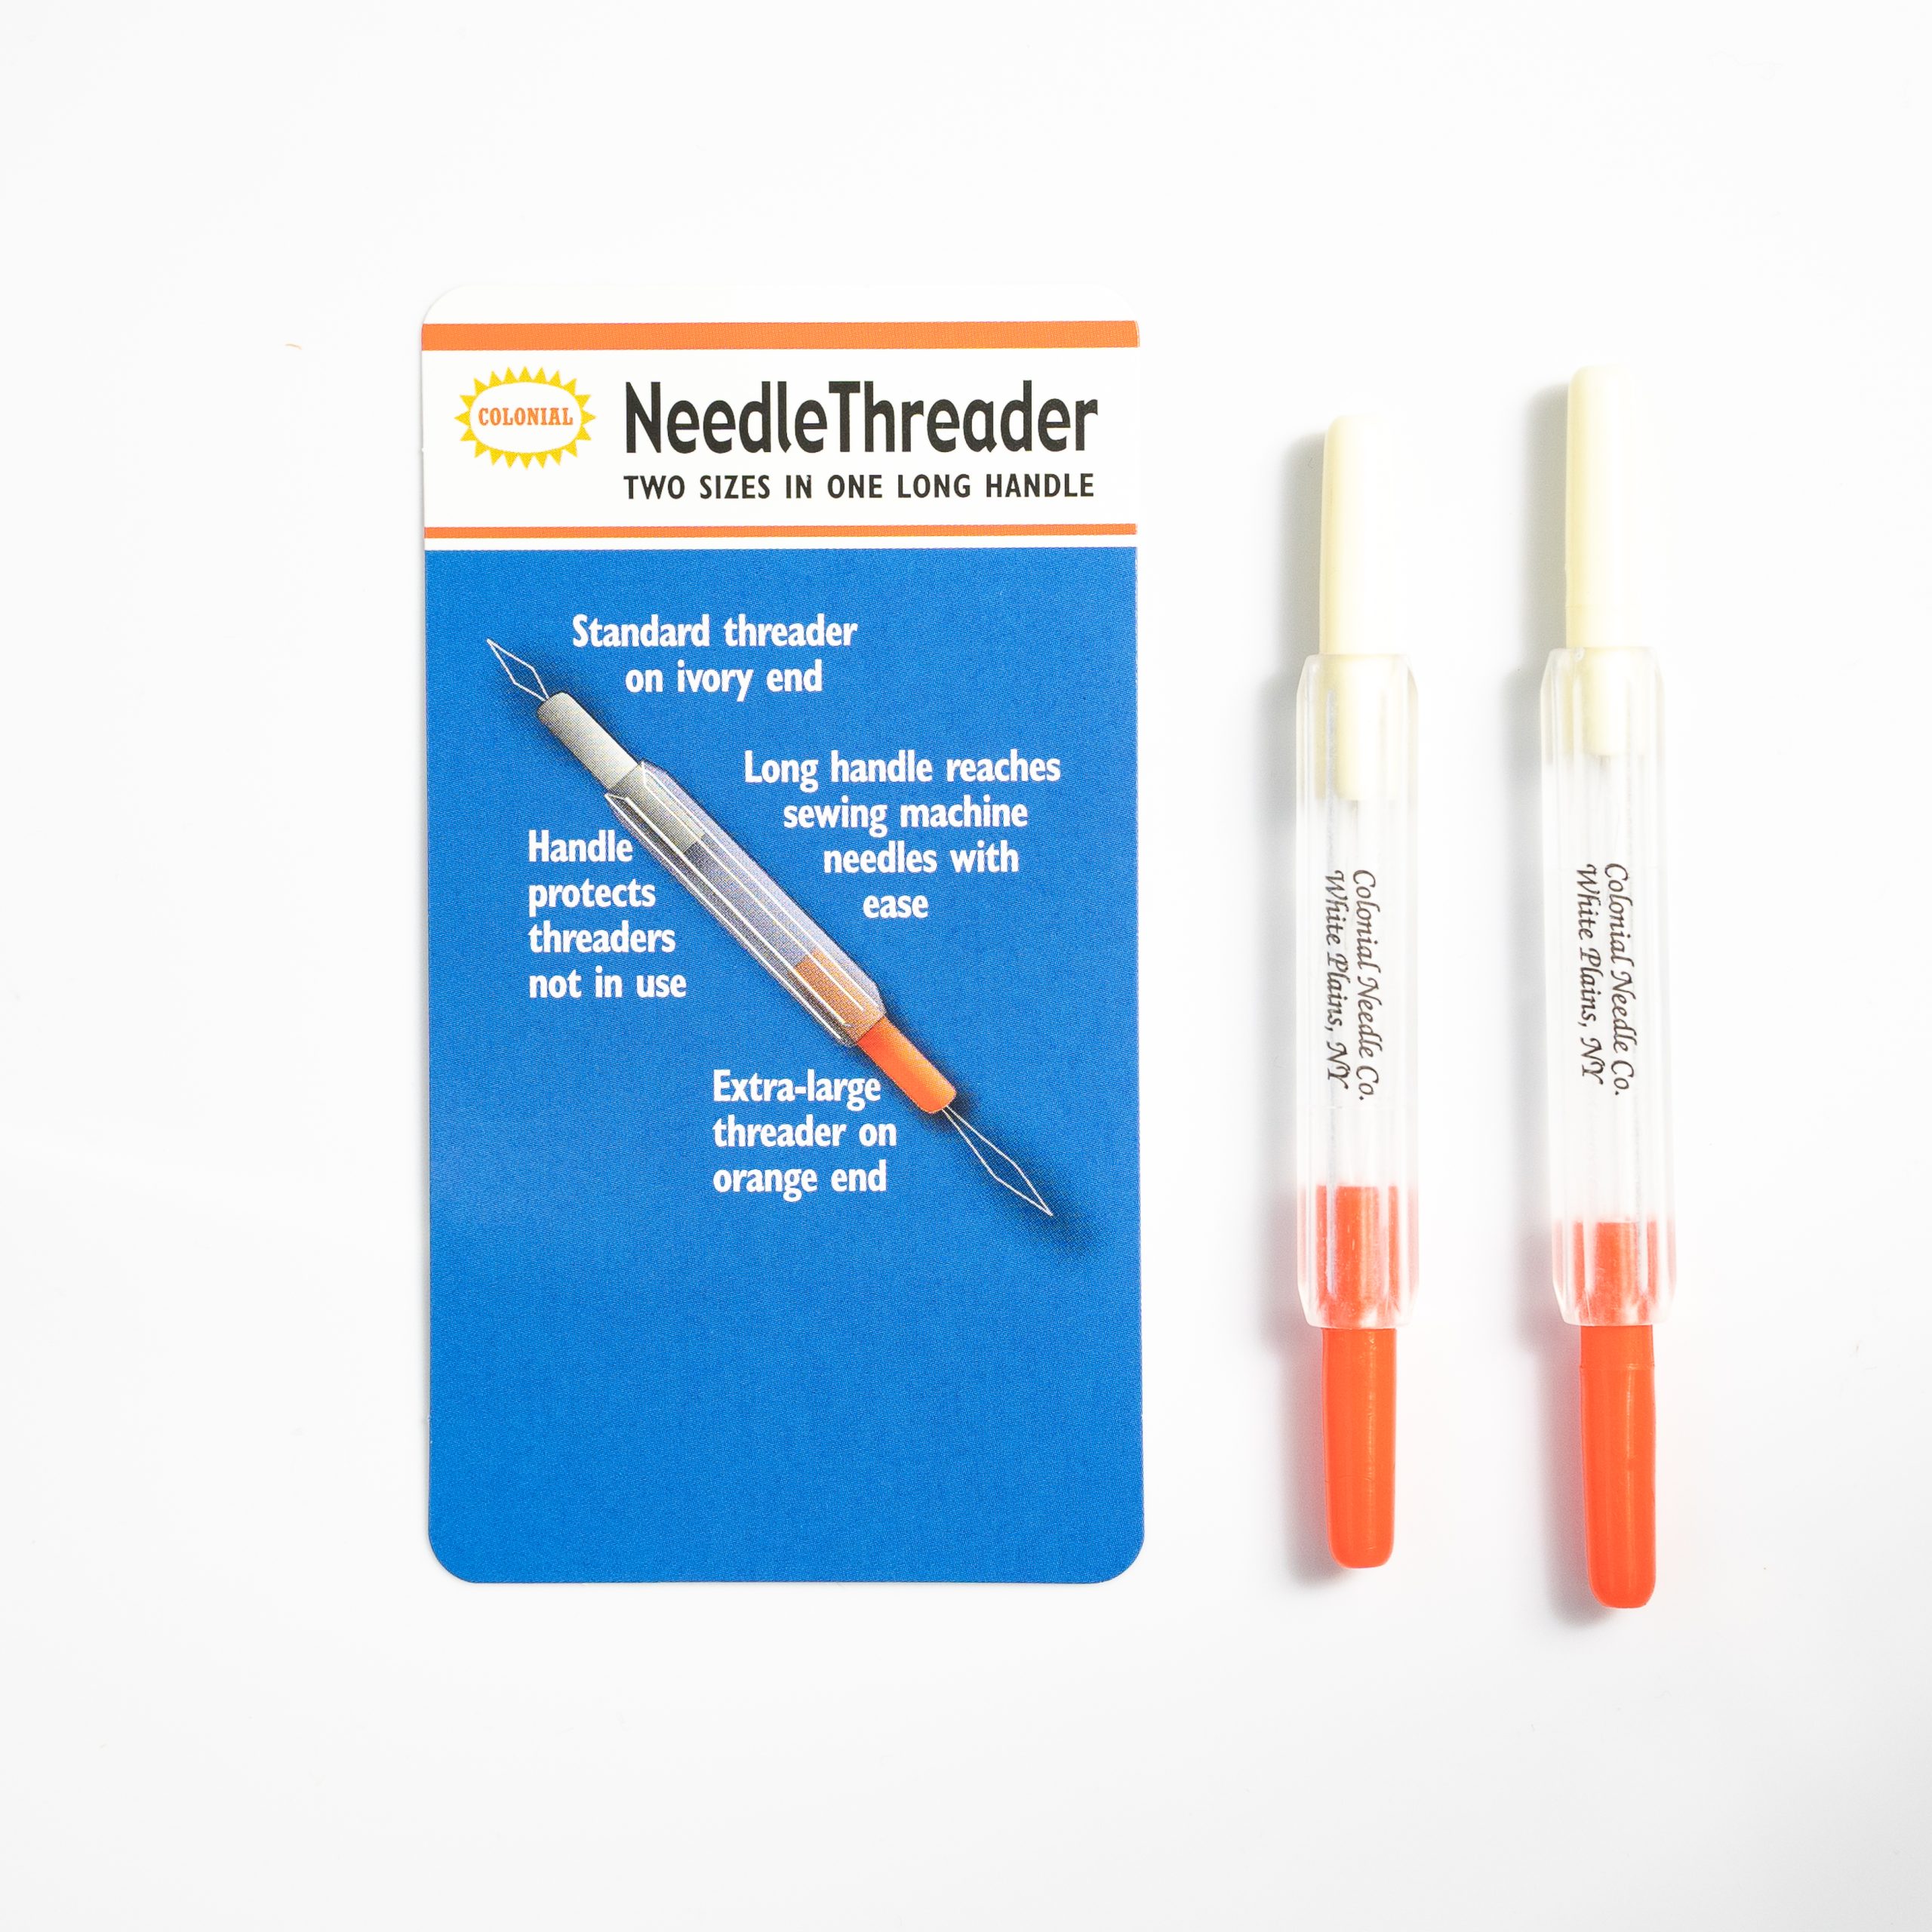
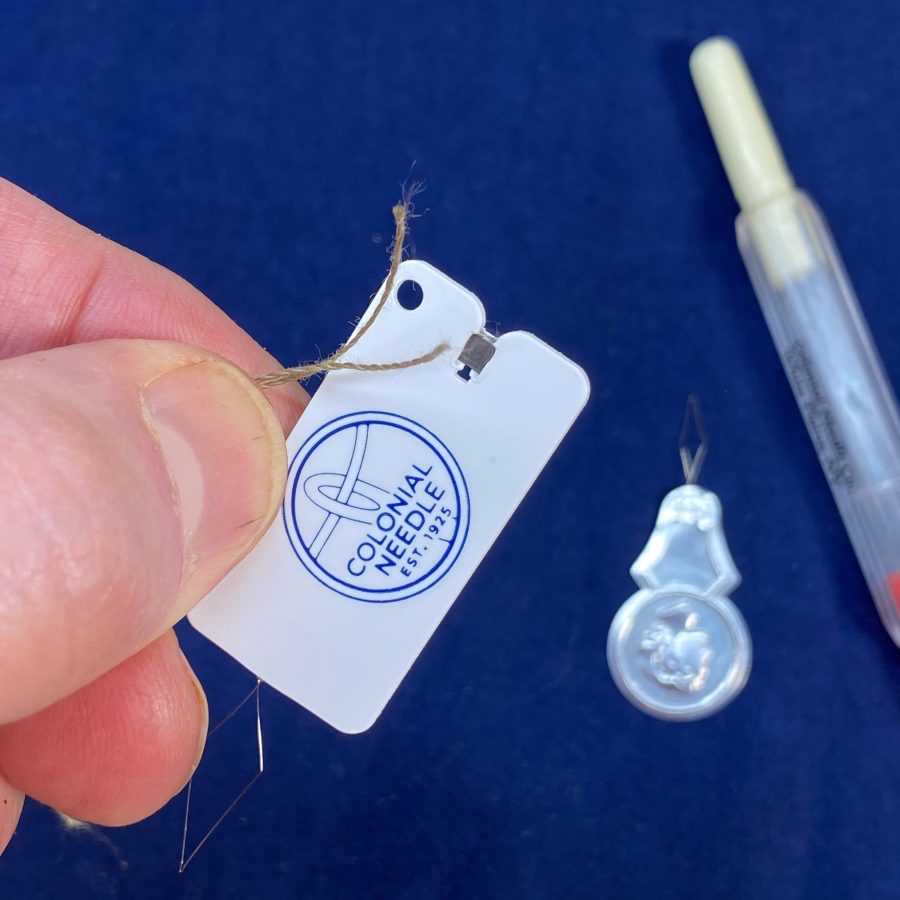
Colonial Dual Threader: This is the one that lives in our sewing machine tray. It features a long handle (perfect for reaching into tight machine spaces) and two different wire sizes: a standard end and an extra-large end for thicker threads or Pearl Cotton
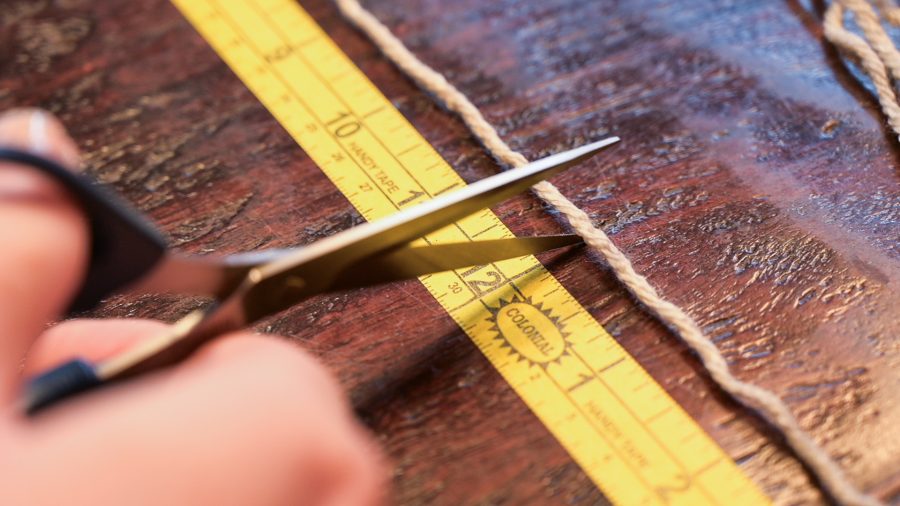
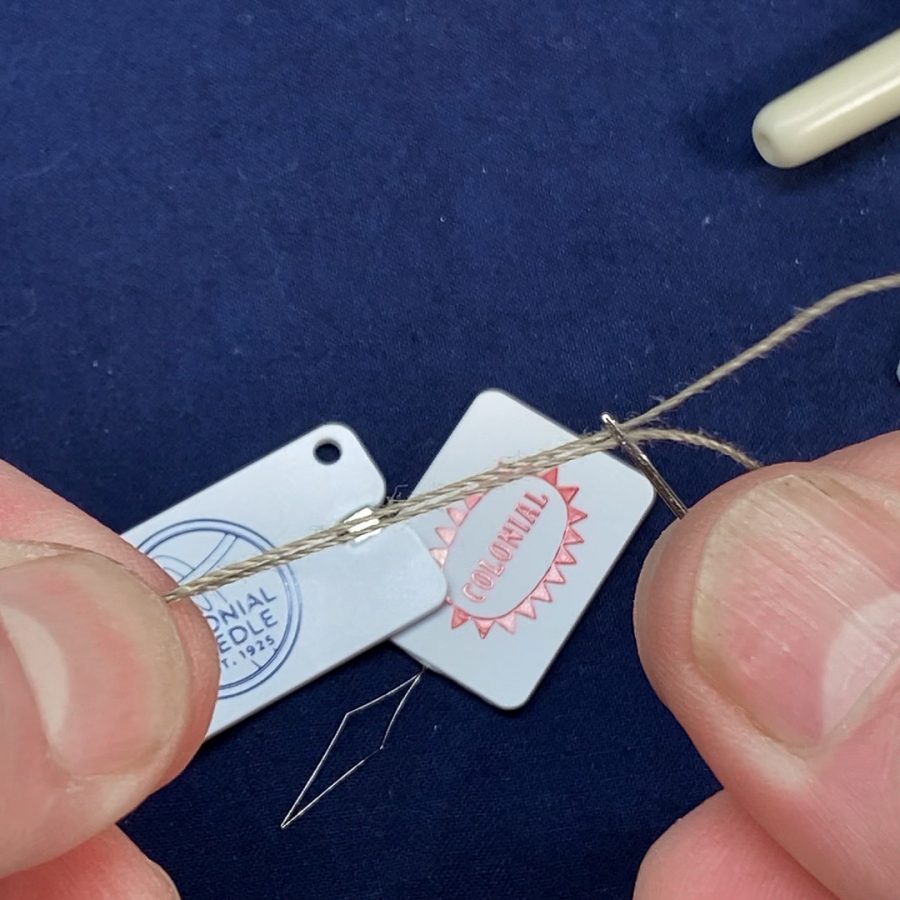
Ultrafine Threader with Cutter: The “must-have” for Sashiko and fine appliqué. The wire is incredibly thin to fit through tiny needle eyes, and the built-in cutter means you don’t have to reach for your scissors every time you finish a strand.
Roxanne Needle Threaders: If you do a lot of hand quilting or beading, these are legendary. They are patented, exceptionally fine, and designed to be sturdy enough for repetitive use without the wire snapping.
John James Threaders: These are the gold standard for traditional hand sewing. They are simple, reliable, and come in various sizes to match your favorite John James needles.
How to Use a Needle Threader (The Correct Way!)
For Hand Sewing:
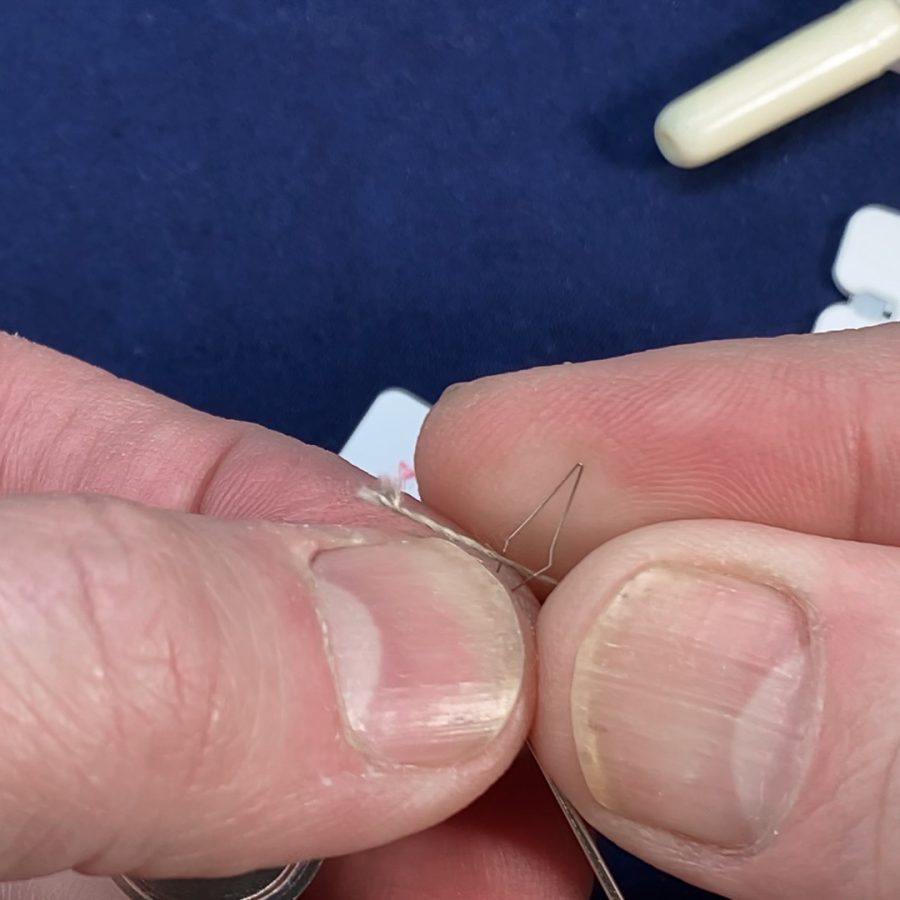
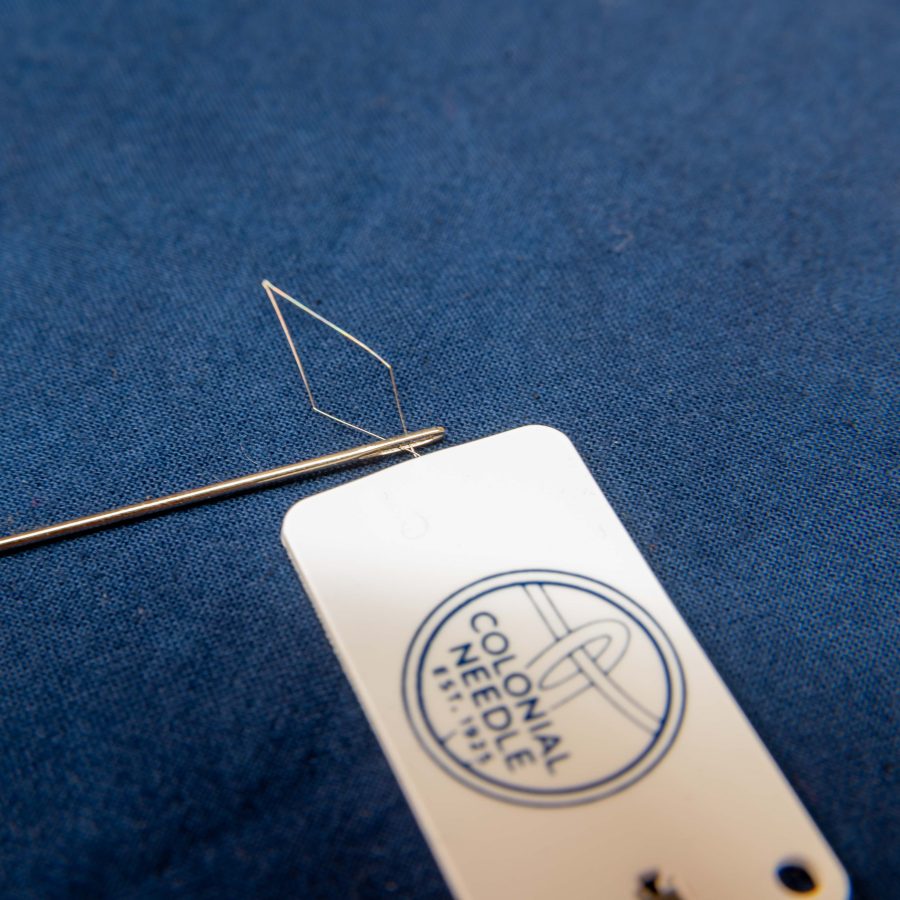
The Insert: Hold the needle threader by the handle and slide the wire loop through the eye of your needle.
The Thread: Pass your thread through the large wire loop (not the tiny needle eye!).
The Pull: Gently pull the wire loop back through the needle eye. The wire will carry the thread right through.
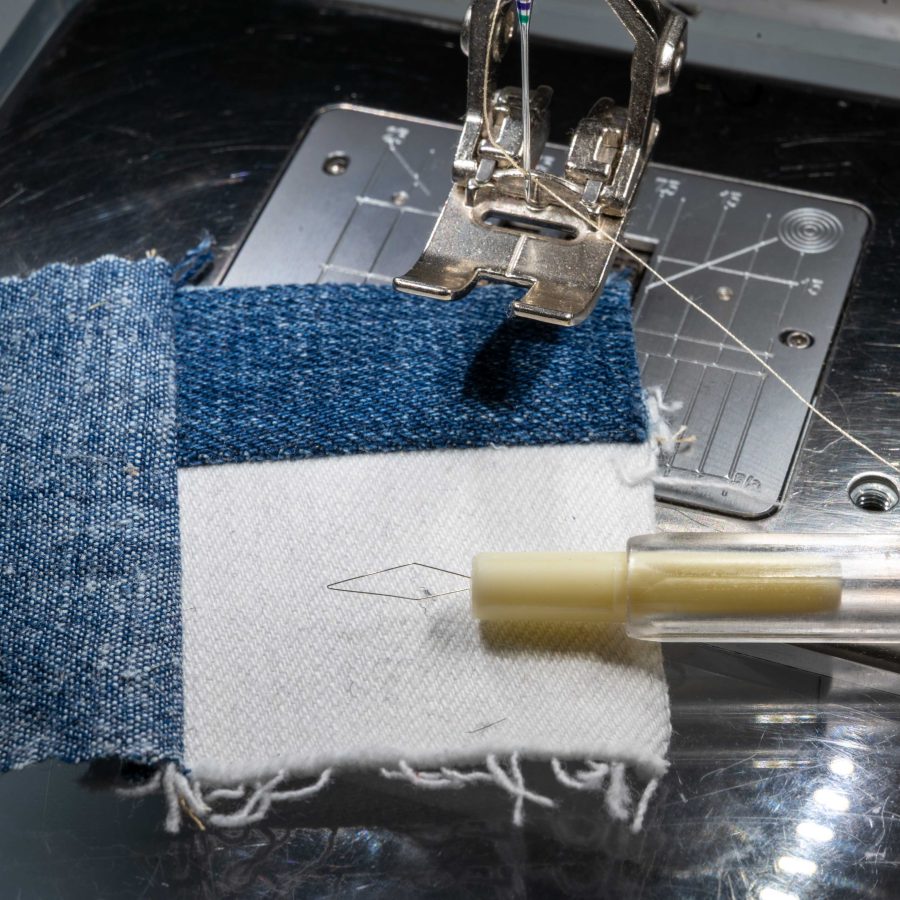
For Machine Sewing:
The Positioning: Ensure your needle is in the highest position.
The Reach: Using the Colonial Dual Threader, insert the wire loop through the needle eye from the back to the front (or side to side, depending on your machine).
The Magic: Place your thread in the loop and pull the threader back through.
Pro Tip: If you’re using the Ultrafine Threader, be gentle! These are high-precision tools. If the wire feels stuck, don’t force it—ensure your thread weight is appropriate for your needle size.
Watch the Step-by-Step
Want to see these in action? We filmed a quick tutorial demonstrating exactly how we use the Ultrafine Threader for Sashiko and the Dual Threader at the machine.
It’s funny how the simplest tools can sometimes be the most intimidating… until someone shows you the trick! Whether you’re a lifelong quilter or just starting your first Sashiko project, there is no shame in reaching for a ‘magic wand’ to save your eyes (and your sanity).
Now we want to hear from you: Is there a tool in your sewing tray that you still aren’t quite sure how to use? Or maybe you have a threading hack of your own? Let’s chat in the comments below!
If you’ve ever watched a professional sewist guide a tiny scrap of fabric toward a needle with terrifying precision, you might have wondered: How are their fingertips still intact?
For a long time, my “secret weapon” was actually a set of long acrylic nails. They were great for tucked pleats and guiding seams, but once I moved away from them, I realized I needed a replacement that was just as precise (and a lot more durable… ever snagged a needle on an acrylic nail? Ugh.).
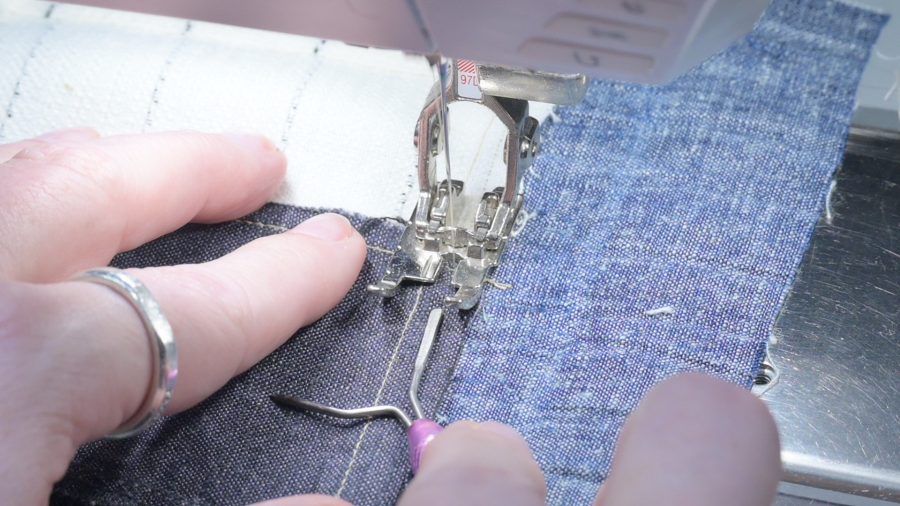
Enter the Sixth Finger Stiletto from Colonial Needle Company. It has officially earned a permanent spot in the tool tray right next to our machines. Here is why this little tool is a total game-changer in our textile studio.
1. Safety Without Sacrificing Precision
The primary job of the Sixth Finger Stiletto is to do exactly what its name suggests: act as an extension of your hand. When you’re feeding fabric into the machine – especially at the very beginning or end of a seam – your fingers can get uncomfortably close to that very sharp, very fast-moving needle. The stiletto gives you ultimate control to nudge, push, and hold fabric flat without putting your actual fingers in harm’s way. Anyone else cringe hard at the memory of a needle-meets-finger moment?
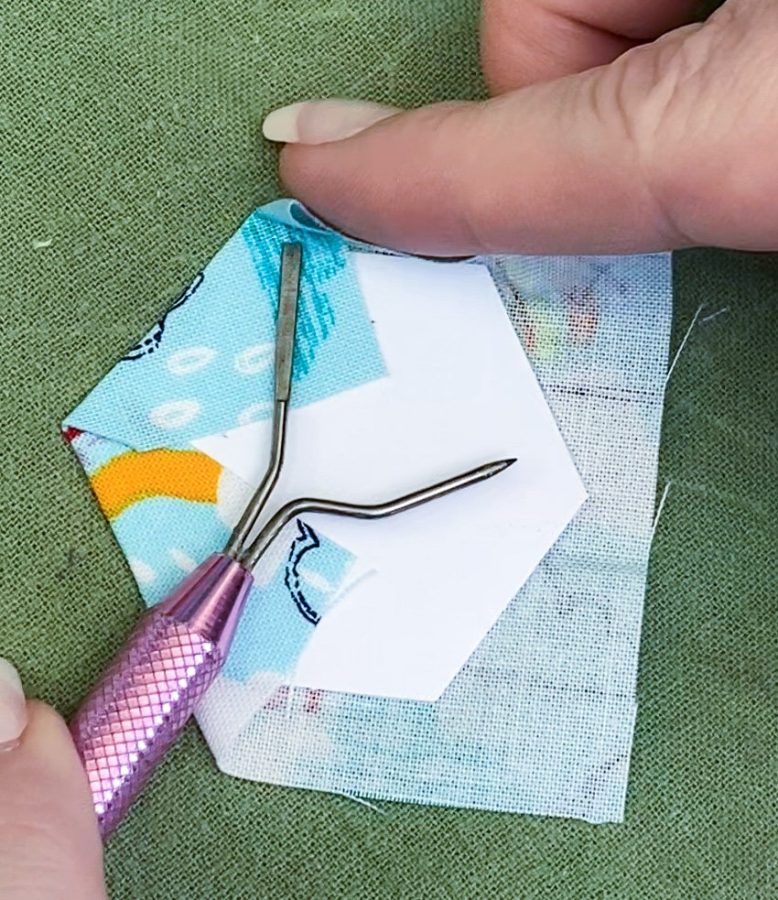
2. The EPP “Glue-Saver” Hack
We discovered a brand-new use for this tool last year that we can’t stop talking about. If you do English Paper Piecing (EPP), you know the struggle of glue-basting:
Glue gets on your fingertips.
Your sticky fingertips then touch the front of your beautiful fabric.
The fabric sticks to you instead of the template.
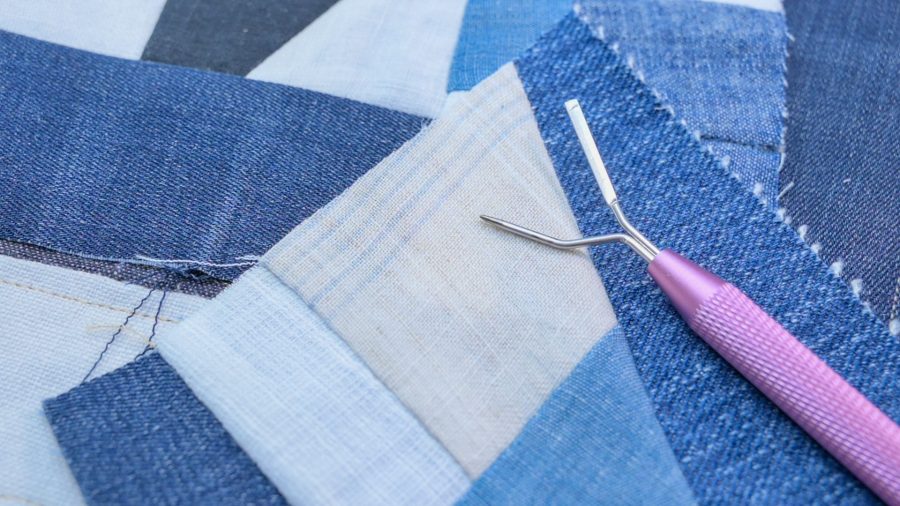
We started using the flat prong of the Sixth Finger Stiletto to fold the fabric over the edges of the EPP templates. It creates a crisp, tight fold and keeps the glue exactly where it belongs – on the paper, not on your hands! A quick swipe with a damp cloth or a small sponge kept on the side and the prong is clean of glue residue and you are on your way again.
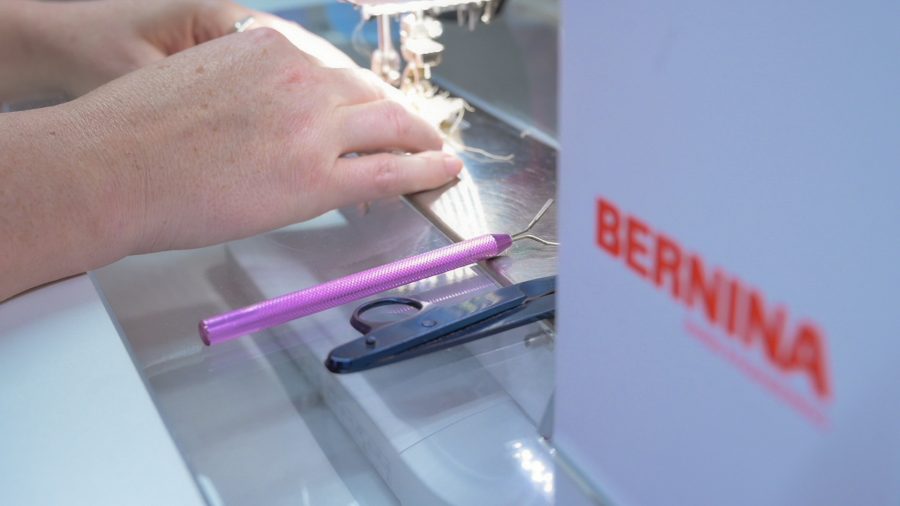
3. It’s Always Within Reach
Some tools end up buried in a drawer, but the Sixth Finger is a “front-row” tool. Whether I’m guiding a bulky seam allowance, holding a ribbon in place, or helping a feed dog grab a slippery silk, it’s sitting right there in the tray. It’s simple, ergonomic, and honestly, I feel a little lost sewing without it now.
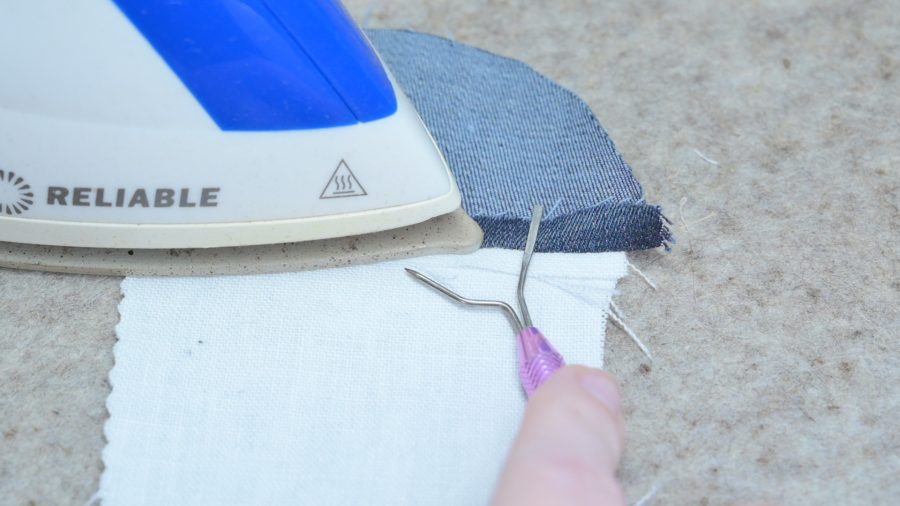
Bonus: Pressing Tool
Unlike some rounded pressing assist tools, we absolutely love using the flat prong of the Sixth Finger Stiletto to open and then “finger press” a seam open. Even with shorter nails, I don’t like dragging them across my fabric to set a pre-crease so this tool is perfect for that. Then, we hold the flat edge across the seams securing them while pressing the seam open. It slides easily along the seams holding it in place ahead of the tip of the iron. Safety and precision all in one!
Pro Tip: Because it’s made by Colonial Needle Company, the quality is top-notch. It’s sturdy enough to handle heavy denim but precise enough for delicate appliqué and slippery gauze and silks.
What’s Next?
Tune in! Make sure you check our YouTube video demonstration where we show you the Sixth Finger Stiletto in action at the machine and give you a close-up look at our EPP folding technique and all the ways we use this versatile tool in our studio.
Do you use a stiletto in your sewing room, or are you still risking your fingertips? Let us know in the comments!
January is the season of fresh starts—and in the sewing room, that often means returning to the basics. Whether you’re mending a favorite garment, repairing household linens, or trying visible mending for the first time, hand sewing is where many stitchers reconnect with the simple satisfaction of needle and thread.
Yet even the simplest stitch can feel frustrating if the tool in your hand isn’t quite right. Choosing the right needle for hand sewing and mending can make stitches smoother, neater, and more enjoyable—and can even extend the life of the fabric you’re repairing.
Let’s take a closer look at how the right needle supports better hand sewing and mending.
The Stitching Scenario
Everyday hand sewing & mending
This category includes:
Closing seams or hems
Repairing small tears or worn spots
Attaching buttons
Darning socks or sweaters
Visible mending on garments or textiles
These projects often involve a mix of fabrics and threads, which means flexibility matters.
The Common Challenges
Many stitchers struggle with:
Thread fraying or knotting while stitching
Difficulty pulling the needle through fabric
Uneven or bulky stitches
Hand fatigue during longer mending sessions
These issues are often blamed on technique—but just as often, the needle itself is the culprit.
Why the Right Needle Matters
A hand sewing needle may look simple, but small differences make a big impact:
Eye size: Too small, and your thread frays or won’t pass through smoothly. Too large, and stitches can look sloppy.
Shaft thickness: A needle that’s too thick can damage fabric fibers; too thin, and it may bend or break.
Point style: The point determines how the needle enters fabric—cleanly or with resistance.
Length: Longer needles are helpful for basting or running stitches, while shorter needles offer more control for fine repairs.
Matching these qualities to your project improves both stitch quality and comfort.
Our Recommendation: Needles for Hand Sewing & Mending
For most general hand sewing and mending, look for:
Sharps (Sizes 7–9) These are the workhorses of hand sewing. They have:
A sharp point for easy fabric penetration
A medium eye suitable for most sewing threads
Enough strength for woven fabrics and light repairs
Sharps are ideal for hems, seam repairs, and general garment mending.
When in doubt, test your needle on a scrap of the fabric you’re repairing. If the needle glides smoothly without resistance—and the thread passes through without fraying—you’ve found a good match. If you hear fabric “popping” or feel drag, try a finer needle.
Special Considerations for Visible Mending
Visible mending is as much about expression as repair, and needle choice supports that creativity.
Use a larger eye when working with thicker threads or embroidery floss
Choose a slightly longer needle for rhythmic, even stitches
Avoid forcing thick threads through tiny eyes—it weakens both thread and fabric
The goal is durability and beauty.
Reader Takeaway: A Simple Needle Checklist
If you’re hand sewing or mending:
✔ Match needle size to fabric weight
✔ Match eye size to thread thickness
✔ Keep a small assortment on hand
✔ Replace needles that feel rough or bent
A fresh needle truly makes a difference.
Looking Ahead
Hand sewing and mending are foundational skills—and mastering them sets you up for more advanced techniques throughout the year. In our next installment of The Right Tool for the Stitch, we’ll explore needle choices for embroidery on linen and other specialty fabrics.
Until then, may your stitches be smooth, your repairs satisfying, and your sewing basket well-stocked.