At first glance, the running stitch may seem like the simplest stitch in hand sewing. It’s often one of the first stitches we learn, used for quick repairs, gathering fabric, or temporary basting.
But around the world, this humble stitch has been transformed into something extraordinary.
From the intricate geometric patterns of Japanese Sashiko to modern visible mending, the running stitch has become both a practical tool and an art form. With just a needle, thread, and a little creativity, you can reinforce worn fabrics, create decorative designs, or simply enjoy the calming rhythm of stitching.
What Is a running Stitch?
The running stitch is created by passing the needle in and out of the fabric at regular intervals, forming a line of evenly spaced stitches.
Its simplicity makes it incredibly versatile. Change the stitch length, spacing, thread weight, or pattern, and the running stitch can shift from functional construction to decorative embroidery.
When & How It’s Used
The running stitch is ideal for:
Visible mending and decorative repairs
Sashiko-inspired stitching
Quilting and big stitch quilting
Gathering fabric
Temporary basting
Decorative borders
Hand quilting
Simple embroidery accents
It is one of the most versatile stitches every maker should know.
Pro Tip: For visible mending or Sashiko-inspired projects, choose a thicker cotton thread in a contrasting color to highlight the stitch pattern.
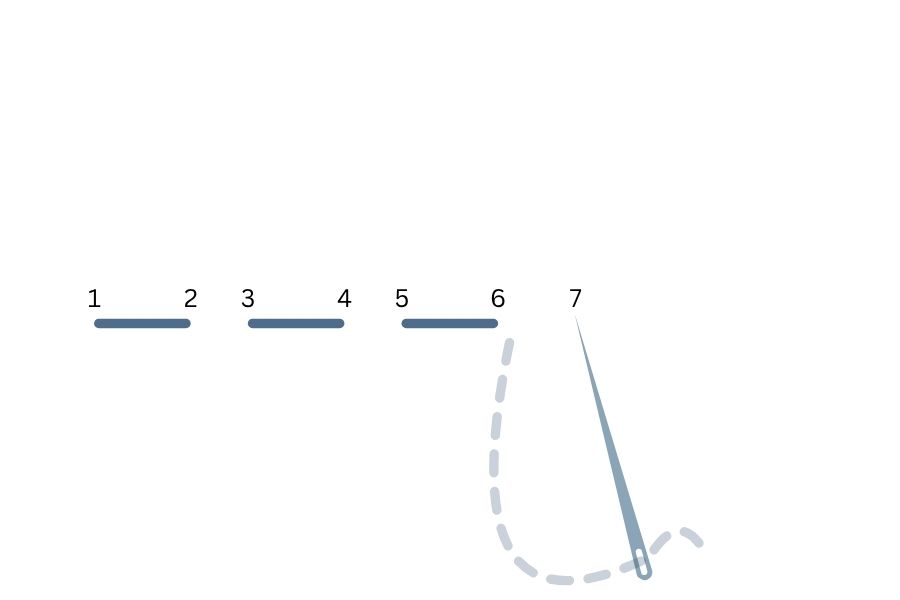
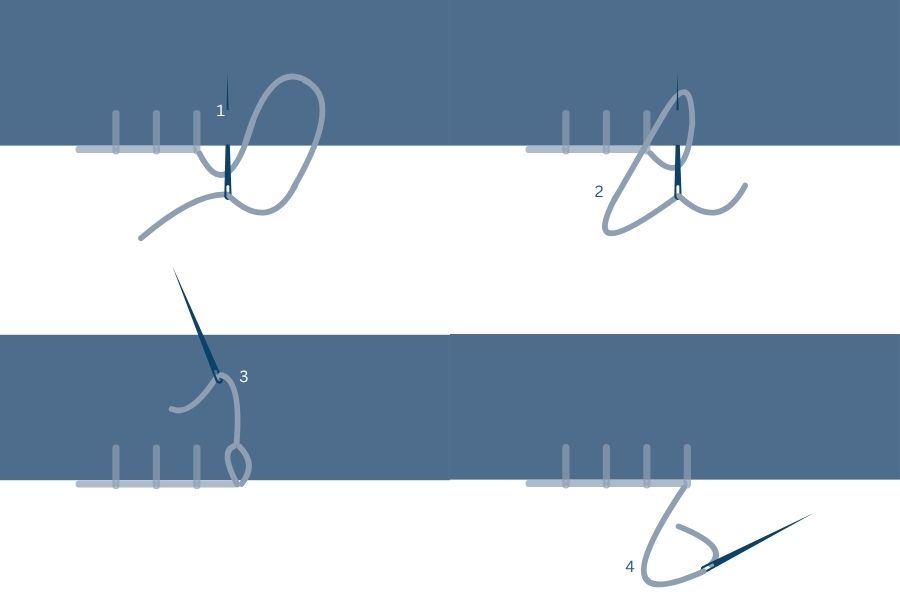
How to Sew a Running Stitch
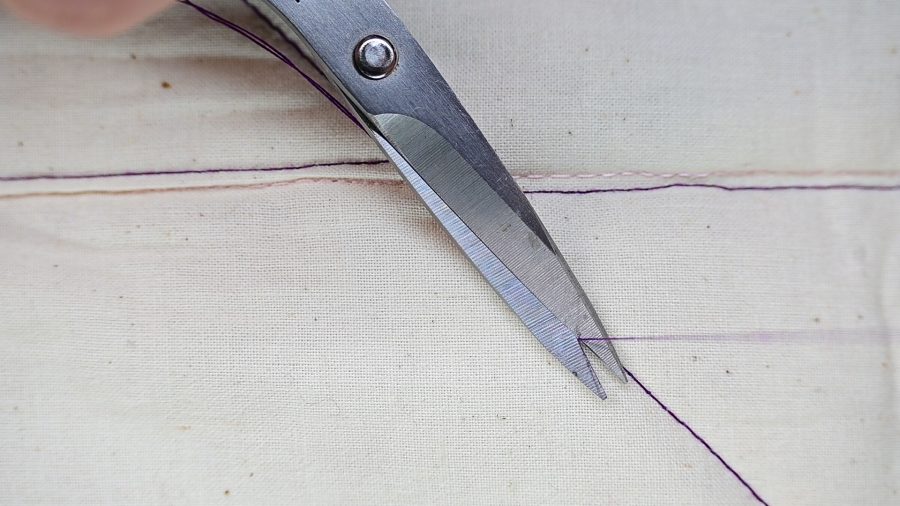
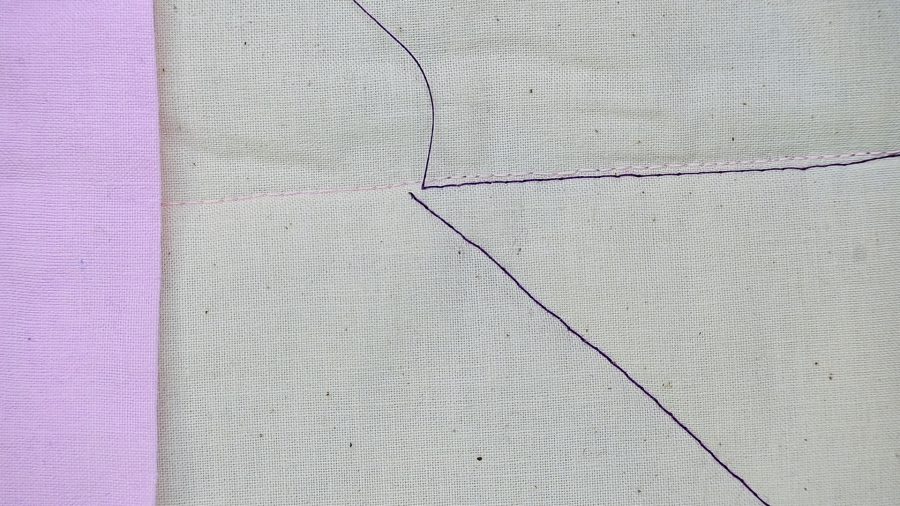
Step 1: Mark Your Stitch Line – Lightly draw a straight line or pattern on your fabric if desired.
Step 2: Bring the Needle Up – Bring the needle up through the fabric at the beginning of your line.
Step 3: Weave the Needle – Pass the needle in and out of the fabric in evenly spaced intervals, loading several stitches onto the needle before pulling it through.
Step 4: Continue the Pattern – Repeat the process, maintaining consistent stitch lengths and spacing.
Step 5: Finish the Thread – Secure the thread on the back of the fabric with a small knot or weave it beneath existing stitches.
Tips for Beautiful Running Stitches
Keep stitch length as even as possible.
Practice loading multiple stitches onto the needle for efficiency.
Use contrasting thread to emphasize decorative patterns.
Experiment with curved lines and geometric designs.
Don’t strive for perfection—the handmade character is part of the charm.
Common Projects Using Running Stitch
The running stitch is perfect for:
Visible clothing repairs
Sashiko-inspired coasters and placemats
Quilted table runners
Decorative tote bags
Hand-quilted projects
Embroidered borders
Slow stitching journals
Whether you’re repairing a favorite pair of jeans or creating a beautiful decorative pattern, the running stitch proves that the simplest techniques often have the greatest impact.
Next Month: We’ll explore the Pad Stitch, a tailoring technique that adds hidden structure and professional finishing to handmade garments.
We almost left a needle permanently inside a quilt. No, it was not as a design choice for some strange mixed media piece. A side-threading easy needle had snagged on the batting inside the quilt layers during the tail-burying process, and no amount of gentle coaxing, creative angling, or colorful language was going to free it. We were this close to declaring it a permanent resident of that quilt and moving on with our lives. In addition, over the course of that one quilt, we broke six needles out of a pack of side-threading needles. It turns out that molding that swirl into the side of a needle results in a thin piece of metal that will, indeed, snap off without too much effort.
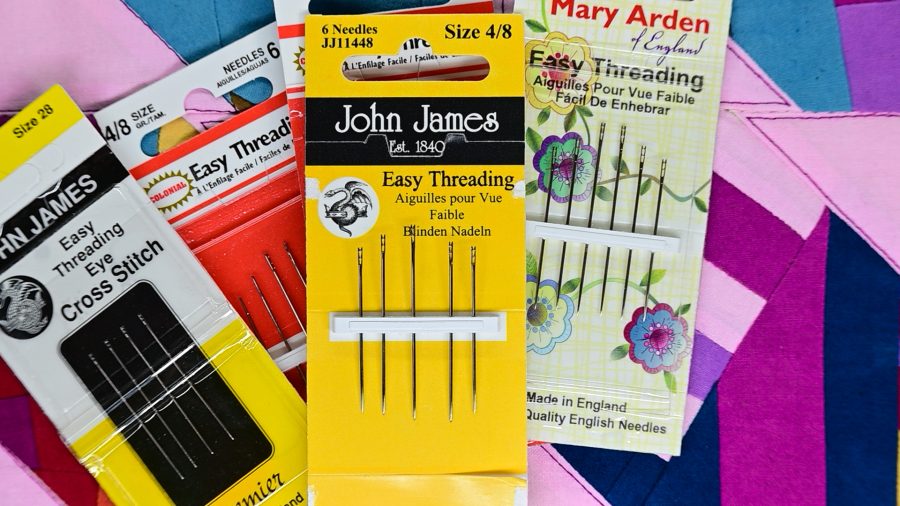
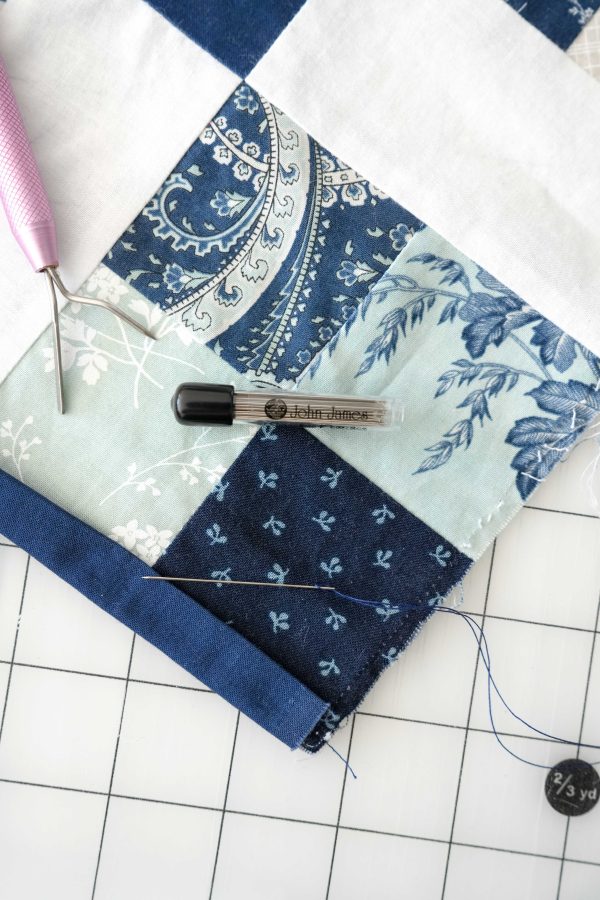
Jason had been researching top-loading easy thread needles in the background—because of course he had—and that was the moment we stopped debating and started acting. We called our local fabric store to make sure they had them in stock, jumped in the car, drove down the hill, and came home with a pack of John James top-loading easy thread needles.
That was during the making of our book Scrappy Wonky Quilt Block Extravaganza. This many years later, they are the only easy thread needles in our studio. We now work with Colonial Needle Company and can speak with absolute authority: these needles are the real deal.
The Problem With Side-Threading Needles
If you’ve tried easy threading needles before and given up on them, we’d bet good money you were using side-loading versions.
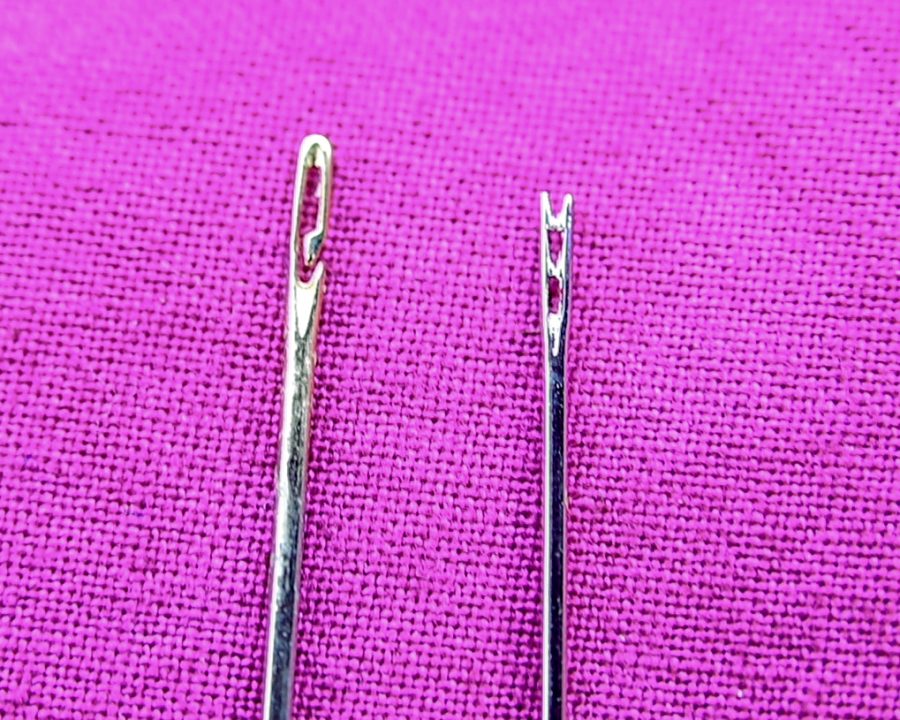
Side-threading needles have a slot on the side of the needle shaft. The thread snaps in from the side rather than being passed through a traditional eye. In theory: brilliant. In practice: the open slot catches on fabric fibers as you pull the needle through, creating snags, pulls, and—if you’re working through quilt layers—a needle that grabs the batting like velcro and refuses to let go. And just forget using the shaft of your needle to tie a knot… We know this from experience. Painful, frustrating, knotted thread, nearly-left-a-needle-in-a-quilt experience.
Why Top-Loading Changes Everything
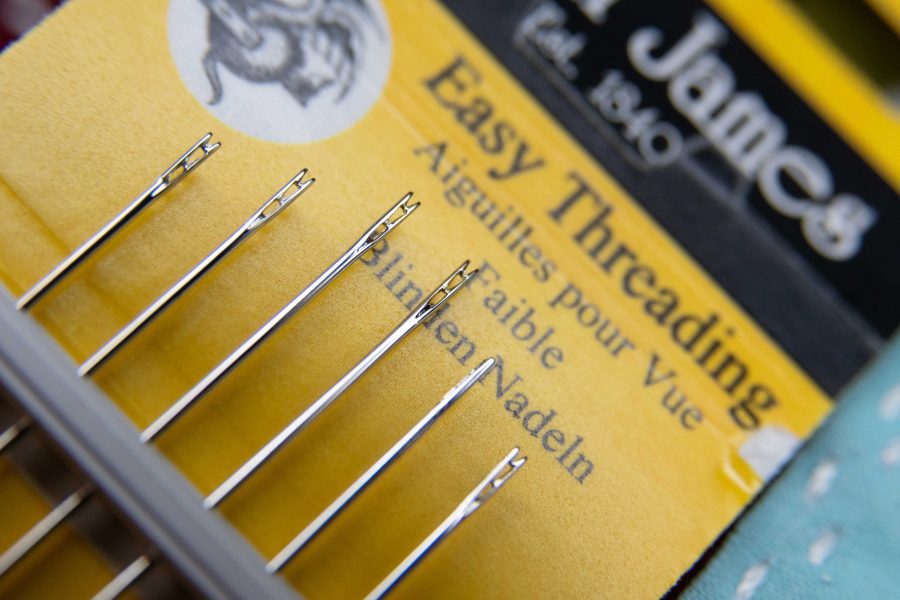
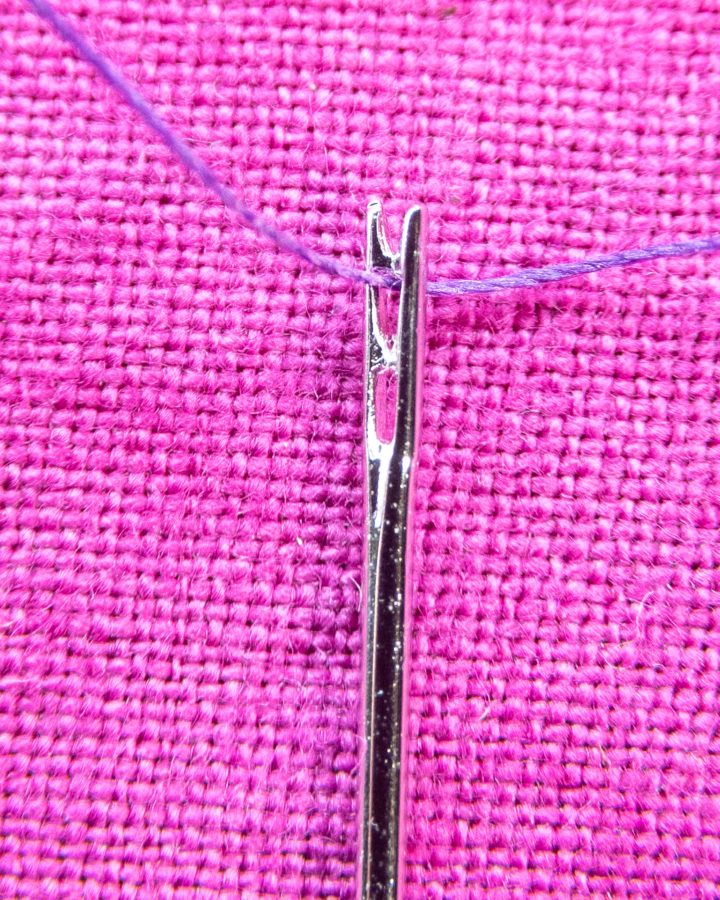
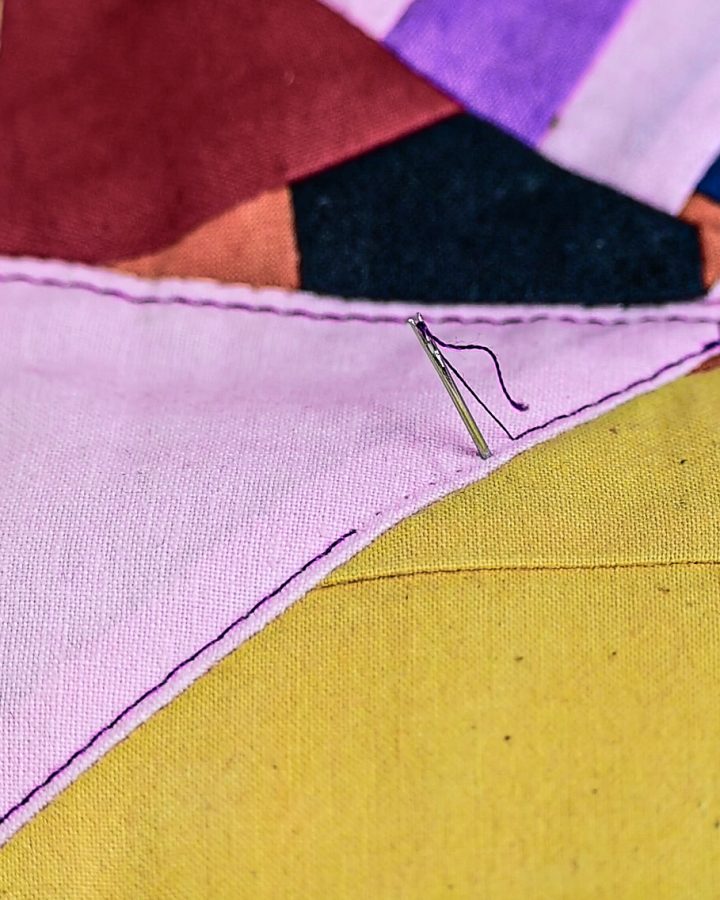
The John James top-loading easy thread needle has a channel at the top of the needle rather than a slot on the side. You press the thread down into the channel from above, and the needle is threaded. No more squinting at a tiny eye. No more licking the thread end and hoping for the best.
But here’s the crucial difference: the channel is enclosed as the needle passes through fabric. There’s nothing exposed to catch on fibers, snag delicate fabric, or grab batting mid-burial. The needle moves through your layers cleanly, exactly the way it should.
The Real Hero Feature: Burying Thread Tails
Let’s talk about what these needles were actually born to do, because this is where they earn their place as the only easy thread needle in our studio.
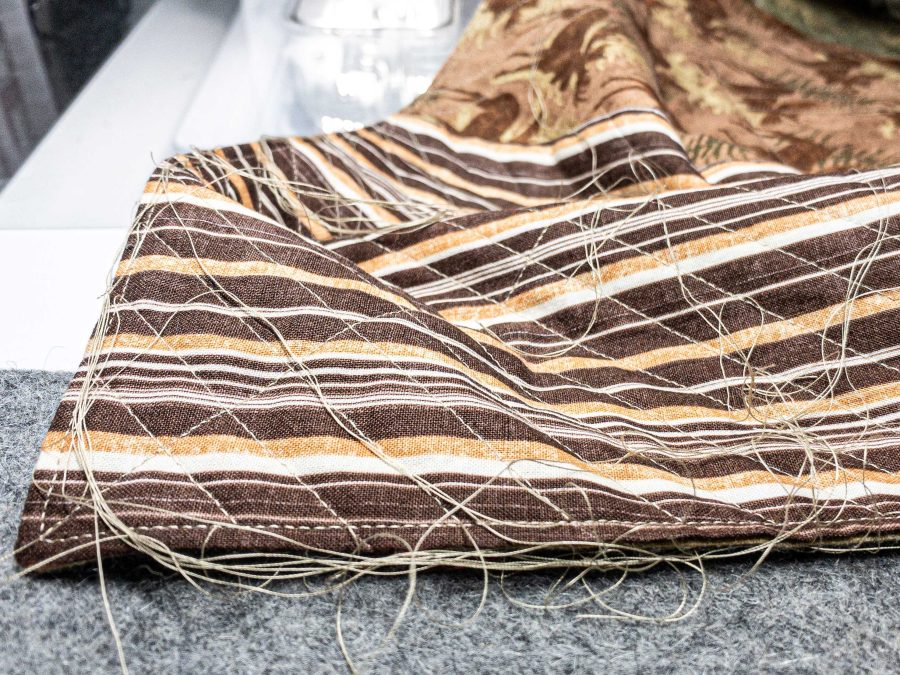
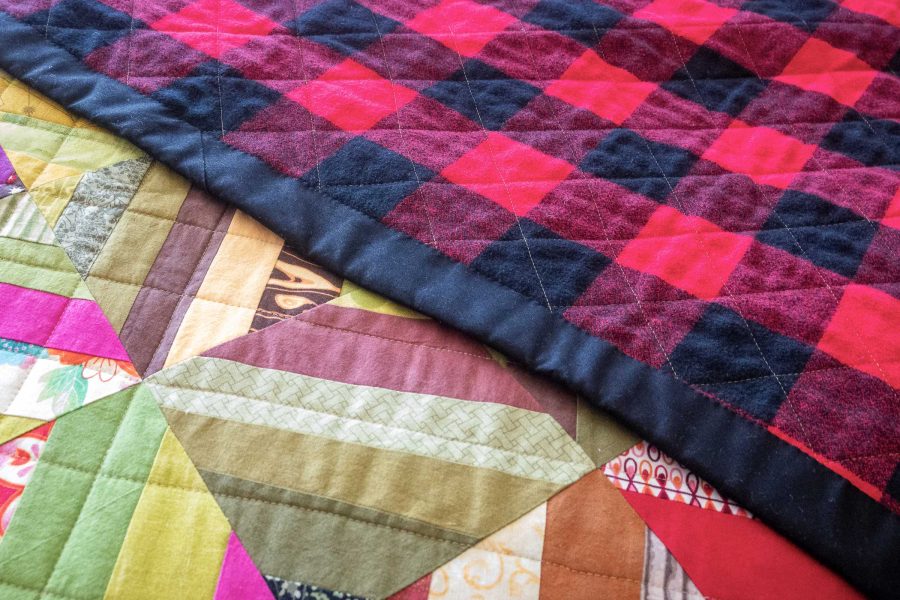
Finishing a quilt means burying thread tails. All of them. Every single starting and stopping point from every line of quilting stitching gets a tail, and every one of those tails needs to be buried between the quilt layers so it disappears completely into the finished piece.
On a complex quilt? We’re easily talking hundreds of tails; possibly more.
Threading each of those tails through a traditional needle is maddening. It’s the part of finishing a quilt that can genuinely dampen your enthusiasm for a project you’ve spent months loving. Your eyes are tired. The threads are short. The needle is small. And you have approximately four hundred more to go.
Top-loading easy thread needles make this process not just bearable—they make it actually enjoyable. Pop the tail into the channel, bury it between the layers, pull it through, trim.
Pop, bury, pull, trim. You develop a rhythm. The stack of buried tails grows. The project gets closer to finished.
How to Bury a Thread Tail With an Easy Thread Needle
Here’s the basic process. For the full step-by-step tutorial, watch the YouTube video linked below.
What you need:
John James top-loading easy thread needle
Your quilt with thread tails to bury
Small scissors
The process:
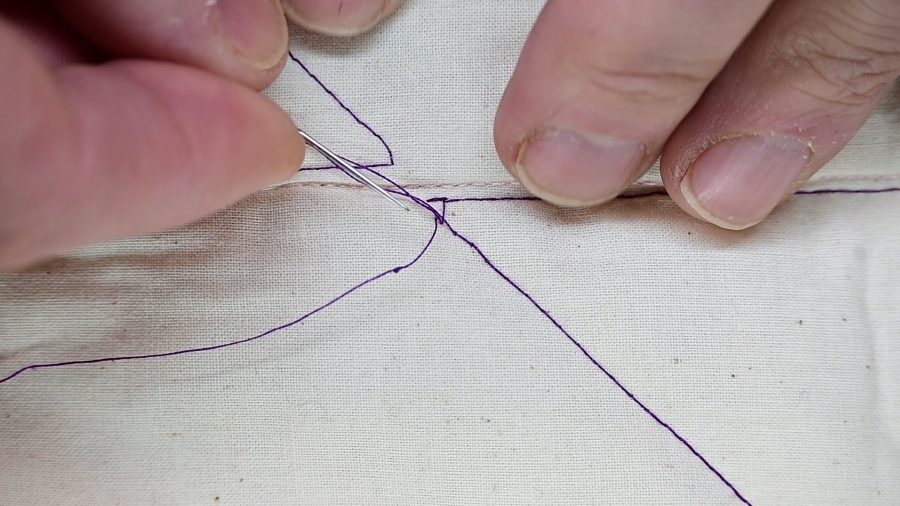
Guide the thread tail into the top-loading channel to thread the needle
Bring the top thread to the back of the quilt.
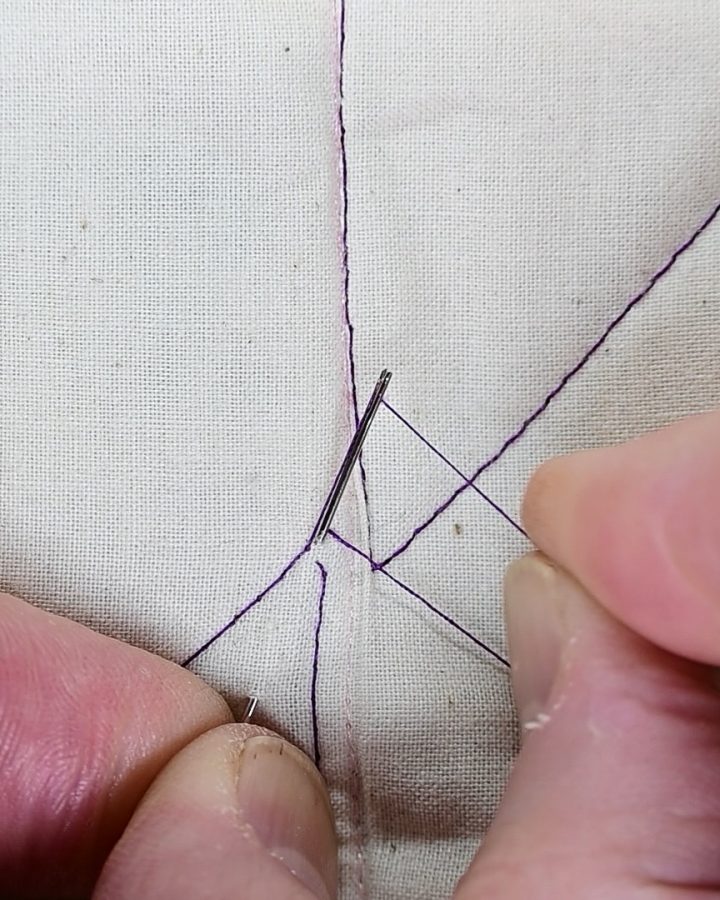
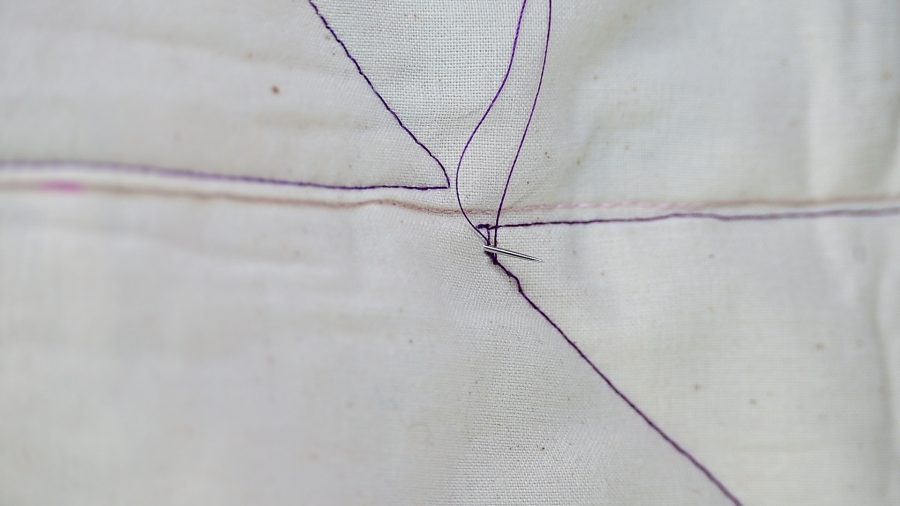
Make the knot of your choice about ¼” from the base then insert the needle tip into the quilt layers at the point where the tail exits the fabric
Run the needle between the fabric layers and back out again about an inch or two away from there you inserted it.
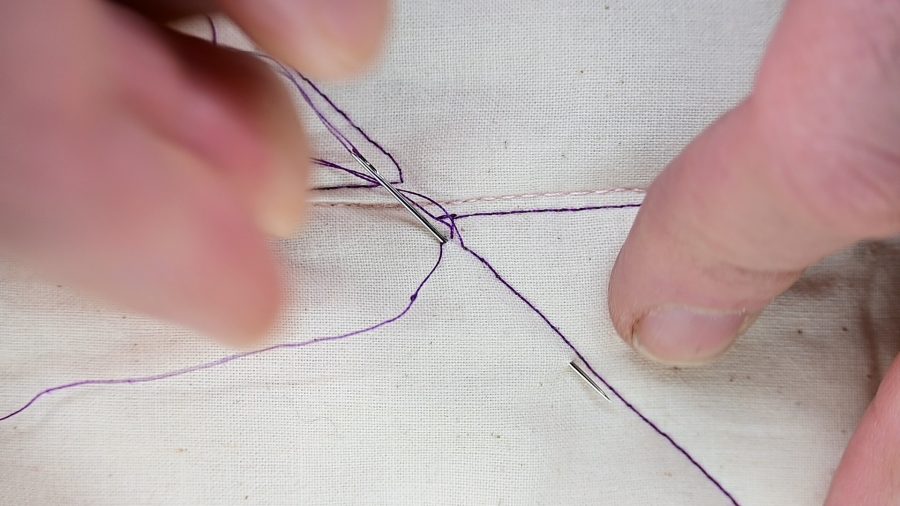
Gently pull the needle and thread tail through being sure to pull the knot to the inside of the layers.
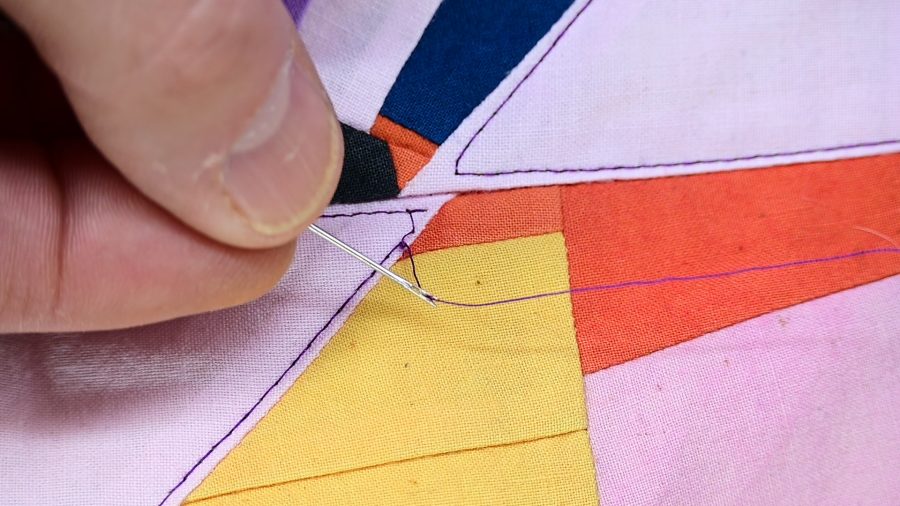
Pull the needle and thread a little more and trim the tail close to the fabric surface.
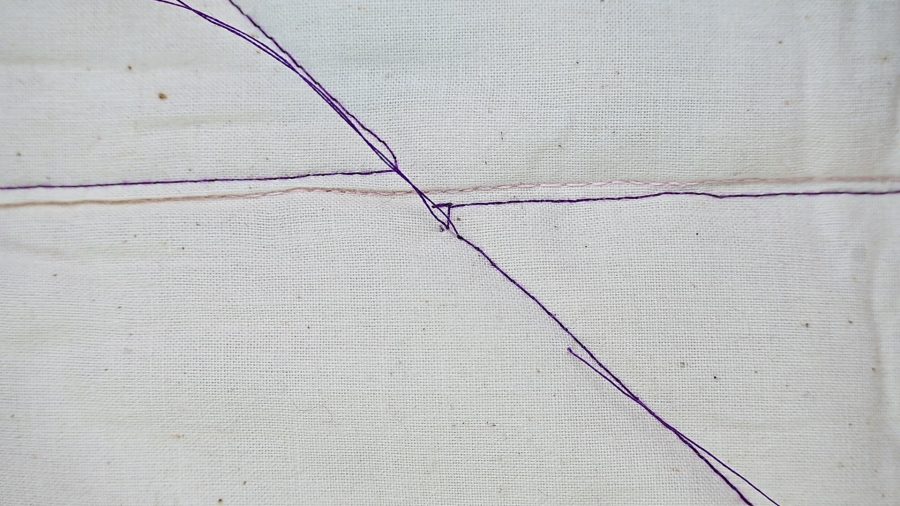
Smooth the fabric and the tail disappears into the layers
The thread tail vanishes. No knot on the back. No visible evidence it was ever there. Just a clean, professional finish.
The “Also Starring” Features
Winning at Thread Chicken
Thread chicken: the act of absolutely believing—with your whole heart—that you can squeeze just a few more stitches out of that rapidly shortening thread length if you simply believe hard enough.
Wishcraft is wonderful. Tinker Bell told us so. But clapping your hands and believing is not going to make that thread reach the end of the line.
When thread chicken claims another victim and you end up with a tail so short it’s practically a suggestion, the top-loading channel is your secret weapon. Easy thread needles need just enough tail to catch in the top-loading channel, bury, and disappear.
The Broken Thread Mid-Quilt
We have all experienced the heartbreak of a mid-line thread break. Whether the thread tension was off and the break happens in the middle of quilting or the quilting thread on a well-loved quilt gives way and snaps, sometimes it just happens. Mid-project, mid-layer, mid-everything, and suddenly you have a short tail that needs to be dealt with. Normally, we would have to take out enough stitches to have a thread tail that could be pulled through the eye of a regular needle. But, with easy thread needles, all we need to do is take out enough stitches to catch in the top-thread channel. To use the least amount of thread possible, partially insert the needle into the fabric first to shorten the distance from the quilt surface to the thread, guide the short tail into the channel, and pull it through to bury it. Repeat on the other side of the break and then you can machine or hand stitch the gap in the line of stitching so it looks like nothing ever happened. Problem solved without drama.
Threading in Low Light (Or When Your Bifocals Aren’t Cooperating)
We’re just going to say it: threading a traditional needle when your eyes are tired, the light is low, or your bifocals just aren’t focal-ing as well as they used to is an exercise in frustration that nobody needs.
Top-loading easy thread needles require zero precision threading. Guide the thread into the channel until you feel that “pop” that tells you the thread is secured. Done. Your eyes will thank you.
The Bottom Line
We went from nearly leaving a needle permanently inside a quilt to genuinely enjoying the tail-burying process. That’s not a small thing. Finishing a quilt should feel like a celebration, not a chore.
John James top-loading easy thread needles are the only easy thread needles in our studio now. They thread fast, move cleanly through fabric and batting, and make the most tedious part of quilt finishing actually satisfying.
Bonus: Our easy thread needles origin story revolved around quilting but Colonial Needle Company has easy thread needles in a variety of sizes from cross-stitch to sharps. From cross-stitch to fine detail embroidery, hand sewing to quilting, we’ve been able to find an easy thread needle that does the job beautifully.
If you’ve given up on easy thread needles before, we understand. Try the top-loading version. It’s different. It’s better. And it won’t get stuck in your batting and you can keep stitching for longer even when your bifocals aren’t cooperating.
Summer is the perfect season to take your stitching beyond the sewing room. Whether you’re relaxing on the porch, traveling to a retreat, waiting at the airport, or enjoying a quiet afternoon by the lake, portable projects make it easy to fit creativity into life’s little moments.
But stitching away from home comes with its own challenges. Limited space, changing lighting, and carrying only the essentials mean that every tool in your project bag needs to earn its place.
The good news? A thoughtfully packed stitching kit—and the right needles—can help you stitch comfortably wherever your summer takes you.
The Stitching Scenario
Portable hand stitching
Portable projects often include:
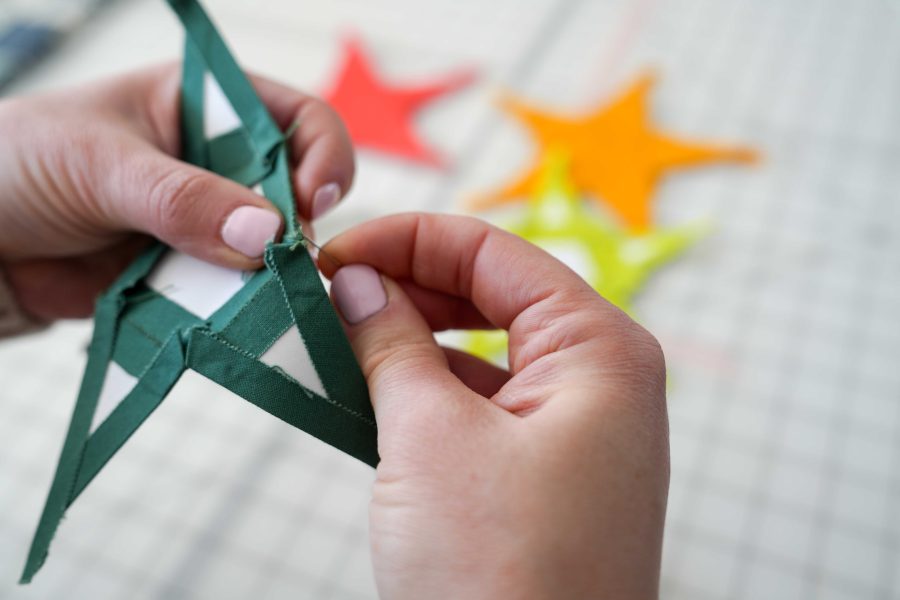
English Paper Piecing (EPP)
Cross stitch
Needlepoint
Embroidery
Wool appliqué
Hand quilting
Slow stitching
Small mending projects
These projects are ideal for travel because they’re compact, relaxing, and easy to pick up whenever you have a few spare minutes.
The Common Challenges
When stitching on the go, you may encounter:
Forgetting the needle you need
Carrying too many supplies
Lost or damaged needles
Poor lighting
Limited workspace
Thread tangles inside your project bag
A little planning can make stitching away from home just as enjoyable as stitching in your favorite chair.
Why the Right Tool Matters
When you’re packing light, versatility becomes just as important as performance.
Instead of carrying every needle you own, consider choosing a small assortment that covers the projects you’ll actually be working on.
Think about:
Needle Type
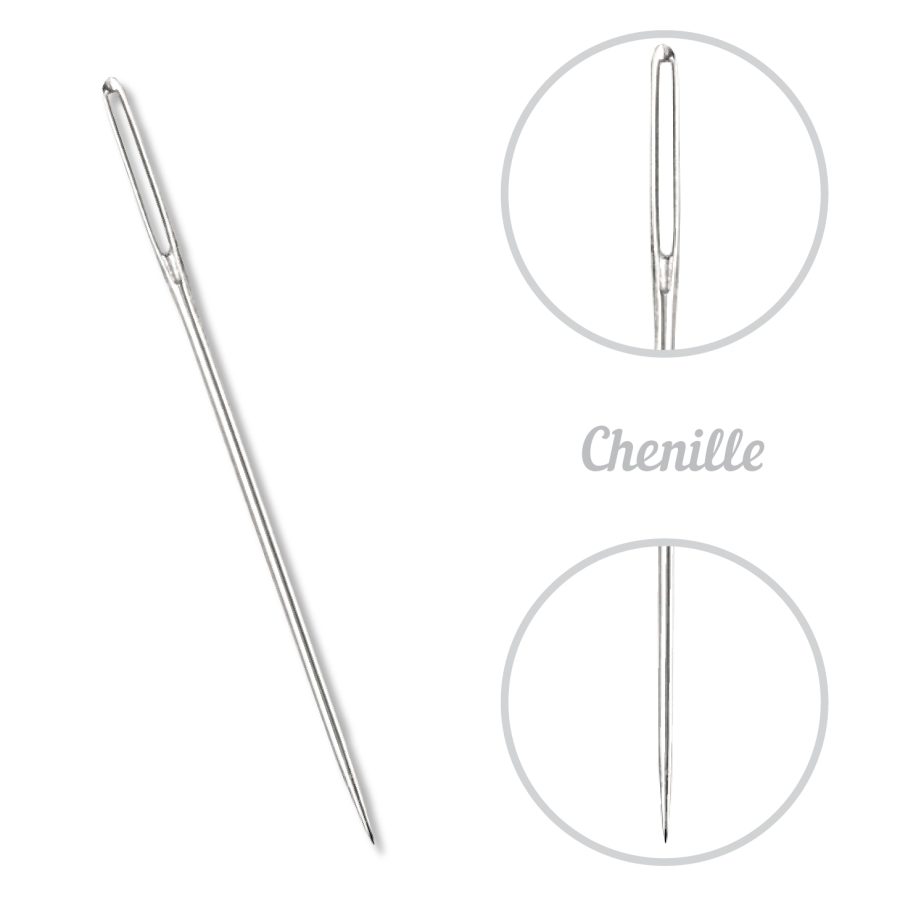
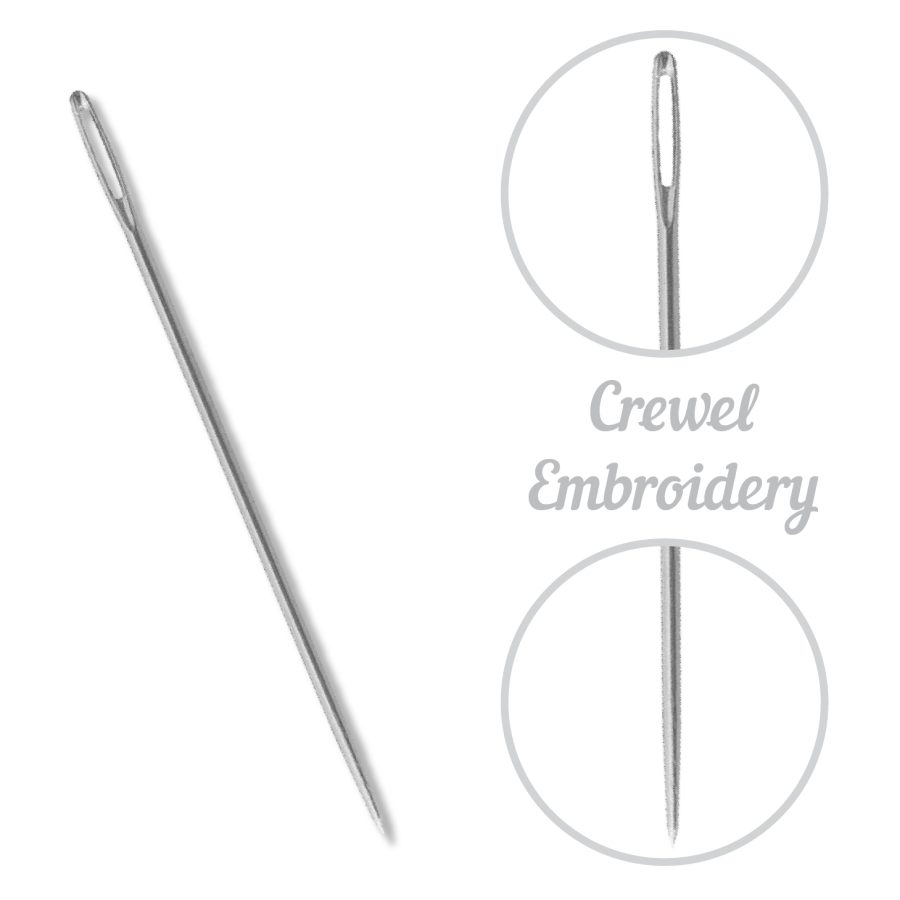
Will your project call for a tapestry, chenille, embroidery (crewel), or sharps needle?
Needle Size
Packing a few sizes gives you flexibility if you switch projects or thread weights.
Storage
Keeping needles organized protects both your supplies and your fingers.
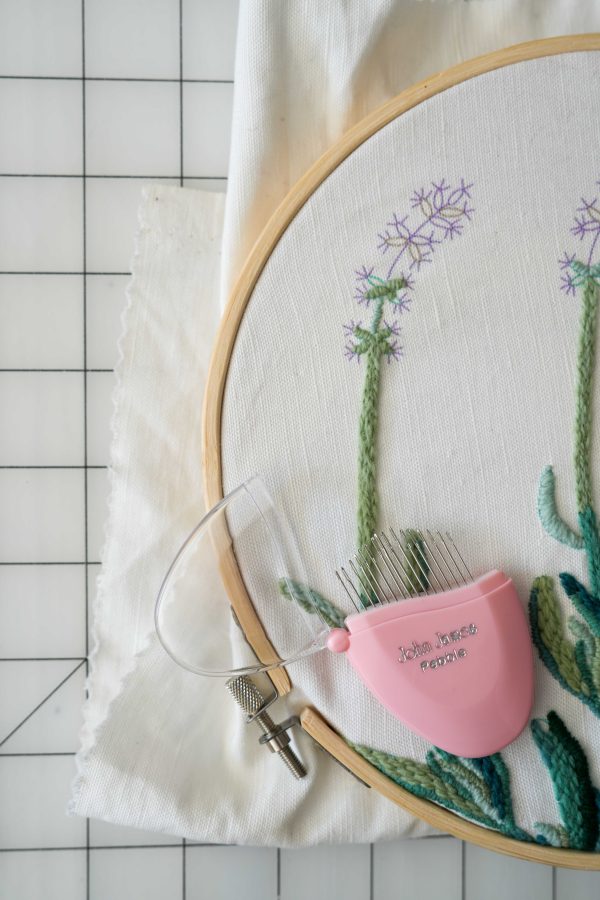
A compact needle case makes it easy to find exactly what you need—without digging through your project bag.
Our Recommendation: Building a Travel Needle Kit
Rather than packing dozens of needles, consider carrying a small assortment that handles most portable projects.
Having a small variety means you’re ready for nearly any stitching opportunity that comes your way.
Pro Tip: Pack for the Project You Might Stitch
Many stitchers pack for the project they’re working on today—but vacations and retreats often inspire us to start something new.
Including one or two extra needle types takes very little space and gives you the flexibility to switch techniques if inspiration strikes.
Special Considerations for Travel
Whether you’re flying across the country or spending the afternoon at your local park, organization makes all the difference.
A few travel-friendly habits:
✔ Store needles securely in a compact case ✔ Bring pre-cut thread lengths ✔ Include a needle threader if needed ✔ Keep a small magnetic holder nearby to prevent lost needles
The less time spent searching for supplies, the more time you can spend stitching.
Reader Takeaway
For your next portable stitching project:
✔ Pack only the needles you’ll realistically use ✔ Include a variety of needle types ✔ Keep them organized in a protective case ✔ Plan for flexibility—not perfection
Sometimes the best stitching happens in the unexpected moments.
Looking Ahead
Next month in The Right Tool for the Stitch, we’ll explore the long, elegant needles designed specifically for Sashiko and Japanese running stitch—and why they create such beautiful rhythm.
Until then, safe travels, happy stitching, and don’t forget to tag us when you pack supplies for your favorite project!
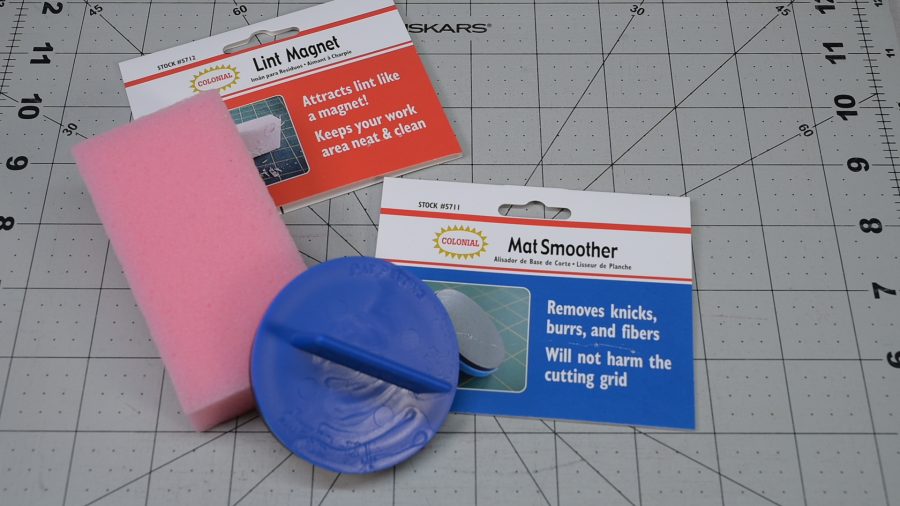
Hey there folx! Shannon & Jason here and this month we’re going to be completely honest with you here for a moment: When the folx at CNC told us to try these out, we thought both of these tools were gimmicks. A little scrubbing tool to “restore” cutting mats? And a reusable sponge to replace our lint roller? Yeah, sure okay. When a mat gets grooved and scarred from years of rotary cutting, utility knives, and general studio chaos, you flip it, rotate it, and eventually replace it. When fabric gets covered in thread lint, you grab whatever sticky roller is closest. That’s just how it works. Right?
Turns out, we were spectacularly wrong about both of them.
The Problem We Didn’t Know We Could Fix
Our big industrial cutting mat – the beast we bought from years ago for the main worktable – had seen some things. We use that surface for everything: fabric cutting, yes, but also scoring paper, trimming mat board for textile art pieces, cutting reclaimed plastic for our Unconventional Boro work, you name it.
The center section, the high-traffic zone where 90% of our cutting happens, had developed serious grooves. Not just surface scratches but deep channels filled with fabric fibers that made our rotary cutters skip mid-cut. You know that feeling when your blade skips a few threads or slips forward because it hit a scar in the mat? Yeah. That was happening multiple times per project. Truly maddening.
We’d already flipped and rotated the mat once and that was a task and a half that we did not look forward to repeating. The next step was replacement, which for an industrial-sized mat is not a small expense.
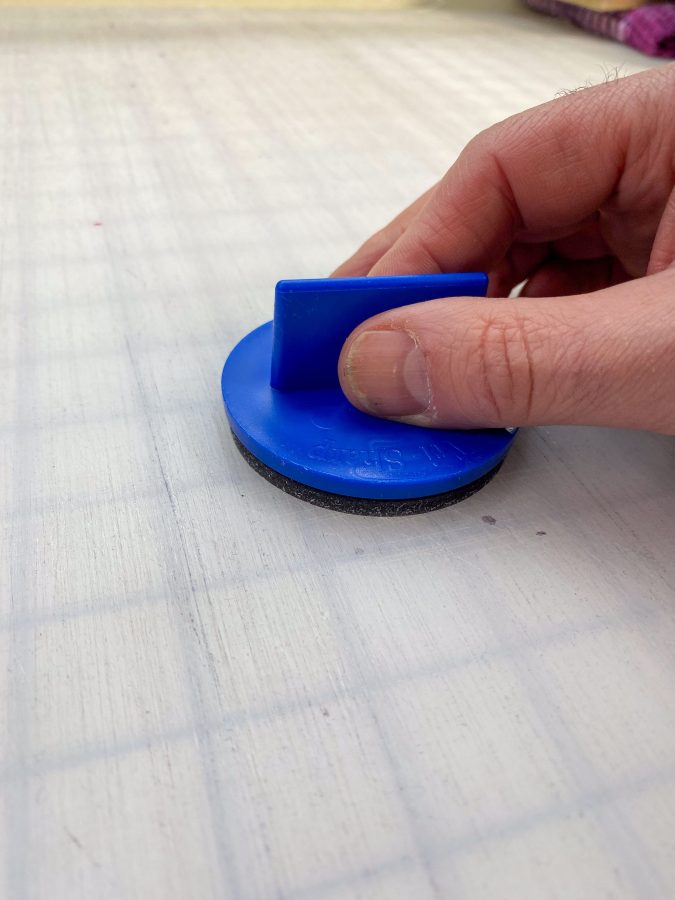
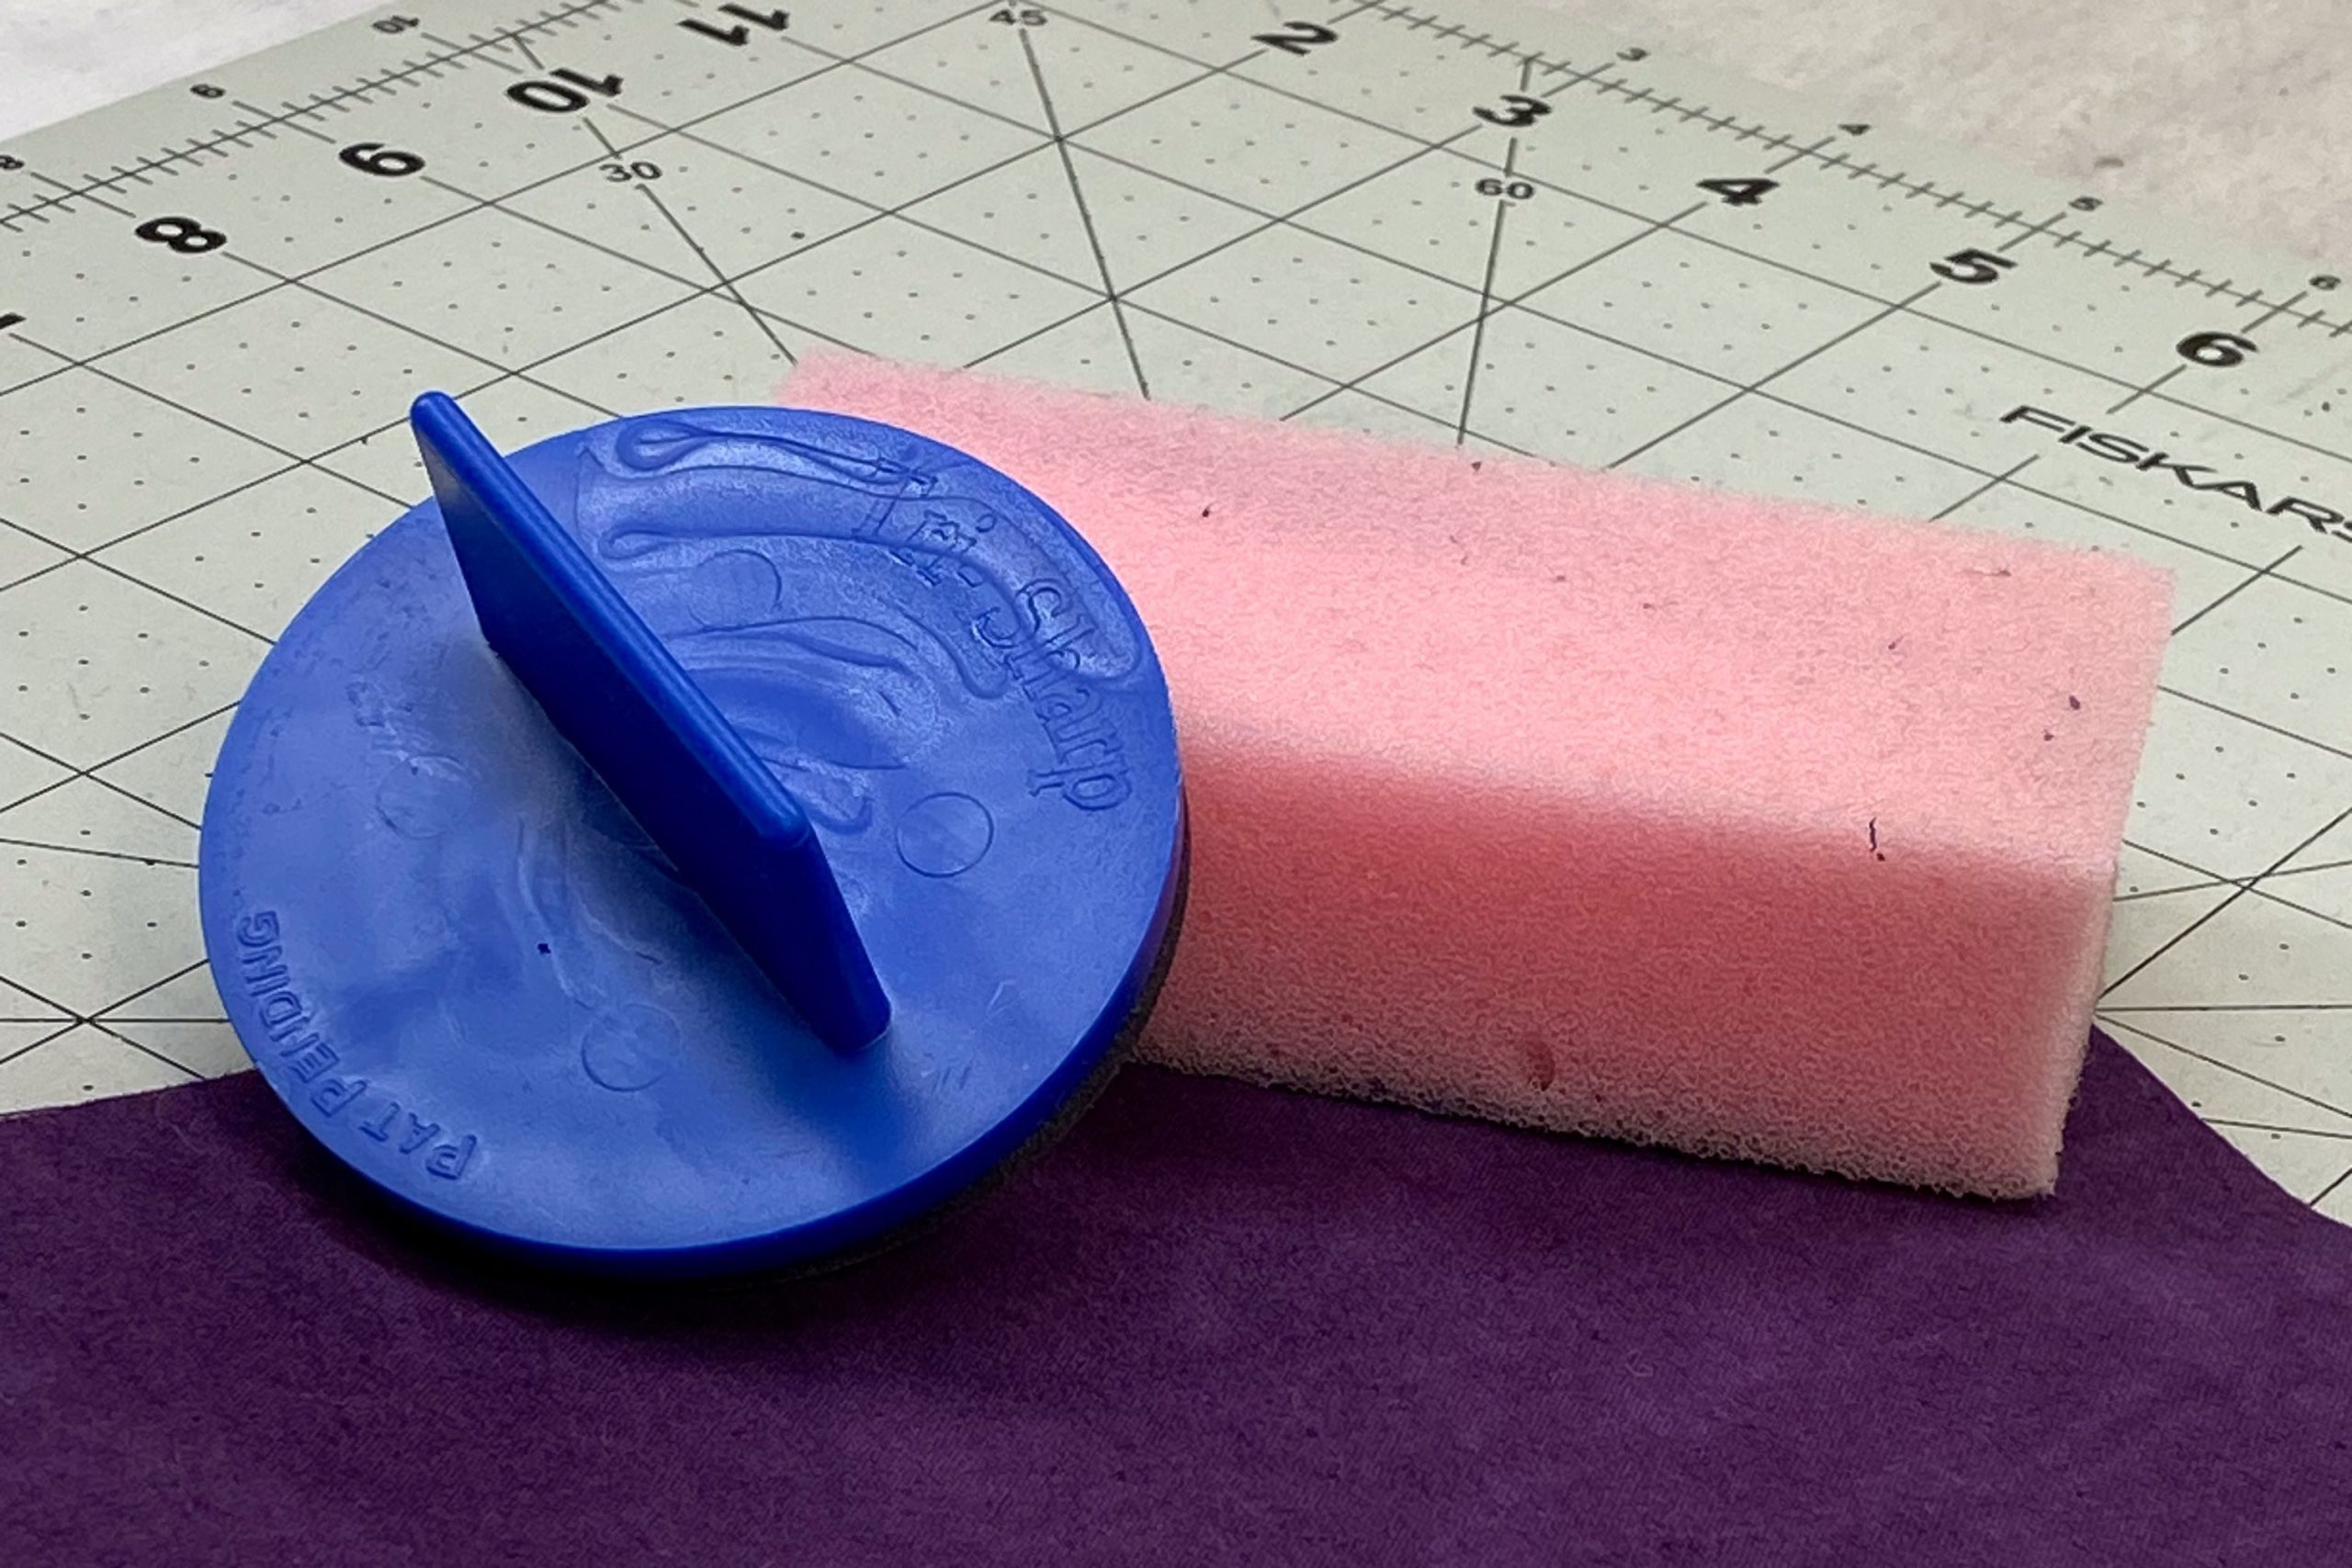
And then the folks at Colonial Needle said, “Just try the Mat Smoother first.” (They are always doing that kind of thing to us!)
We were skeptical. But we tried it anyway (because what did we have to lose) and, if it didn’t work… well then, we’d have to go back to the flip or replace plan. Turns out (as with the other tools the folx at Colonial Needle Co. show us)…
It worked.
Not just “a little better” worked. Not “bought us a few more months” worked. The Mat Smoother lifted out the trapped fibers from those grooves, allowing the self-healing surface to actually close back up under the motion of the mat smoother. The skipping stopped. The blade glided smooth and true and the cuts were clear again. No skipped threads. The mat we thought was done for is still in heavy rotation a year later.
The “Unsexy” Tools That Save Money
Here’s the thing about the Mat Smoother: it’s not flashy. It doesn’t make your projects prettier or faster. It doesn’t unlock new techniques or creative possibilities.
But it saves you money. Real money.
How it works: The Mat Smoother isn’t sanding down your mat — it’s gently buffing out the fabric fibers, thread bits, and debris that get trapped in the cuts. Self-healing mats are designed to close back up after each cut, but they can’t do that if the grooves are packed with lint and fiber. The Mat Smoother massages those fibers out (always use circular motions with light pressure), and suddenly your “dead” mat is smooth again.
We use it on:
The big industrial mat when the center section starts to feel gritty
Our smaller side-table mat by the sewing machine (that one gets messy FAST from trimming threads and seam allowances)
Any mat that’s starting to show visible fiber buildup
Pro tip: If you’re working on a white mat (like we do for photo and video shoots), dark fabric fibers can get embedded in the surface and cause color cross-contamination when you lay down lighter fabrics. A quick pass with the Mat Smoother before switching from dark to light fabric prevents that transfer. Once we learned that little trick, we use it every time we shoot a class or photograph a project or step-out.
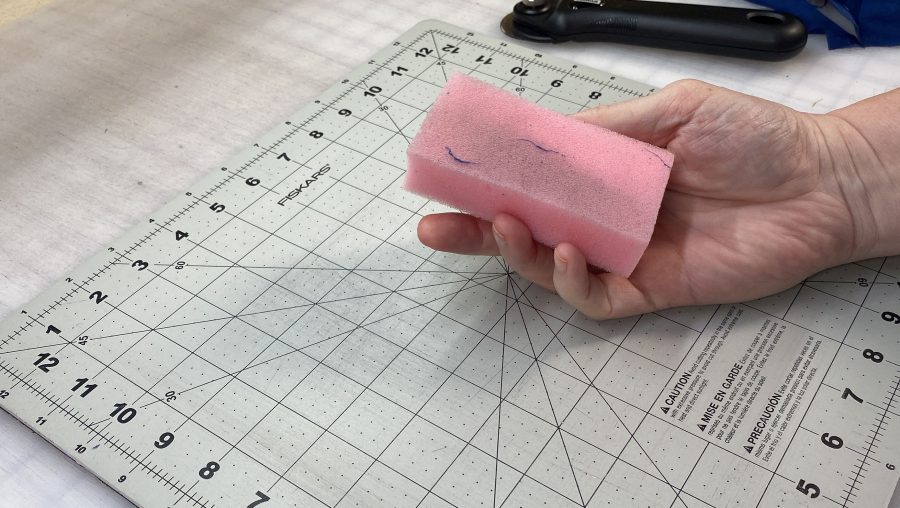
The Lint Magnet: The Unsung Hero of Photo Prep
And then there’s the Lint Magnet, which we also thought we didn’t need. We had lint rollers. We had tape. We had a vacuum with a brush attachment. What more could a sponge-like thingamabob possibly offer?
Turns out: a lot.
Side Note: Yes, we’ve learned to just trust the Colonial Needle Co. folks and use the tools they recommend. We learn!
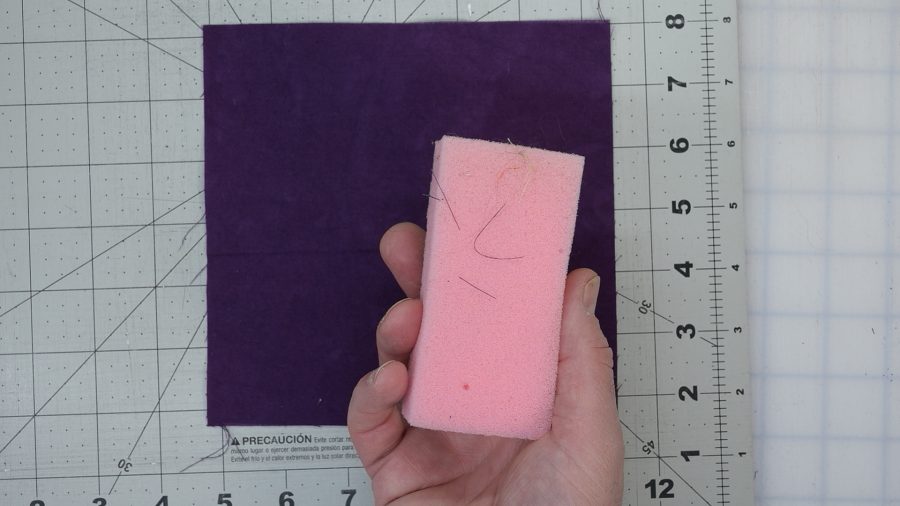
The Lint Magnet doesn’t just move lint around or pick up surface fuzz, it lifts embedded threads and fibers from fabric without leaving residue, without using sticky sheets you have to replace, and without the aggressive pull of a lint roller that can distort delicate textiles.
We use it constantly for:
Cleaning up the big white cutting table between photo shoots (because every thread shows up on white, and we film and photograph a LOT of content)
Removing thread lint from dark sashiko fabric after stitching (white thread on indigo? Every speck is visible)
Prepping wool and felt projects before photography
Quick cleanup of our sewing machine’s exterior surfaces (because yes, those get fuzzy too)
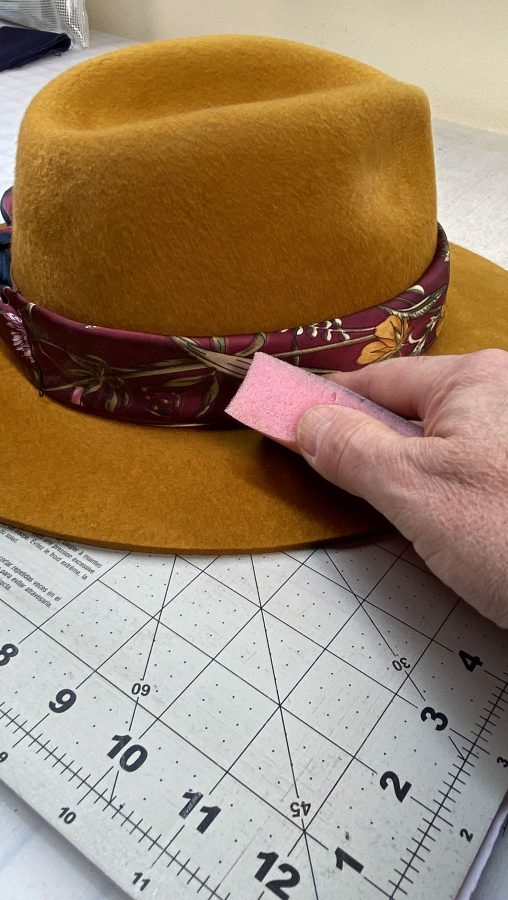
And then there’s the bonus use we stumbled onto recently that we did not see coming: felt hats. If you have a collection of felt hats — and apparently, we do — you already know they attract absolutely everything. The Lint Magnet handles them perfectly. No pulling, no distorting the felt, and no sticky residue that attracts more “stuff,” just clean hats. It’s now a permanent part of our hat care routine before we walk out the door.
The best part? It’s reusable. No disposable sticky sheets filling the trash. Just rinse it when it gets saturated, let it dry, and it’s ready to go again.
It’s one of those tools that falls squarely into our category of “things we thought we didn’t need until we tried them and now we know just how terribly wrong we were and are glad we don’t have to do without them.” It’s a long category title, but we can admit when we’re wrong.
Why Maintenance Actually Matters
Here’s what we’ve learned about studio maintenance over the years: it’s not about keeping things Instagram-perfect, it’s about protecting your investment in your craft.
Clean mats mean:
Your rotary blades stay sharper longer (less friction = less dulling)
Your rulers don’t slip on gritty surfaces
Your cuts are accurate because the blade isn’t skipping over embedded fibers
You’re not wasting money replacing mats that just needed a good cleaning
Lint-free fabric means:
Your finished projects look professional (no white fuzz on your black wool coat)
Your photo and video content is cleaner (trust us, every speck shows up on camera)
You’re not fighting cross-contamination between light and dark fabrics
These aren’t glamorous tools. They won’t make your Instagram feed pop. But they’ll save you money, extend the life of your expensive surfaces, and prevent the low-key frustration of cutting on a mat that fights you every step of the way.
The Bottom Line: Maintenance Makes the Maker
A few years ago, if you’d told us we’d be writing a love letter to a mat cleaning and smoothing tool and a lint sponge, we would have laughed.
But here we are.
The Mat Smoother saved our big industrial mat from early retirement and extends the life of our cutting mats all over the studio. The Lint Magnet keeps our photo prep from turning into a 20-minute lint-picking session — and our felt hats looking sharp. Together, they’re the maintenance duo we reach for every time we reset the studio.
If your cutting mat is feeling gritty, if your rotary blade is skipping, if you’re considering replacing a mat that’s “just worn out” — try the Mat Smoother first. If you’re spending more time picking lint off dark fabric than actually stitching it, the Lint Magnet will change your life. And if you have felt hats, well. You’re welcome.
They’re not exciting. But their value is in how well they work. And sometimes, that’s exactly what you need.
Watch the video demonstration on YouTube to see these tools in action on our battle-scarred mats and lint-covered fabrics.
What’s your studio’s “high-traffic” zone? Is your cutting mat more scarred or smooth? Share a photo and tag us — we want to see those Mat Smoothers saving the day!
The buttonhole stitch is one of those classic hand-sewing techniques that beautifully balances form and function. While its name suggests it’s only used for buttonholes, this versatile stitch has long been valued for its durability, decorative potential, and ability to create clean, finished edges.
Whether you’re sewing garments, embellishing embroidery projects, or exploring heirloom techniques, the buttonhole stitch is a skill worth mastering.
What Is a Buttonhole Stitch?
The buttonhole stitch is a looped edge stitch designed to reinforce cut edges and prevent fraying. Each stitch forms a small knot along the edge of the fabric, creating a sturdy finish that stands up to repeated use.
Although it shares similarities with the blanket stitch, the buttonhole stitch is worked more closely together and features a distinct knotted edge that offers additional strength.
When & How It’s Used
The buttonhole stitch is ideal for both practical sewing and decorative embroidery.
It’s best for:
Hand-worked buttonholes
Reinforcing fabric edges
Heirloom sewing projects
Wool appliqué
Decorative borders
Finishing felt ornaments and accessories
Because of its strength, it’s especially useful anywhere a finished edge will experience wear and tear.
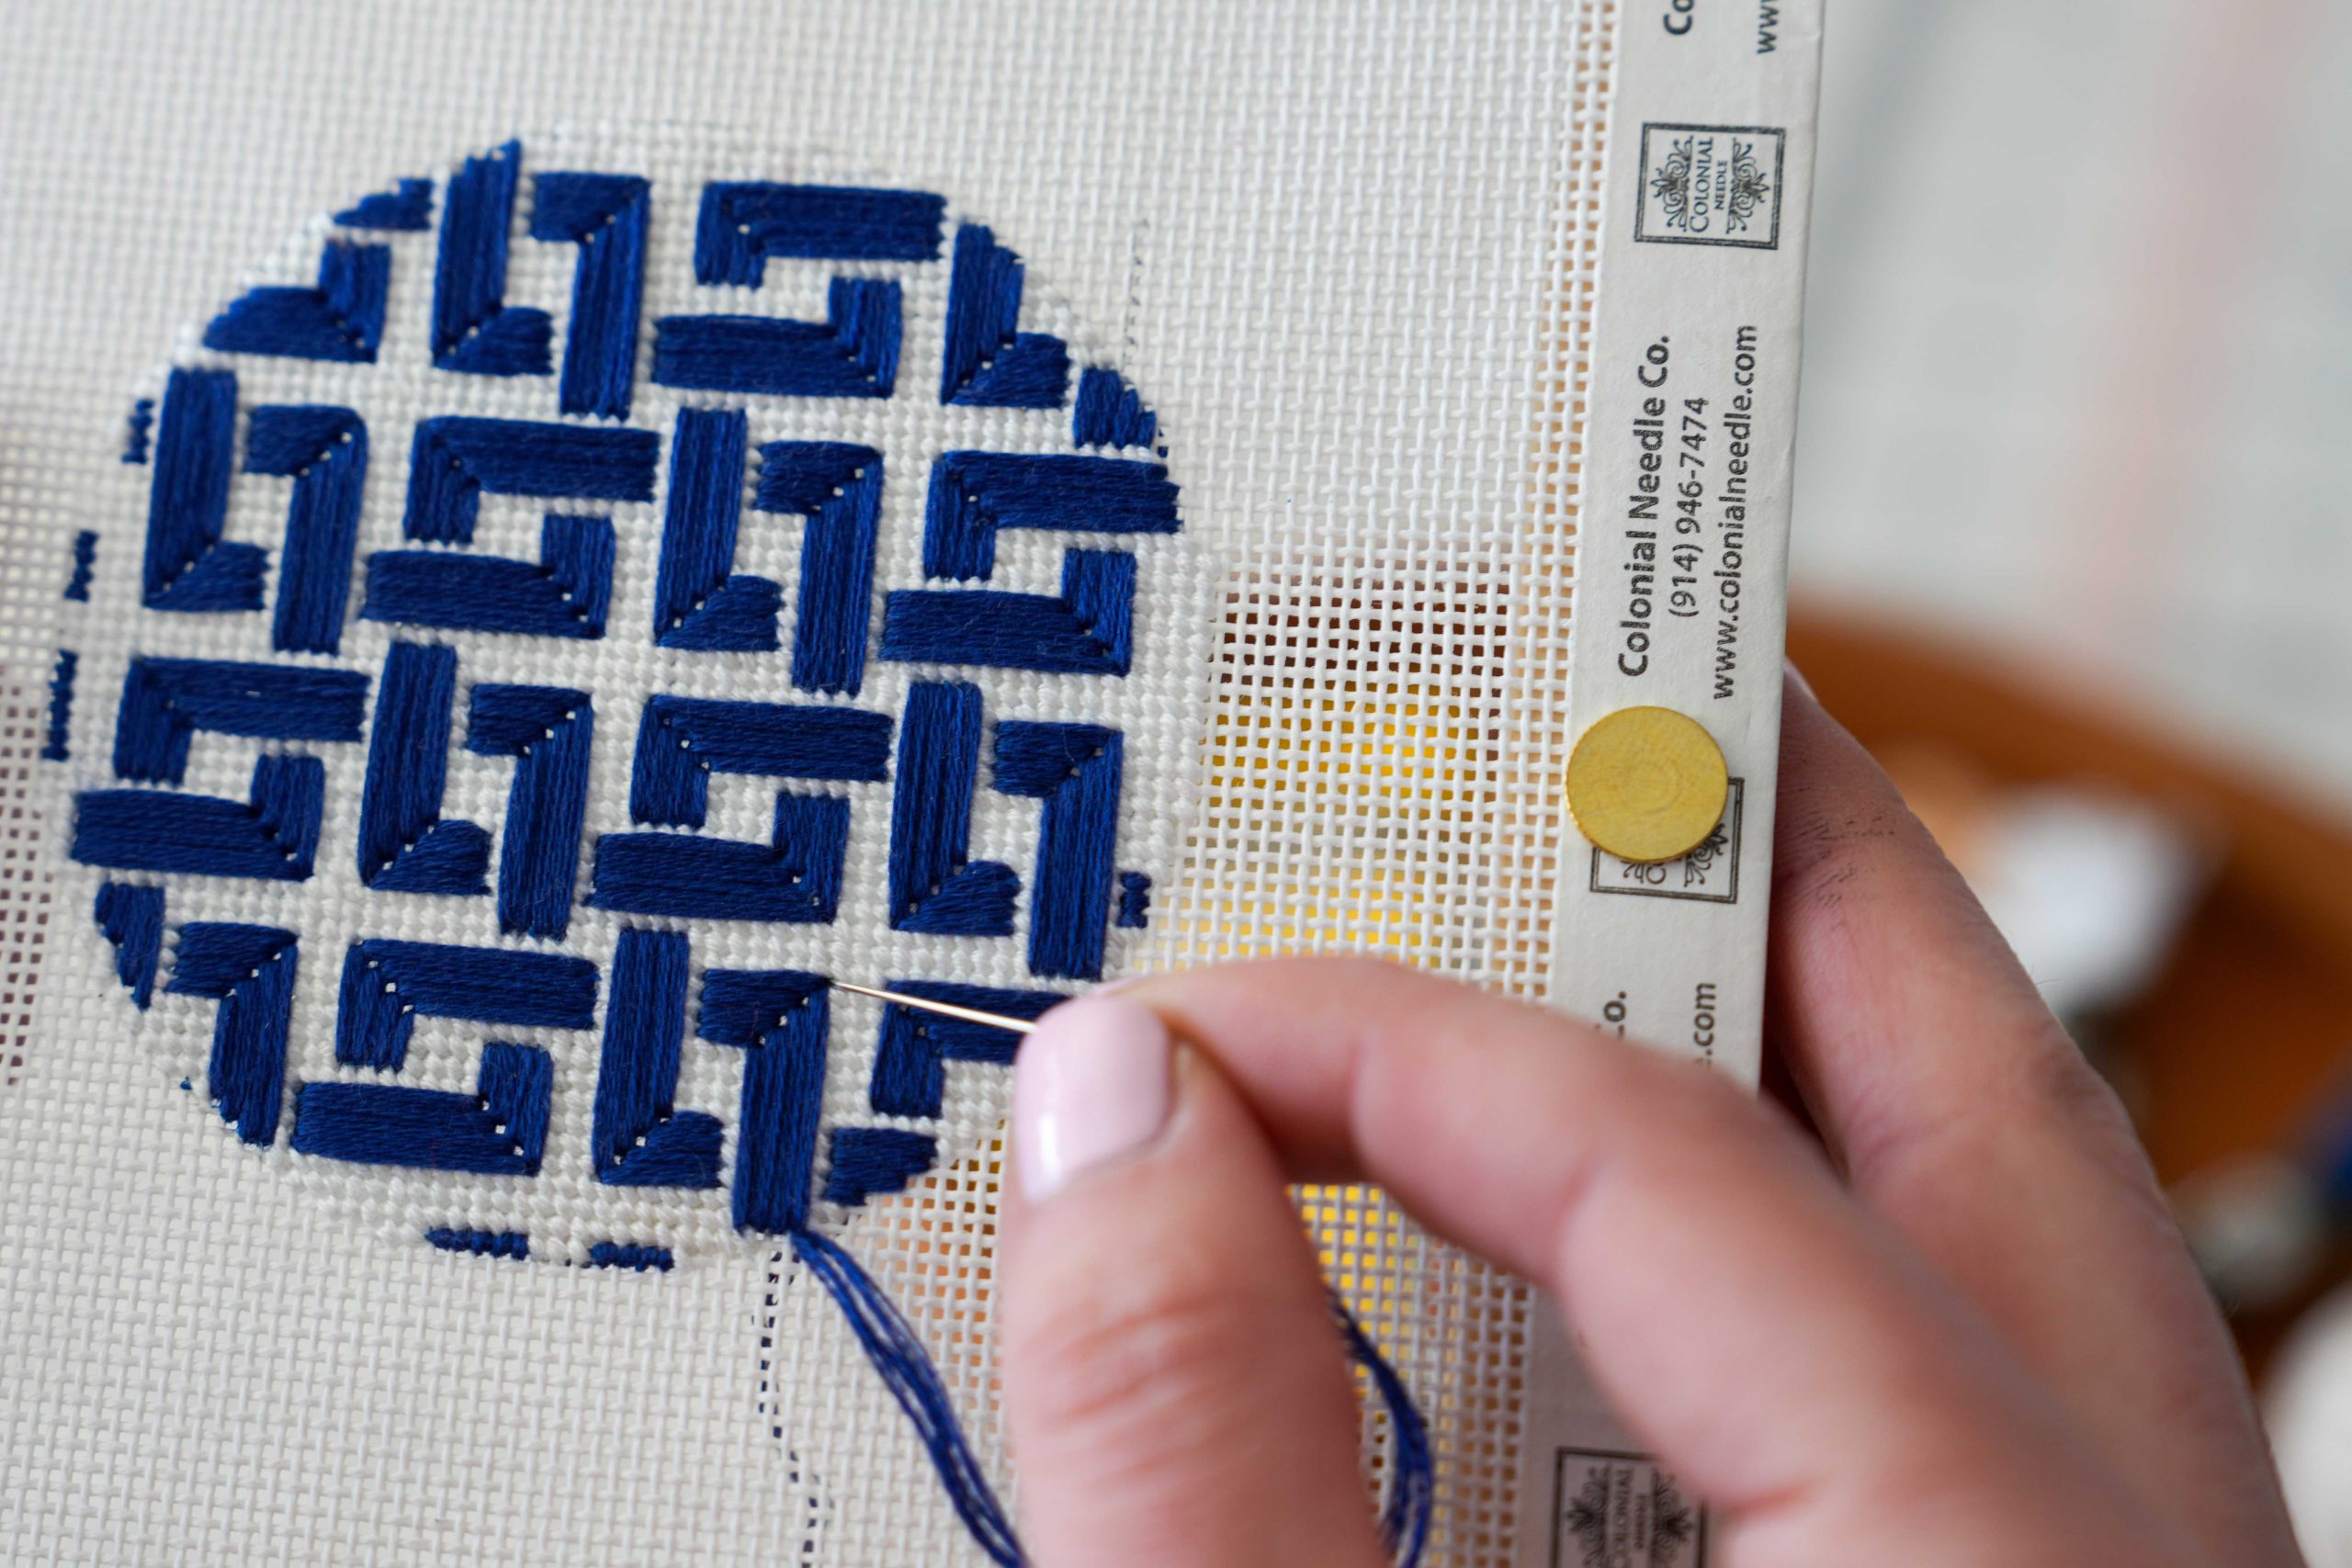
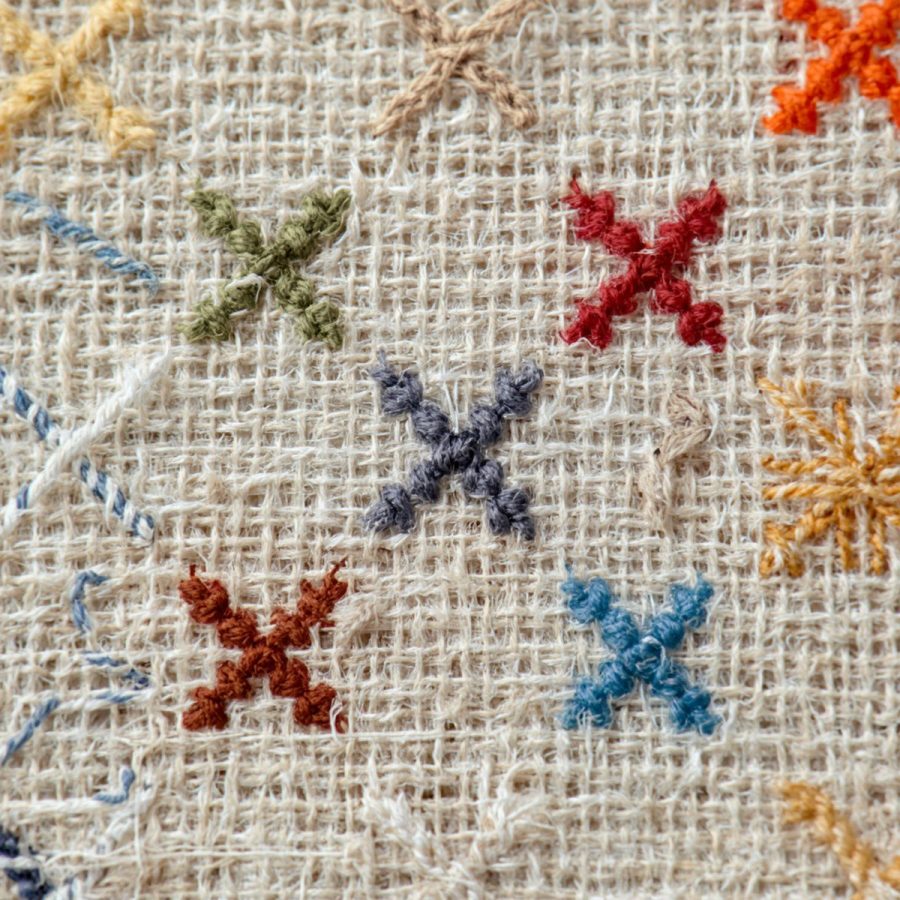
Cross stitch on linen and evenweave has a look all its own—soft texture, delicate detail, and beautifully defined stitches. But these fabrics behave differently than standard Aida cloth, and the needle you choose can dramatically affect both your stitching experience and your finished results.
If your thread twists, your fabric holes seem difficult to find, or your stitches feel bulky or uneven, your needle may be working against you instead of with you.
Let’s explore how the right needle supports smoother, more precise stitching on linen and evenweave fabrics.
The Stitching Scenario
Cross stitch on linen & evenweave
These fabrics are favorites for:
Heirloom samplers
Detailed counted cross stitch
Specialty stitches
Fine monogramming
Elegant finishing projects
Unlike Aida, linen and evenweave require stitching “over two” fabric threads, making precision and visibility especially important.
The Common Challenges
When stitching on linen or evenweave, stitchers often notice:
Difficulty seeing fabric holes
Twisted or worn thread
Uneven stitch tension
Splitting fabric threads accidentally
Eye strain or hand fatigue during detailed work
These fabrics reward precision—but they also require the right tool for the job.
Why the Right Tool Matters
Several needle characteristics improve stitching on linen and evenweave:
Point Style
This is where personal preference often comes into play.
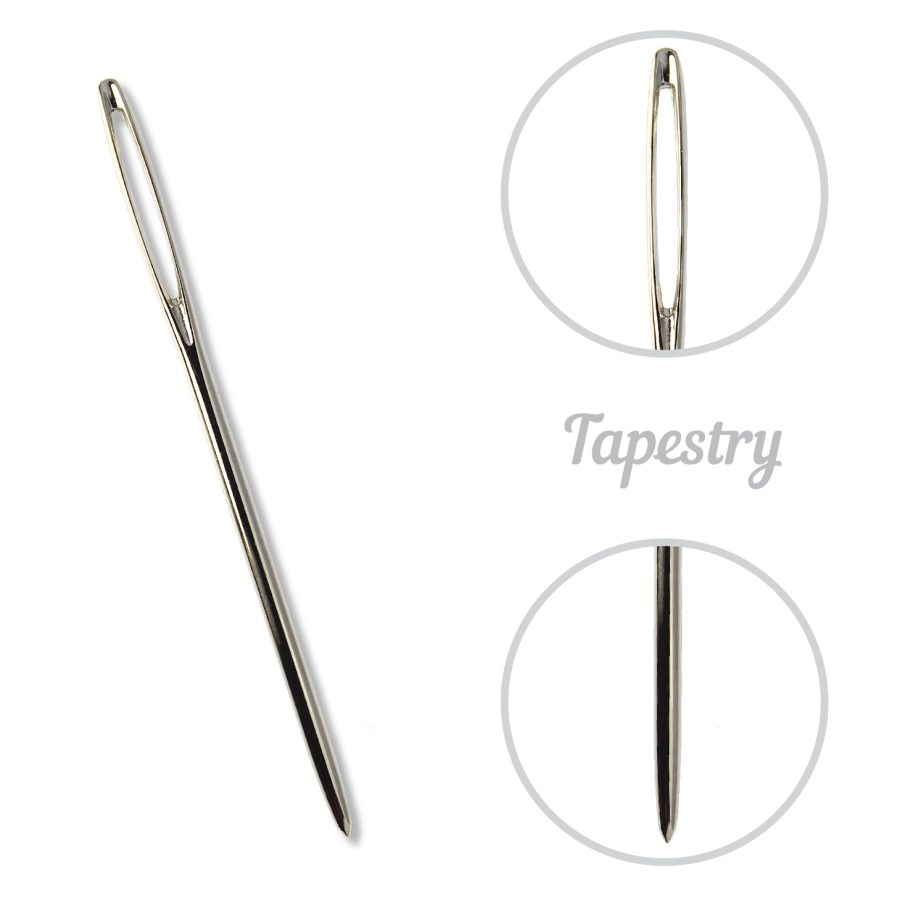
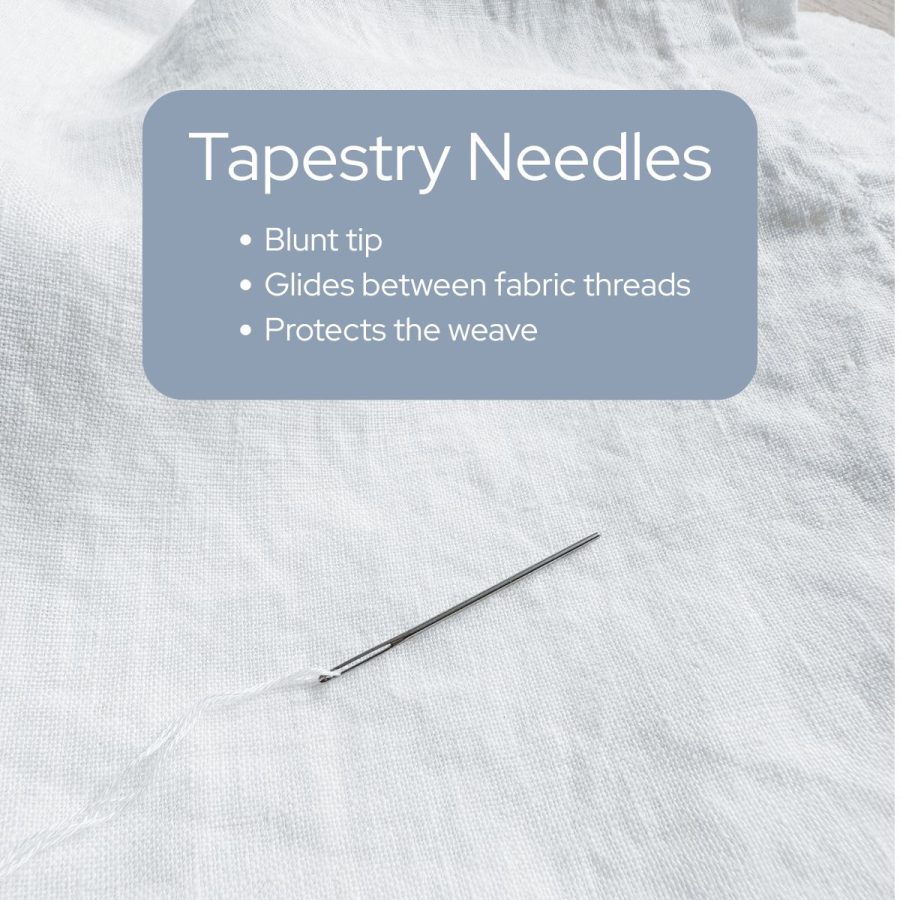
Many stitchers use blunt tapestry needles because they slide between fabric threads without piercing the weave. They’re especially helpful for maintaining fabric structure and preventing thread splitting.
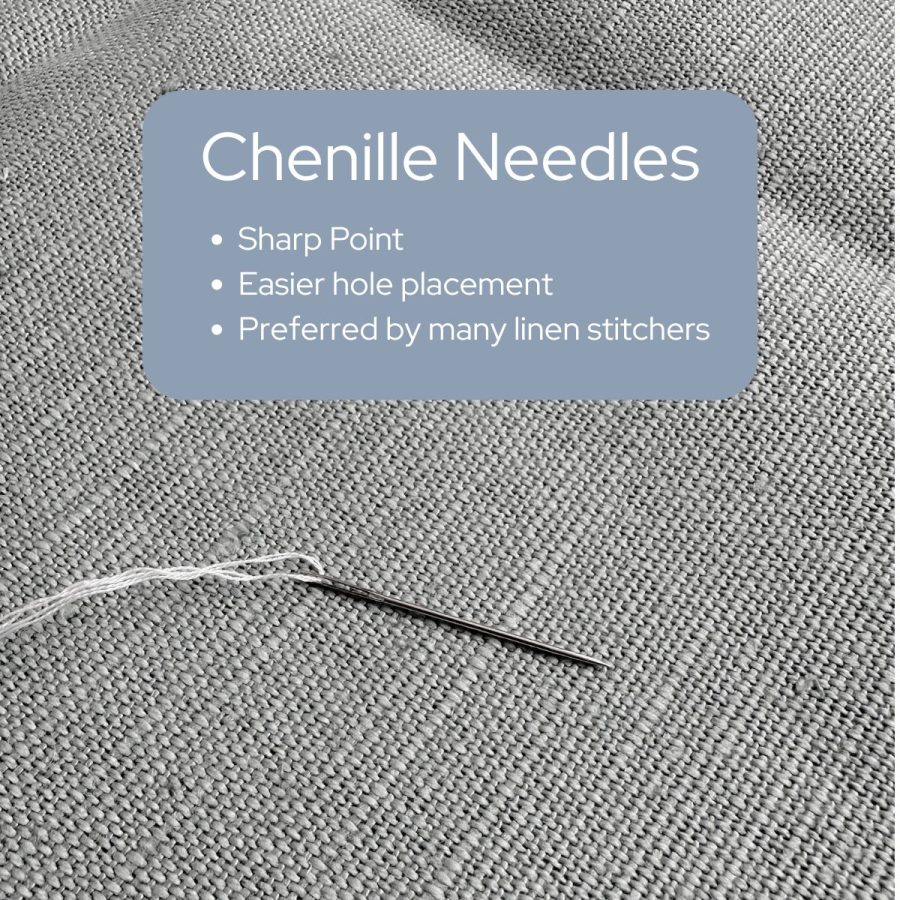
However, many experienced linen stitchers prefer chenille needles for cross stitch on linen and evenweave. Because chenille needles have a sharp point paired with a large eye, they allow for more precise hole placement—especially on higher-count fabrics or natural linens where holes can be harder to see.
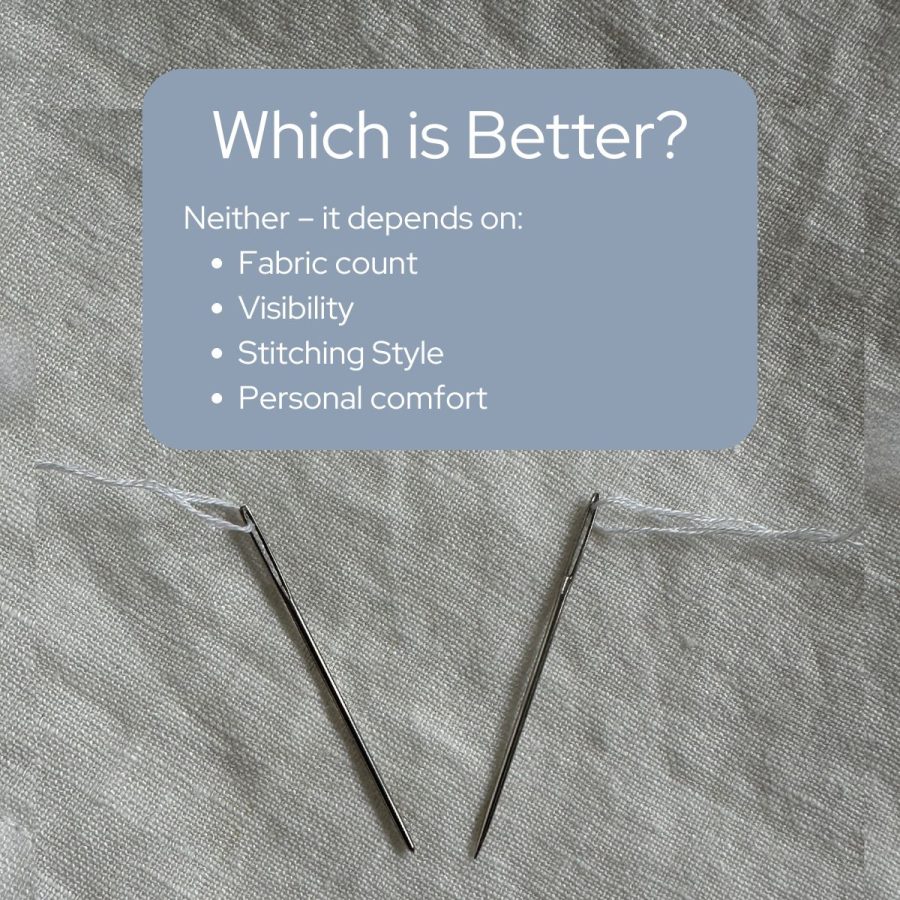
The best choice often depends on:
fabric count
lighting and visibility
stitching style
personal comfort
Eye Size
The eye should comfortably accommodate your floss without causing fraying or drag.
Needle Size
A finer needle works better on higher-count fabrics because it passes easily through smaller openings without enlarging holes.
Needle Length
Comfort matters—some stitchers prefer shorter needles for control, while others like slightly longer needles for rhythm and grip.
The goal is smooth movement through the fabric with minimal resistance.
Our Recommendation: Needles for Cross Stitch on Linen & Evenweave
Tapestry Needles – Sizes 24–28
A classic choice for counted cross stitch. Their blunt point glides between fabric threads, helping preserve the weave and reduce accidental splitting.
These are especially popular for:
standard cross stitch,
lower-count fabrics,
and stitchers who prefer a softer feel against the fabric.
Chenille Needles – Sizes 24–28
A favorite among many linen stitchers, chenille needles combine:
a sharp point,
a long eye,
and easy threading.
The sharp tip allows for more precise hole placement, which can be especially helpful on:
high-count linen,
uneven natural fibers,
specialty stitches,
or projects stitched “over two.”
Many stitchers find chenille needles easier to control when fabric holes are less visually defined.
Pro Tip: Try Both
If you’ve only ever stitched linen with tapestry needles, try a chenille needle on your next project—or vice versa.
Some stitchers love the glide of a tapestry needle, while others prefer the precision of a sharp chenille point. Small differences in point style can dramatically change how comfortable and accurate stitching feels.
There’s no universal “best” needle—only the one that works best for you and your fabric.
Special Considerations for Higher-Count Fabrics
As fabric count increases:
Needle size generally decreases
Smaller eyes reduce bulk
Finer needles help maintain fabric structure
Using a needle that’s too large can distort stitches and widen holes over time.
Reader Takeaway: Quick Checklist
When stitching on linen or evenweave:
✔ Point depends on preference, but try a blunt tapestry needle or sharp chenille when starting a new project ✔ Match needle size to fabric count ✔ Use finer needles for higher-count fabrics ✔ Avoid forcing the needle through the weave
Small adjustments create cleaner, more even stitches.
Looking Ahead
Next month in The Right Tool for the Stitch, we’ll explore needle choices for portable summer stitching and travel projects—because great stitching should go wherever you do.
Until then, enjoy the rhythm and precision that linen and evenweave bring to every stitch.