Fifty-Cent Glue vs. the Good Stuff: When Cheap Is Fine and When Your Fabric Deserves Better

A Colonial Needle Company feature with Shannon & Jason

Let’s get the obvious elephant out of the studio first. A purple school glue stick costs about fifty cents, fits in a pencil pouch, and lives at every drugstore, big box store, and back-to-school endcap on the planet. So when someone at a show tells us they would just grab the cheap stick instead of a Roxanne, we get it. We really do. We use school glue sticks too.

Here’s the part nobody says out loud, though: we use different glues for different work. Not because one is good and the rest are garbage, but because a studio full of textile projects is a lot like a studio full of any other kind of art. You reach for what the job actually needs. Sometimes that’s the fifty-cent tube. Sometimes it very much is not.
Think Like an Artist Buying Supplies

Walk into any art store and nobody blinks when a painter keeps student-grade paper for warming up and saves the good cotton rag for the piece that’s headed to a frame. Pencils, pens, sketchbooks, paints, fabric… they all come in student, artist, and professional grades, and every maker learns to match the material to the moment. Practice needs low-stakes supplies so we don’t freeze up worrying about wasting the fancy stuff. That fear of ruining something precious? It’s a creativity killer, and we refuse to let it win. But the work meant to last for generations needs materials that will actually last for generations.

For some reason, the fiber and textile arts haven’t always insisted on that same distinction. We’ll happily spend real money on gorgeous hand-dyed cotton, precision cutters, and a needle for every occasion… and then reach for an adhesive formulated for third-grade construction paper. So let us walk you through how we actually sort it out on our own worktable.

Three Glues, Three Jobs

School glue sticks

These are our accessibility-and-play tier. They’re what we hand out in beginner-friendly workshops where cost matters and everyone’s just there to learn a technique, and they’re what we grab in the studio when we’re testing a layout or goofing around with an idea. Cheap, washable, everywhere. Perfect for low-stakes, temporary, get-out-of-your-own-head basting.

Permanent glue sticks

These (the UHU-style ones) are our middle tier. When we’re teaching art-forward classes, building mixed media pieces, or doing certain visible mending where we want a bond that stays put, this is the reach. More commitment than school glue, different job than Roxanne.

Roxanne Baste-It

This is what we reach for on almost every textile piece that matters here in the studio. Gallery work. Commissions. Heirloom-bound quilts. The pieces we want someone to still be holding in fifty years. It’s the one glue we trust not to gum up our hand stitching or our machine work, it dries flexible instead of crunchy, and it washes out completely and cleanly.

None of that is a knock on the cheaper tubes. It’s just knowing which tool got invited to which party.

What Roxanne Actually Does on Cloth
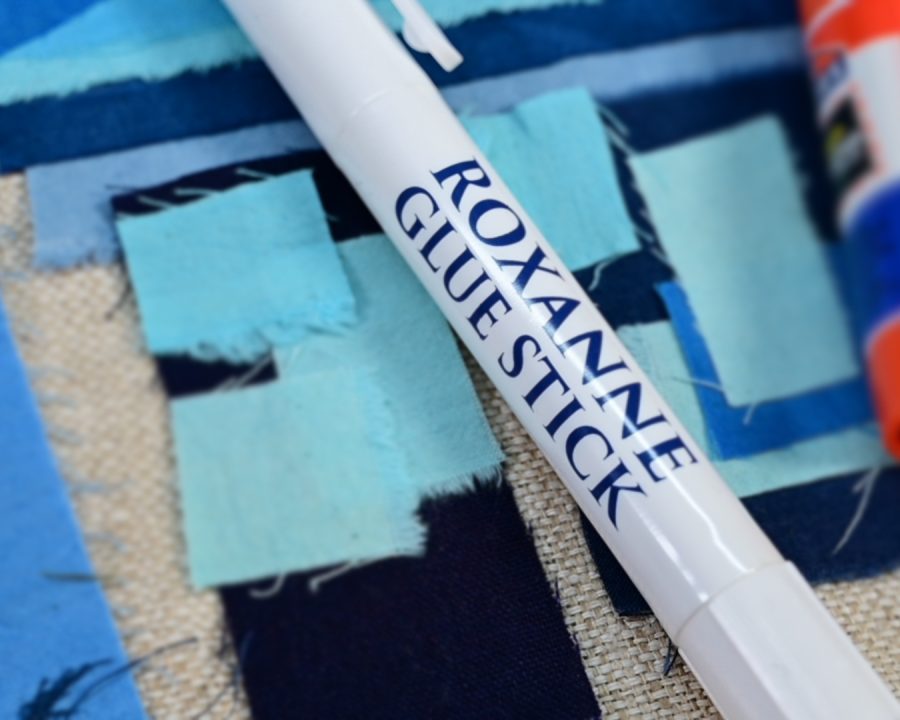
Sticking two things together is easy. Getting fabric to stay put without wrecking its drape, its hand, or its color is the hard part, and that’s where a glue built for textiles instead of paper starts earning its keep.

  • Smooth, light application. It doesn’t drag on delicate weaves or leave thick, gummy clumps. For our English paper piecing, we can lay down the finest skiff of it on the template and the fabric, just enough to hold, with none of that sticky mess. On the fine garment fabrics in our upcoming visible mending workshops, that light hand is exactly why it beats a school glue stick, which drags and gums up the very fabrics we’re trying to save (more on the gumming in a minute).
  • Fast-drying and water-soluble. It sets quickly so you can keep moving, then washes out completely once the stitching is doing the structural work.
  • Made for the actual jobs. Appliqué, bindings, hems, EPP… it holds edges crisp under the genuine physical stress of textile work without turning your piece stiff as a board.

School glue can hold two pieces of cloth together, sure. But Roxanne is the one that was clearly invited to the fabric party.

The Studio View: Saving Your Needles, Your Thread, and Your Sanity

This is the one we feel in our hands, so bear with us while we get specific, because it’s the difference nobody warns you about until you’re living it. When we’re doing the stitching-heavy work we love most, sashiko, visible mending, EPP, appliqué, the wrong glue turns into a genuine problem. The heavier, gummier sticks do hold the fabric in place, we’ll give them that. But they dry stiff; stitching through stiff, gummy fabric is a fight. Worse, the glue transfers onto the needle. By hand, that means a rubbery drag that makes your thimble slide and your hand ache, and it means we’re stopping to wipe our needles down with alcohol to keep them moving smoothly. That’s not a workflow. That’s a chore we invented for ourselves by grabbing the wrong tube.
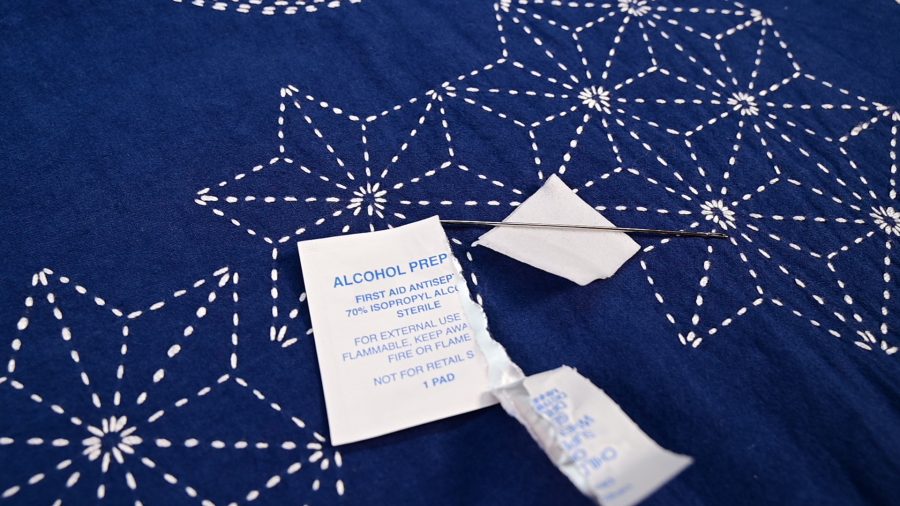
On the machine it gets worse, and here’s the chain of events we’ve watched happen more than once. The glue gets onto the needle and, with the friction and heat of stitching, melts onto it a bit. Now the needle is tacky, so it grabs at the fabric and pulls it instead of piercing cleanly, and that drag throws off your stitches, sometimes skipping them outright. Then comes the part that really stings: the same gummed-up needle tugging on the thread until the thread itself breaks. We’ve traced more than one snapped length of good thread back to exactly that. None of this is a lab-certified white paper, and we won’t dress it up as one. It’s our studio experience, learned the annoying way. But it’s consistent enough that we trust it.

Roxanne dries down light and flexible, so whether the needle’s driven by your hand or your motor, it slips through the basted zone instead of collecting adhesive and dragging it into the works. No alcohol wipes, no melting, no mystery thread breaks. Just smooth, rhythmic stitching, which is the whole reason we sat down to sew in the first place.

The Preservation Angle: Why Old Quilts Go Brown

Here’s the one that keeps us honest, because we’ve handled a lot of vintage textiles and old quilts, and we’ve seen the damage up close. You know those brown and yellow stains that bloom on antique pieces over the years? Most of us recognize them on sight. Fewer of us stop to ask what actually causes them.

A big part of the answer is the adhesives. Many old glues were acidic to begin with, or turned acidic as they aged and broke down, and that acid migrates straight into the fibers. Acid is what makes natural fabric yellow, weaken, and eventually fall apart, the same reason conservators fuss over acid-free mat board and archival tissue. Some adhesives off-gas as they degrade too, which doesn’t help. The through-line is simple: put an acidic, breaking-down glue against cloth and give it enough time, and the cloth pays for it.
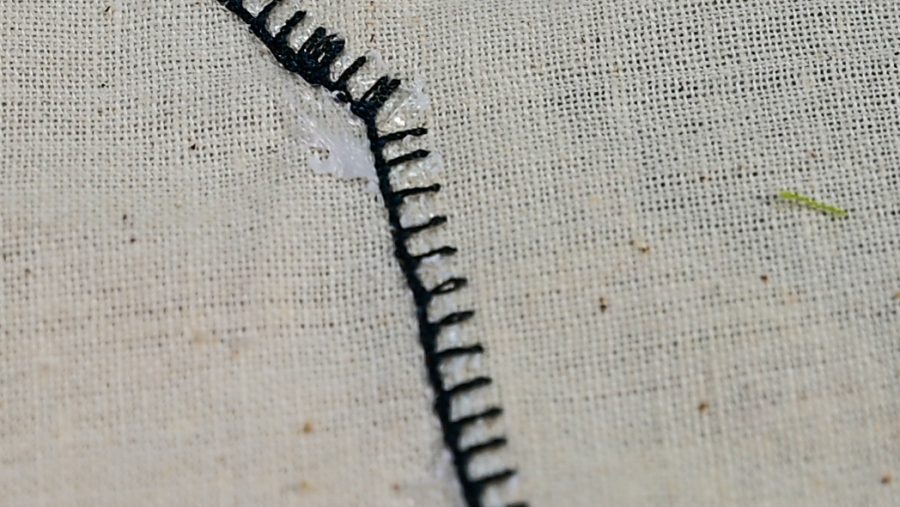
Which is exactly why acid-free and pH-neutral aren’t just label decoration. An acid-free adhesive isn’t leaving a slow decay bomb tucked inside your quilt sandwich or your garment seams. Roxanne is acid-free and pH-neutral, and that’s the language we’re comfortable standing behind. You’ll hear folx toss around archival too, but in textile conservation that word carries the weight of decades of standardized testing, so we’d rather keep our claims clean and true: acid-free, pH-neutral, and a safe, stable choice when you want today’s work to still be here for the folx who come after you.

Use the Right Tool for the Job

Cheap glue sticks have their place, and we mean that. Mockups, rough drafts, kid projects, quick low-stakes fixes, and every I’m-just-playing moment where the whole point is not to feel precious about it. Keep that fifty-cent tube. Use it with joy.

But when you move past practice and into the work that matters, your tools should match your effort. Not every project deserves the fancy glue. But when the fabric matters, the fancy glue isn’t actually fancy. It’s just the better tool. Roxanne is the one we reach for when we want fabric to behave: smooth application, a lighter hand, easier stitching, and zero drama at the needle. That’s the whole philosophy, really. There’s a right tool and a right material for every project, and the trick is just knowing which is which.

Stitch on,

Shannon & Jason

🧵 Shop Roxanne Baste-It Glue and the full Roxanne glue lineup here.

📌 Explore Colonial Needle’s needles, thimbles, and notions for your next textile project here.

▶️ Catch more Colonial Needle tips and tutorials on YouTube here.
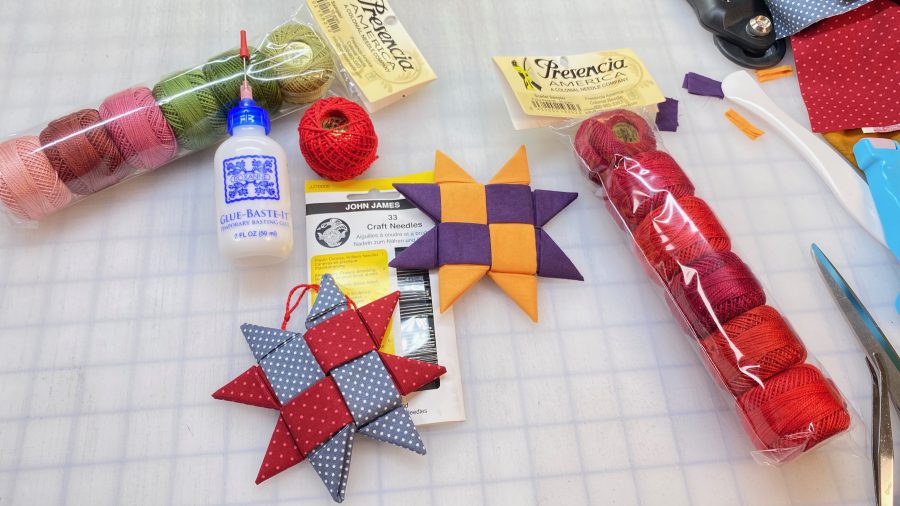
Make Your Own Folded Fabric Star Ornaments

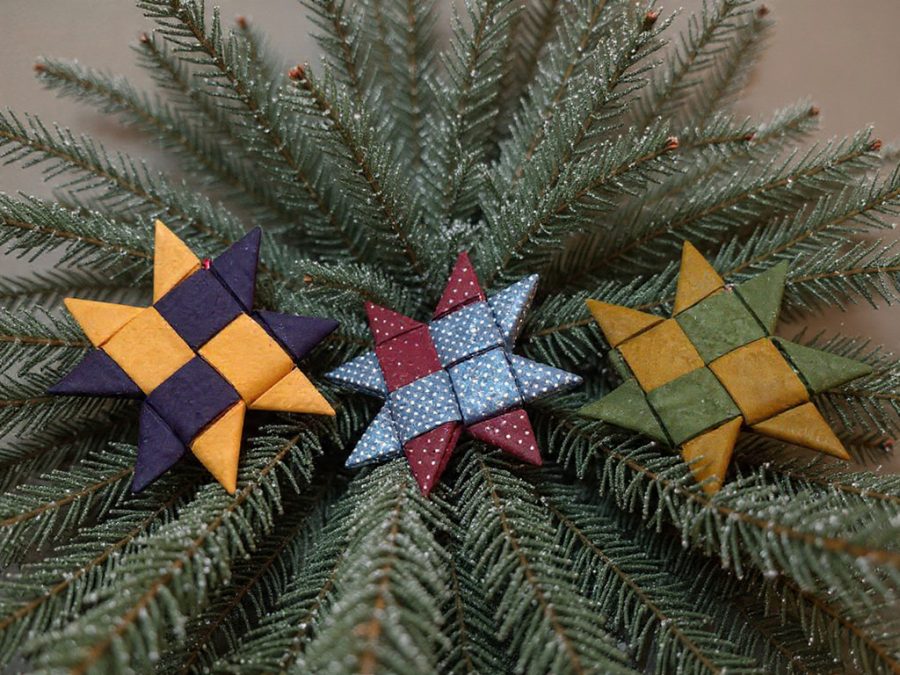
The holidays are the perfect time to embrace traditions – especially ones with centuries of history behind them! This month, Shannon & Jason are sharing their fabric version of the classic Scandinavian Star ornament, and we’re giving you the complete tutorial absolutely free.

A Craft with Roots in History

These beautiful, folded stars – also known as Scandi Stars or Fröbel stars (Fröbelstern) – have a fascinating origin story. The technique dates back to 19th-century Germany, where educator Friedrich Fröbel (yes, that Fröbel, the founder of Kindergarten!) incorporated paper folding and weaving into his curriculum. These hands-on activities weren’t just busy work, they taught children mathematical concepts while encouraging creative, constructive play.

Traditionally, these stars were made from four strips of paper, folded and woven into an eight-pointed, three-dimensional star. Once complete, the paper stars were dipped in wax and sprinkled with glitter for extra sparkle. Shannon can confirm these details because her family used to make these when she was a child. In fact, we STILL have the ornaments she made all those years ago.

The craft became especially beloved in Nordic countries (Denmark, Norway, Sweden, Finland, and Iceland) where these stars evolved into a staple of holiday decoration. Scandinavian families hang them to symbolize the Star of Bethlehem and to represent hope and light during the long, dark winter months.

From Paper to Fabric: A Modern Twist

Fast forward to today, and crafters have given this traditional technique a fabric makeover! The fabric version is thicker, less likely to result in wax in your hair (ahem… what?! I was a CHILD), and, let’s be honest, perfect for using up those fabric scraps quilters can’t bear to throw away.

Our fabric stars maintain the beautiful geometric design of the original while creating ornaments that will last for years. Even better? This is a completely no-sew project. That’s right. No needle and thread required which makes this the perfect craft to do with kids or family members who are not crafty-inclined.

What You’ll Need

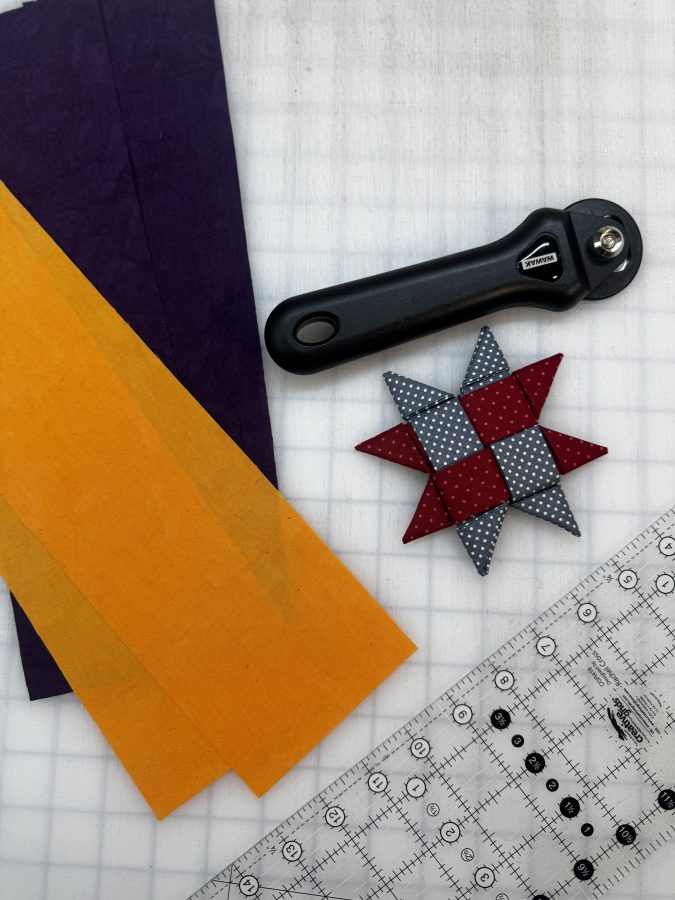
The supply list is wonderfully simple:

That’s it! You probably have everything you need already sitting in your craft room.

Shannon & Jason’s Secret to Success

Here’s what makes these fabric stars work beautifully: sharp creases and strategic glue placement. Over the years, we have perfected the technique of making these FAB little stars by adding a few key steps and our tutorial walks you through every fold, flip, and tuck. We also made sure to include our favorite pro tips about using tools like the Hera marker and using the Roxanne Glue Baste-It to take these stellar ornaments to the next level.

The result? Gorgeous dimensional stars that won’t spring apart and will look stunning on your tree for years to come.

Why We Love This Project

  • Scrap-friendly: Perfect for using up leftover fabric from other projects.
  • Beginner and (supervised) child-friendly: If you can fold and glue, you can make these stars.
  • Quick: Once your strips are cut and pressed, each star takes just minutes. Pro Tip: prep a batch of fabric ahead of time and make a whole constellation of stars in one sitting or as you go when you need a maker’s moment to yourself.
  • Meaningful: Connect with centuries of craft tradition while creating something beautiful.
  • Gift-worthy: Make a batch to give as handmade gifts or use as festive gift toppers.

Get the Free Tutorial

Ready to try your hand at this historic craft technique? Download our complete tutorial, including step-by-step instructions, pro tips, and all the details you need to create your own Scandinavian Star ornaments.

Download the Free Tutorial | Watch the Video Tutorial | Shop the Supplies

Whether you’re looking for a maker’s moment, a craft to share with kids or grandkids, or simply want to add handmade beauty to your holiday decor, these fabric stars are the perfect choice. Plus, you’ll be continuing a tradition that has brought joy and light to homes for nearly 200 years.

Happy folding, and may your holidays be filled with light, laughter, and more than a little Creative Chaos!

Glue Basting with Roxanne Glue

One more product we can’t seem to live without!

Greetings makers, crafters, and creators! Today, we’re diving into another group of Colonial Needle Company products to cover a sticky subject: glue. Specifically, glue basting with the Roxanne Baste-It family of glue.

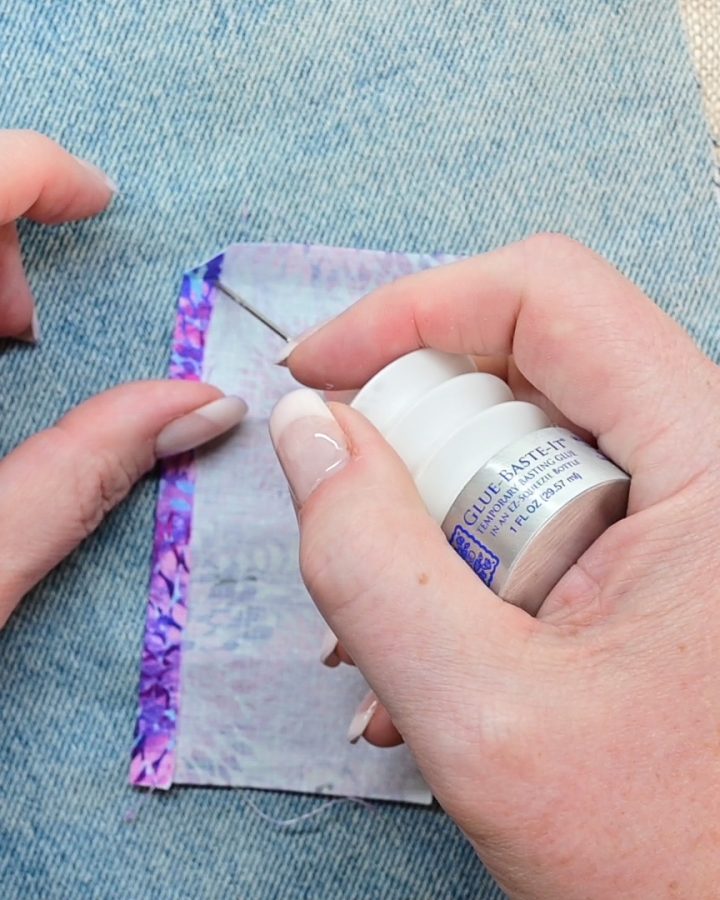
Glue basting is a technique where you apply a thin line of water-soluble glue along the seam allowance or cut edges of fabric pieces to hold them in place before sewing. This allows for precise piecing, perfect points, and smooth curves. It is especially useful for boro, finishing quilts, and a manner of appliqué – completely removing the need for pins.

How to use Roxanne Basting Glue in Four Easy Steps:

  1. Simply apply a fine line of glue
  2. Line up the fabric pieces
  3. Press with a hot iron to set (this step is not always required–as you will see in our video)
  4. Then sew as usual.

Key points about glue basting:

  • Application:
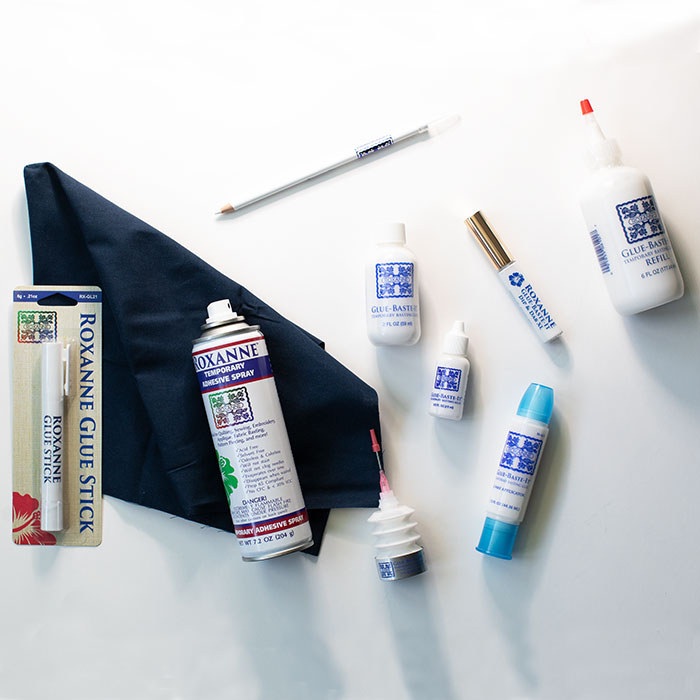
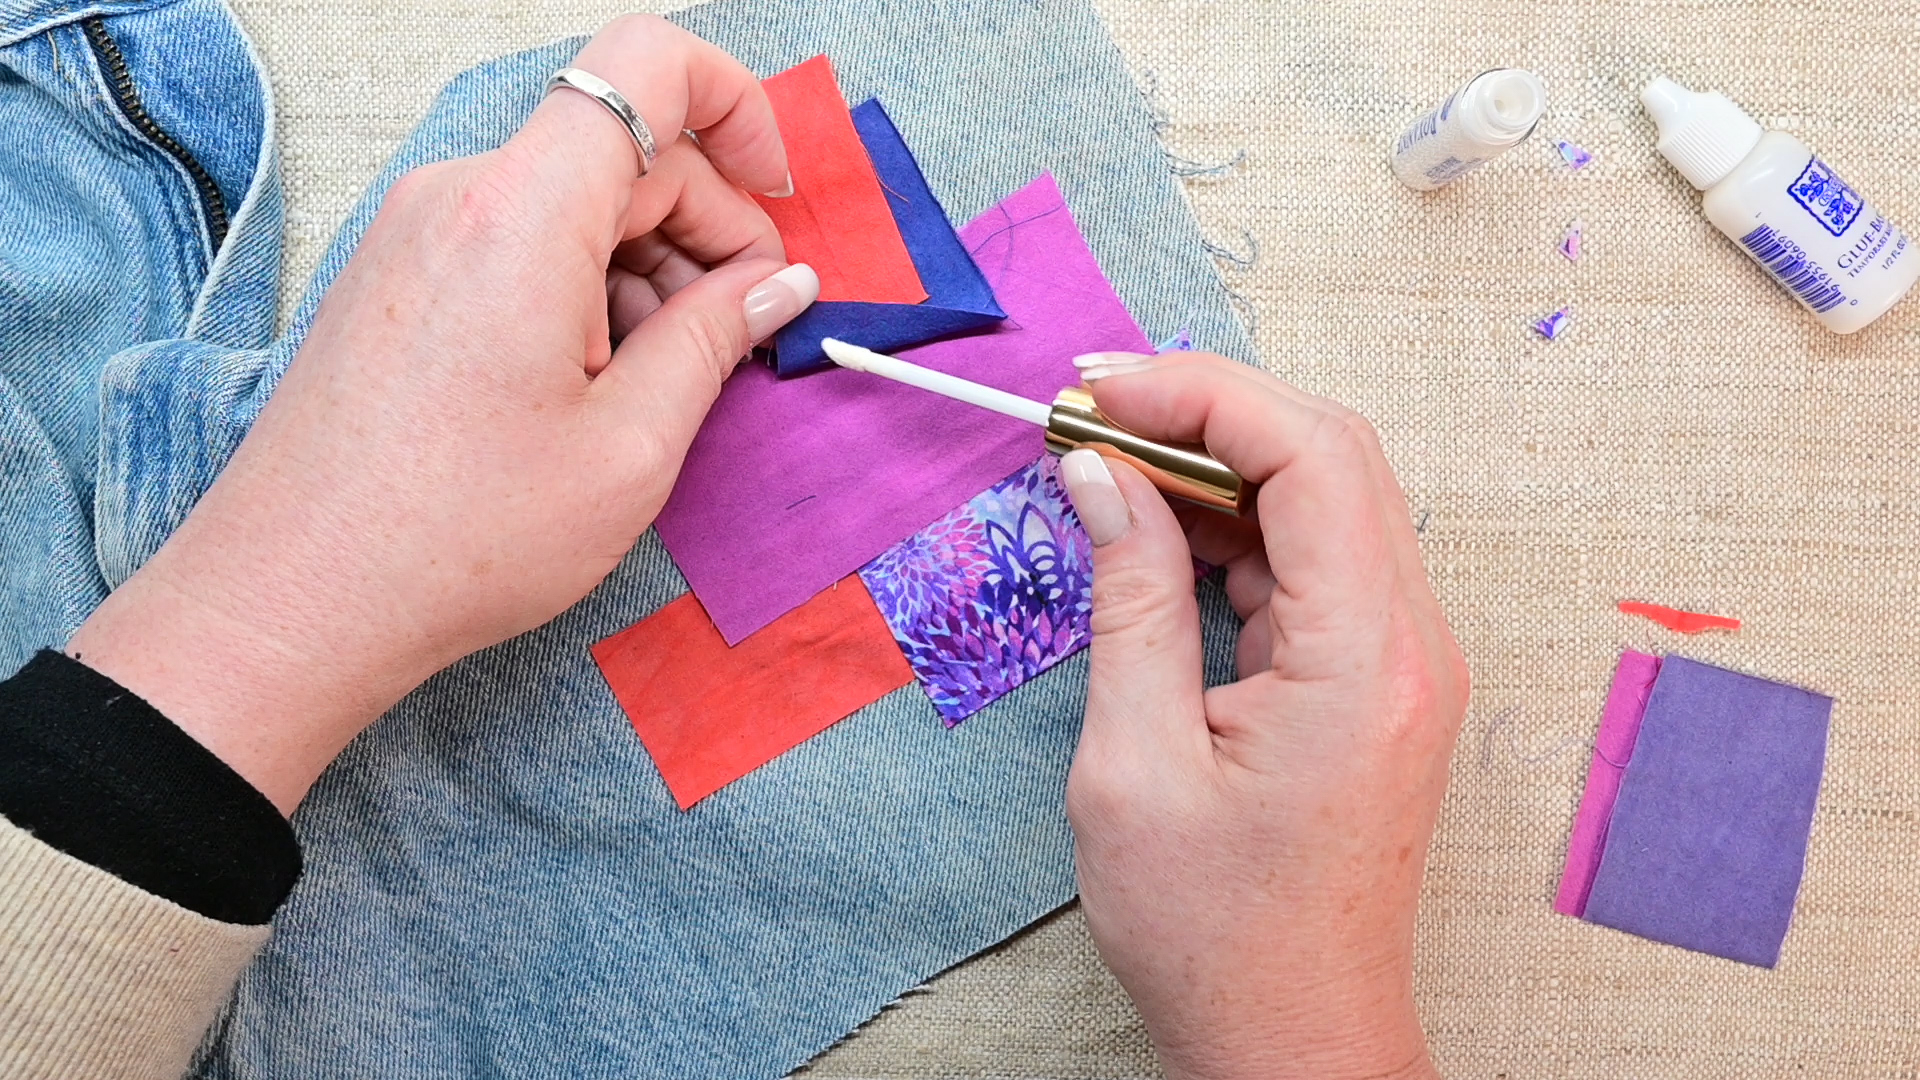
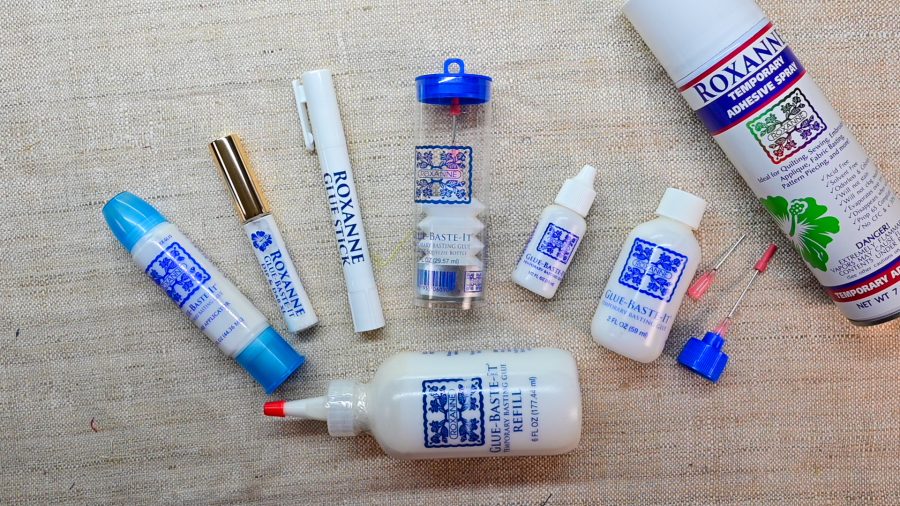
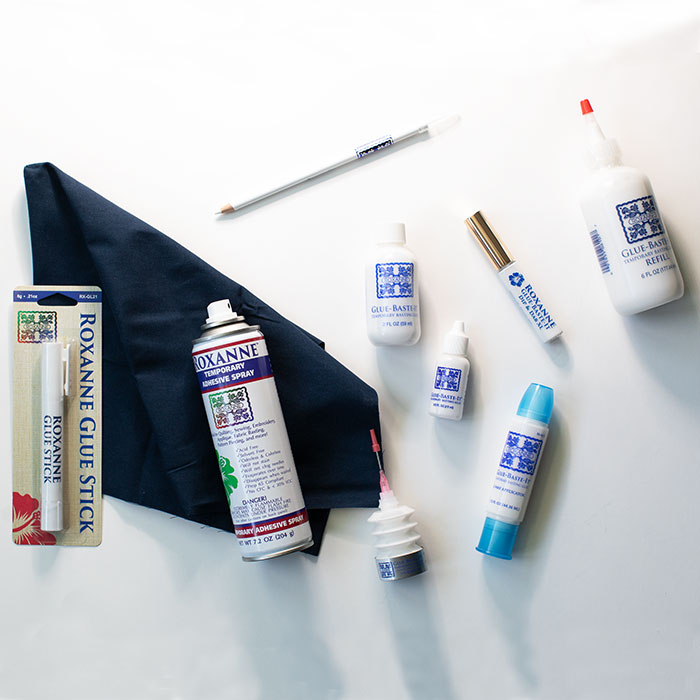
    Roxanne Baste-It comes in a wide variety of container sizes and shapes to suit any purpose. From the spreadable 2-Way applicator to small pipettes and dab on applicators. And the Roxanne Glue Stick glides on smoooooooooth as silk without gumming up your fabric and needles. You choose which glue is best for your project and where to place it.
  • Heat setting:
    Although not required, a hot dry iron can be used to quickly set the glue and further ensure there is no shifting once the placement decisions have been made. Once set, you can easily sew without worrying about shifting seams or fabrics, even when rough handling of the fabric such as for hand quilting, sashiko, and boro.
  • Portability:
    Baste-It products come in easy to store and access sizes. You can take your handwork projects with you whether you’re traveling across the city or just to your sofa for the evening
  • Basting Glue Benefits:
    Say good-by to pins! Baste-It glues reduce the need for pins and clips, making sewing faster and smoother. Especially hand sewing. No fussing to work around pins and no stuck fingers!

Improves accuracy and precision in piecing, especially for points and curves.

Especially well-suited for appliqué, where you need precise placement of fabric edges.

The Roxanne Glue Stick is our go-to for placing boro patches and visible mending patches prior to sewing down. Watch the boro section of our video for how we create boro inspired fabrics as well as some examples of our work.

Baste-It Glue won’t leave a mark on your delicate creations. All of the Roxanne glues are non-staining and wash away completely with ease!

How we use glue basting for different techniques:

  • Boro and Visible Mending:
    Boro Stitching
    Apply a thin layer of glue to the patch and adhere to base fabric, adjusting your placement as necessary. Then stitch down. We love the Roxanne Glue Stick because it glides on smoothly and the patches stay where we place them…until we decide we want them someplace else. Or… someplace else again. But then they stay put!
  • Quilt Binding and Bias Tape: After sewing on your binding to one side of the quilt, fold the fabric over the edge and apply a layer of glue. Press with a hot, dry iron to set, then hand stitch or machine sew the remaining seam down. No clips or pins needed; you don’t have to worry about that binding shifting. Our video features a no worries technique for making fabric tape with Roxanne Basting Glue.
  • Curved seams: Apply a thin line of glue along the curved edge, carefully folding and shaping the fabric edge.
  • Appliqué: Glue the edges of your appliqué piece to the base fabric, ensuring smooth edges and precise placement. Then use your favorite visible or invisible appliqué stitch for attaching. Be sure to watch the video for our tip for sharp corners on those appliqué pieces.

That’s all for now! Let us know if you want a recommendation for which glue is best for your project or share your favorites with us. And remember to check back for more about our fav products from Colonial Needle Company as well as projects and tutorials that show how we use this all-encompassing line of products in our studio.

Keep up with the Colonial Needle Company on their social media channels and YouTube.

You can find us at shannonandjason.com and on our Instagram and Facebook pages we are @embracethecreativechaos.

Which CNC products do YOU have questions about? Let us know and we might just feature your question in a future video or post.

Until then…STITCH ON!!

Shannon & Jason

A Sticky Subject: Roxanne’s Temporary Adhesive Spray

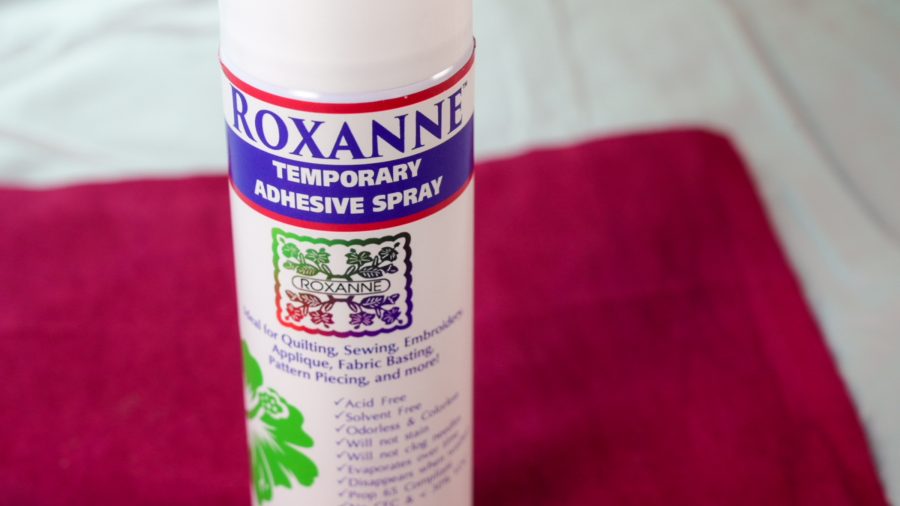
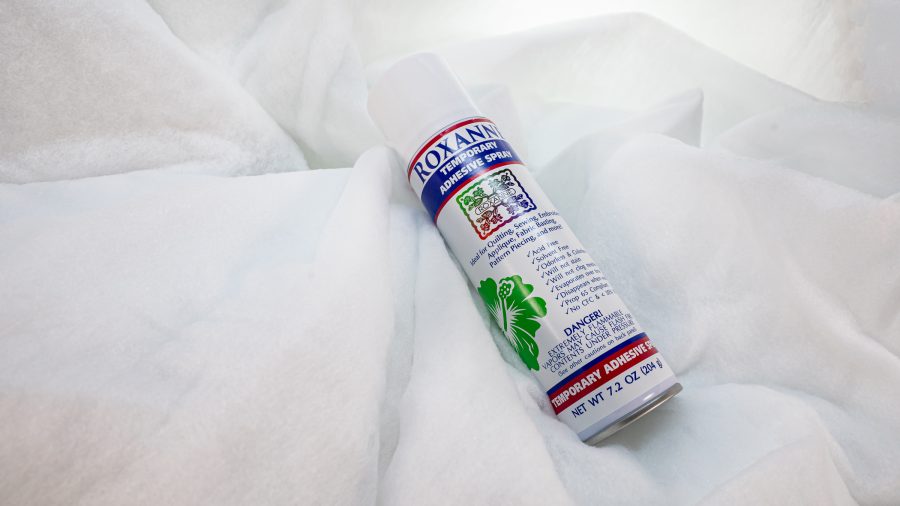
Greetings makers, crafters, and creators! Today, we’re diving into our Colonial Needle Company products to cover a sticky subject: Roxanne’s Temporary Adhesive Spray (see what we did there?), and why it is a must have for your projects.

Who are we?

Who are we you ask? We are Shannon and Jason… the DIY Duo behind shannonandjason.com.

Shannon is the creative driver behind our colorful escapades. Picture a project enthusiast and savvy artist with a penchant for pushing boundaries and a love for all things fiber. Shannon’s imagination knows no bounds, and her ability to blend history and art into fun and inspiring teaching moments will leave you wondering if she’s secretly a sorceress in disguise. (Spoiler: she is.)

And then there’s Jason, the yin to Shannon’s yang, the peanut butter to her jelly (or should we say, the pixels to her crochet hook?). Jason’s the backbone behind our chaotic adventures; a photographer/designer with a knack for turning ideas into reality. From photographing projects for our books and patterns, to machine sewing quilts, to sashiko embroidering garments, there’s never a dull moment as he dreams up the next beautiful thing to create.

We recently joined up with Colonial Needle Company to inspire you to delve into more creative endeavors with their FAB products. You’ll see a lot from us over the next year as we endeavor to educate, motivate, and inspire you to embrace your own creative chaos.

That’s us… now let’s talk about Roxanne’s Temporary Adhesive Spray.
Ah, Roxanne’s Temporary Spray Adhesive—AKA the secret sauce of the quilting world! Let’s dive into what makes this stuff so special, shall we?

What makes Roxanne’s Adhesive’s so special?

Let’s face it—for quilters, pinning layer upon layer of fabric while making a quilt sandwich is like playing a game of “Don’t Poke Your Fingers” on expert mode. And surface design projects can be fussy and a sticky mess with other types of glue…don’t get us started on having to pin some of those details into place. Enter Roxanne’s Temporary Adhesive Spray, the new superstar of your maker toolkit! No more wrestling with prickly pins or risking a gloopy glue mess. Just a spritz here and a spray there, and voila! Your quilt layers and applique are bonded like lifelong friends at a quilting bee.

What are the benefits of Roxanne’s Temporary Adhesive Spray?

  1. Temporary Hold: Imagine having the power to hold fabric together like a boss, but with the freedom to change your mind if the creative mood strikes you… as we are all prone to do. Roxanne Temporary Spray Adhesive gives you just that—temporary bonding for your fabric layers and threads so you can adjust, readjust, and re-re-re-adjust to your heart’s content.
  2. Low Odor: Ah, the sweet smell of success—minus the overpowering chemical stench. This is a big one on our list! Our spaces are small and, although we have plenty of windows, we don’t dare use some of these glues indoors and NEVER use the old style aerosols in the house. Fortunately, we don’t have to run out back to the garden for smaller projects or even larger wall hangings that we are assembling on the dining room… umm… studio floor. Roxanne’s low odor formula allows us to work without feeling like we are going to pass out from fumes that come with other spray adhesives. Disclaimer from the product packaging: this is still an aerosolized glue, so we always wear a mask when using it.
  3. Non-Staining Formula: We’ve all experienced those nightmare moments when a little adhesive turns into a big ol’ nasty stain on our quilt, silk applique, or antique lace. But fear not, intrepid makers! Roxanne won’t leave a mark on your delicate creations. The non-staining formula means you can spray with confidence knowing your fabrics and materials will stay pristine and stain-free. We always tell folx to test your fabrics first to make sure any adhesive isn’t going to stain and we personally did the over-use test on different fabrics for an applique project and it did not leave a single blotch. One less thing to stress about so we can concentrate on the creativity part.
  4. Versatility: From quilting and sewing to embroidery, applique, and surface design (and probably a few we haven’t even thought of yet… give us time), Roxanne is your go-to product for all things fabric-related. Need to baste a quilt? Roxanne’s got you covered. Want to tackle a craft project? Roxanne’s ready to roll. We have started using it for some of our boro and sashiko projects and love how quickly the glue sets (and the fact that we don’t have to go outside to use the spray). There are a LOT of options in the Roxanne line of glues and we will get to those in time so be sure to check them out. Really… there is something for every project. The particular basting spray has been a life saver for us for garments, quilts, and surface design work.
  5. Easy Application: Say goodbye to fumbling with pins and hello to a much easier way to work with this aerosol spray! Roxanne’s easy application means you can baste your quilt (and other projects) with precision and speed, leaving you more time to focus on the fun stuff—like picking out your next fabric obsession… just us? We thought not! We throw down an old sheet to protect our work surface (like we did in the video) and we’re off and running. Even in the case of a little overspray, a damp sponge was all it took to clean off our surfaces including a wood floor and our cutting table. Easy application, easy clean up… because the creative process isn’t always so neat and tidy.

What’s the bottom line?

The bottom line is: we are grateful there is this option for a temporary spray adhesive that doesn’t gas us out of our house and has such a beautifully fine spray that we can decide exactly how much to apply for different styles of projects. Our recommendation is to keep a few around for different projects. We used about one can for an oversized king-sized quilt and can do quite a few wall hangings and garment projects with a single can. We have four cans on the shelf right now because no way, no how, do we want to be struck by inspiration and not have this gem on hand.

That’s all for now but be sure to check back for more about our fav products from Colonial Needle Company as well as some projects and tutorials that reflect how we use this all-encompassing line of products in our studio. Keep up with it all on the Colonial Needle Company social media channels and YouTube. You can find us at shannonandjason.com and on our Instagram and Facebook pages we are @embracethecreativechaos. Which products do YOU have questions about? Let us know and we might just feature your question in a future video or post. Until then…

STITCH ON!!
Shannon & Jason

You can find Shannon and Jason’s tutorial on how to use Roxanne’s Temporary Adhesive Spray to make a quilt sandwich on our YouTube channel here. Don’t forget to subscribe so you’re up-to-date on all our latest reviews and tutorials!