The Right Tool for the Stitch: Denim, Canvas & Heavy Fabrics

Needle Know-How from Colonial Needle

There’s something satisfying about working with a substantial fabric.

Denim, canvas, upholstery fabrics, and other heavyweight textiles are durable, versatile, and often made for things we use every day. They’re the fabrics of favorite jeans, hardworking bags, sturdy jackets, and projects designed to last.

But anyone who’s tried to push a needle through several layers of denim knows that heavier materials can present a few challenges.

The good news? You don’t necessarily need more strength. Sometimes you just need a better-matched needle.

This month, we’re exploring how needle choice can make working with heavier fabrics easier, more comfortable, and more successful—whether you’re repairing a favorite pair of jeans or constructing something new.

The Stitching Scenario

Heavyweight fabrics appear in all kinds of projects:

  • Denim repairs and visible mending
  • Canvas totes and utility bags
  • Jackets and workwear
  • Upholstery and home décor
  • Heavy fabric appliqué
  • Decorative stitching on denim
  • Projects with multiple layers, seams, or reinforced areas

These projects have something in common: the needle must work through material that can be thicker, denser, or more resistant than ordinary quilting cotton.

But not every heavyweight fabric behaves the same way.

Denim is generally a tightly woven twill. Canvas is often a sturdy plain-weave fabric. Their structure, weight, and finish can all influence how easily a needle passes through.

Understanding the material is the first step toward choosing the right tool.

The Common Challenges

When sewing heavier fabrics, you might encounter:

  • Needles that are difficult to push through
  • Bent or broken needles
  • Thread fraying or breaking
  • Uneven or skipped machine stitches
  • Fabric puckering
  • Difficulty stitching through bulky seams
  • Hand fatigue
  • Visible holes from oversized needles

These problems don’t always mean your technique is wrong.

Sometimes your needle is simply not well suited to the material, thread, or number of layers.

Why the Right Tool Matters

Start with the Point

When sewing tightly woven denim or canvas, the needle generally needs to pierce the fabric rather than pass between existing openings.

A sharp, appropriately sized needle helps penetrate the material with less unnecessary resistance.

For hand stitching, that may mean selecting a sturdy sharp-point needle suited to the thread and fabric.

For machine sewing, a purpose-designed jeans or denim needle is often an excellent starting point.
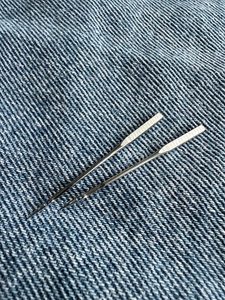
But remember: needle choice isn’t just about sharpness. The needle’s diameter, construction, and eye matter, too.

Consider the Needle’s Strength

A very fine needle may struggle with dense fabric or several layers, particularly at bulky seams.

Choosing a sufficiently sturdy needle can help reduce excessive flexing and breakage.

However, bigger isn’t automatically better.

An unnecessarily large needle can leave visible holes or damage the material. The goal is to choose the smallest needle that can comfortably and reliably handle the fabric and thread.

Don’t Forget the Thread

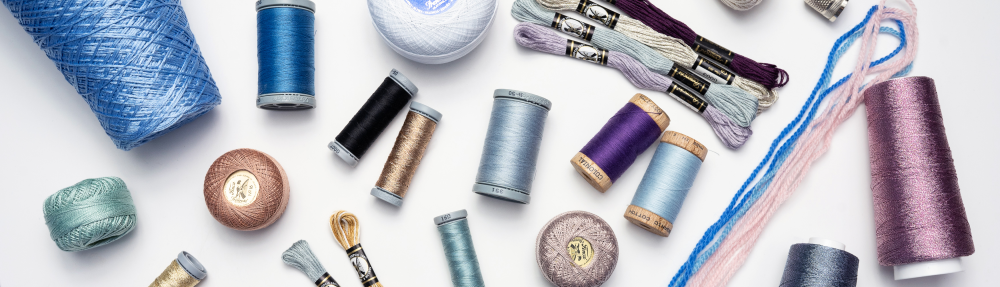
Heavy fabrics are often paired with heavier threads, particularly for topstitching, repairs, and decorative work.

The needle eye must accommodate that thread without excessive friction.

For hand stitching with perlé cotton or another heavier decorative thread, a chenille needle may be useful because it combines a sharp point with a generous eye.

For machine sewing with heavier topstitching thread, a suitable topstitch needle may sometimes be preferable to a standard jeans needle, depending on the thread and machine.

The right combination matters more than the label on the needle package.

Our Recommendation: Match the Needle to the Job

For Machine Sewing: Jeans Needles

Jeans machine needles like these from John James are designed for working with dense, tightly woven fabrics such as denim and canvas.
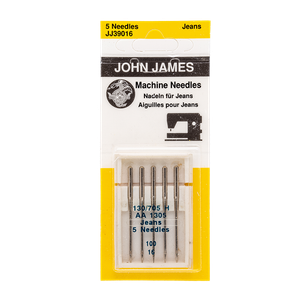
John James Jeans Machine Needles packaging

Their reinforced construction helps provide stability when penetrating heavier material.

They’re particularly useful for:

  • Denim garment construction
  • Jeans repairs
  • Canvas bags
  • Heavy seams
  • Workwear projects

Needle size matters, too.

For many domestic sewing machines, sizes such as 90/14, 100/16, and 110/18 are commonly considered for medium-heavy to heavy materials, depending on the fabric, thread, and machine’s capabilities.

Always check your machine’s needle compatibility and recommended sizes.

Pro Tip: When approaching a bulky seam, slow down. Use a suitable presser-foot leveling tool if needed, and avoid forcing the fabric through the machine.

For Hand Sewing: Sturdy Sharps and Specialty Needles

Hand sewing heavy fabrics requires a slightly different approach.

A sharp-point needle that is strong enough for the fabric can help with repairs, construction, and finishing.

For especially dense materials, consider needles specifically intended for heavier hand-sewing applications.

A thimble can also make a significant difference by helping you push the needle without placing unnecessary pressure on your fingertips. These fingertip thimbles are especially great because you have access to different types for different projects.
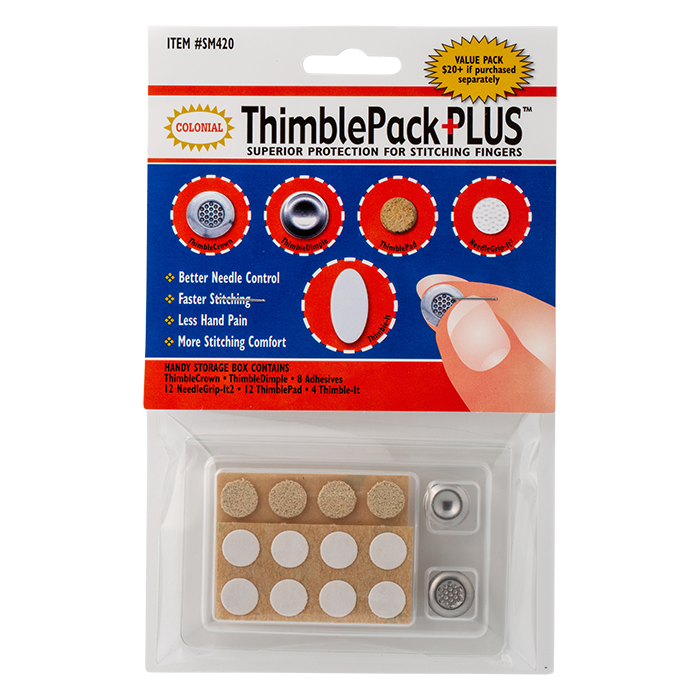
For difficult areas, a needle puller may help you grip and draw the needle through without excessive strain.

Never force a bending needle; stop and reconsider the needle, fabric, and number of layers.

For Decorative Stitching: Chenille Needles

If you’re adding embroidery, blanket stitch, or visible-mending details to denim or canvas, your thread may be considerably thicker than ordinary sewing thread.
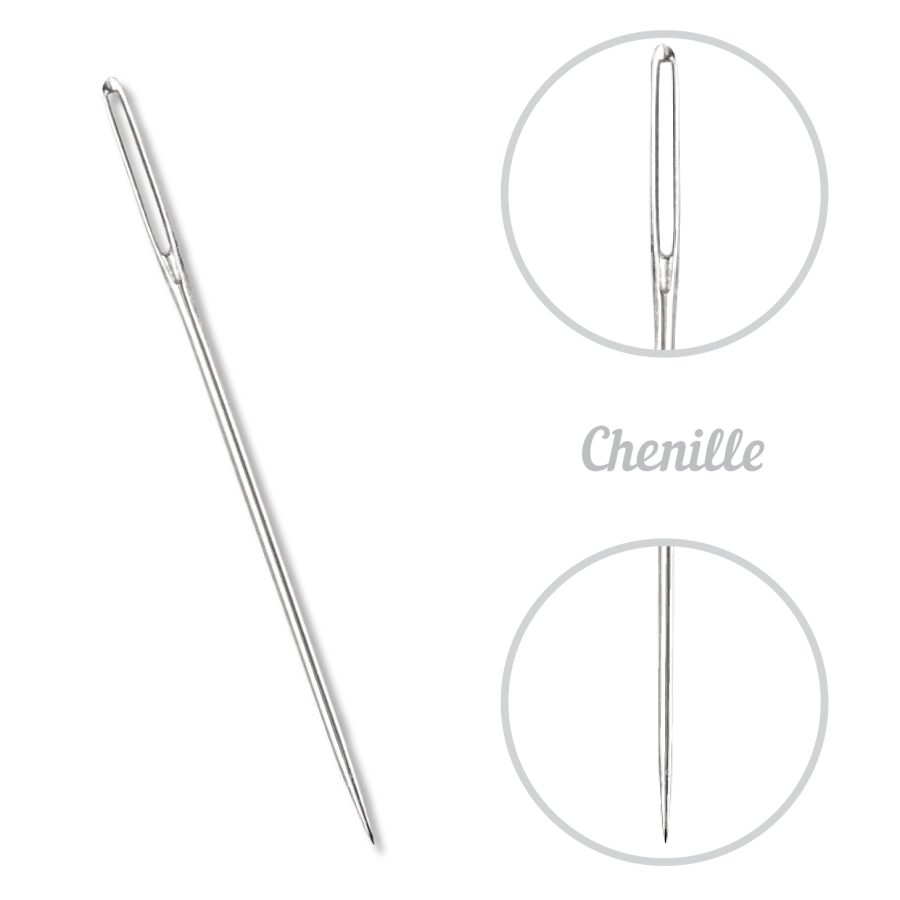
chenille needles

Chenille needles offer a useful combination:

  • A sharp point for piercing woven fabric
  • A larger eye for accommodating thicker decorative threads
  • A range of sizes for different fabric and thread combinations

They’re worth considering for visible repairs using perlé cotton and other decorative fibers. You can shop them here.

Of course, the best size will depend on the specific material and thread.

Pro Tip: Test the Thickest Part First

Here’s a simple habit that can save a lot of frustration:

Don’t test your needle only on a single, flat layer of fabric.

If your project includes folded seams, patches, hems, or reinforced areas, make a sample that includes those layers.

A needle may work beautifully through one layer of denim but struggle where several layers overlap.
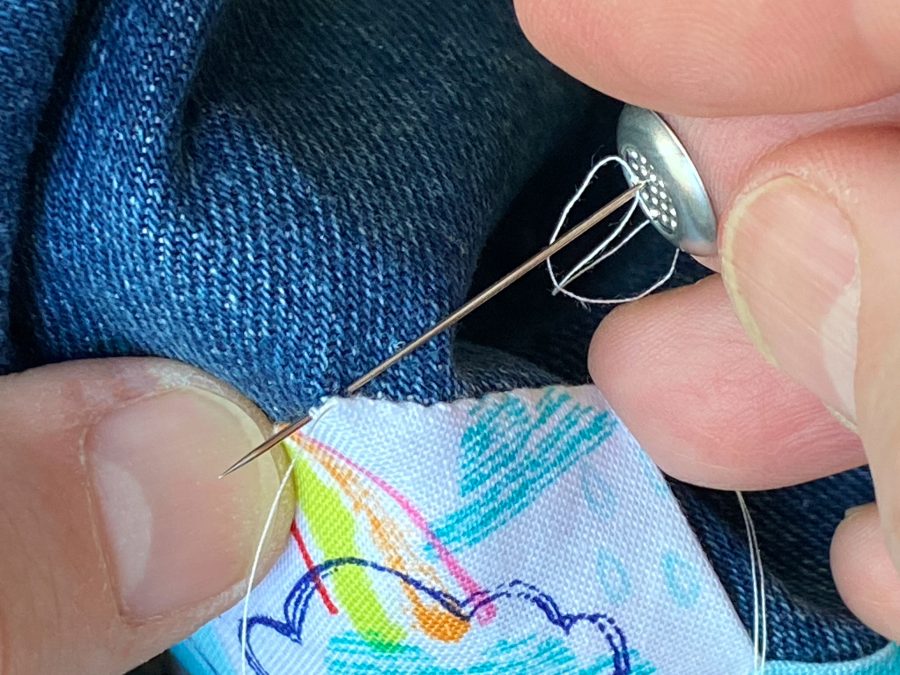
Testing the thickest area helps you identify potential problems before reaching that point in the finished project.

Pay attention to how the needle moves, how the thread behaves, and whether the fabric shows unwanted distortion.

When to Change Your Needle

Sometimes the right needle becomes the wrong needle simply because it’s worn.

Dense fabrics can be demanding on needles, especially during longer projects.

Consider replacing your needle if you notice:

  • New difficulty penetrating the fabric
  • Snagging or damaged threads
  • A visibly bent needle
  • A damaged or dull point
  • Unexplained changes in machine stitch quality

A fresh needle is a small investment that can make a noticeable difference.

Reader Takeaway: Work Smarter, Not Harder

When working with denim, canvas, or other heavyweight fabrics:

✔ Choose a needle designed for the material and technique.

✔ Consider the fabric’s density, not just its thickness.

✔ Match the needle eye to your thread.

✔ Use a sturdy needle without automatically choosing the largest size.

✔ Test your needle through the thickest part of the project.

✔ Slow down around bulky seams and reinforced areas.

✔ Replace worn or damaged needles before they cause problems.

And remember:

If you’re fighting the fabric, reconsider the needle before applying more force.

The right tool won’t eliminate every challenge, but it can make heavyweight stitching much more enjoyable.

Looking Ahead

Next month in The Right Tool for the Stitch, we’ll turn our attention to handmade gifts and the tools that help bring thoughtful, personal projects to life.

Until then, don’t shy away from those sturdy fabrics. With the right tools and a little preparation, even challenging materials can become some of your most rewarding projects.
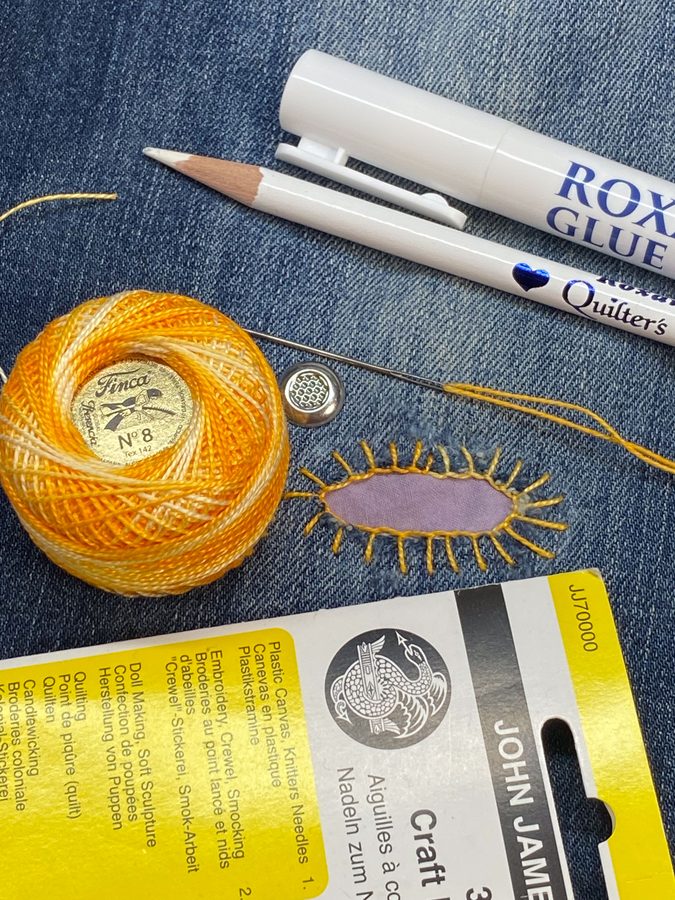
Mishap to Masterpiece: A Blanket Stitch Patch to be Proud of.

How to Patch Jeans with Blanket Stitch for a Durable, Decorative Repair

Colonial Needle Company Blog  |  By Shannon & Jason

Let’s talk about knees. Specifically, the knees of your favorite jeans. You know the pair. They fit like they were made for you, they’ve been broken in for years, and then one day you look down and there it is. A hole. Maybe it started as a thin spot. Maybe there was a sidewalk incident we don’t need to discuss. Either way, the once faithful fabric in the area of the knee has given up, and you’re left wondering if it’s time to say goodbye.

But wait! The is not the time to bid farewell to those beloved jeans. Not even close.

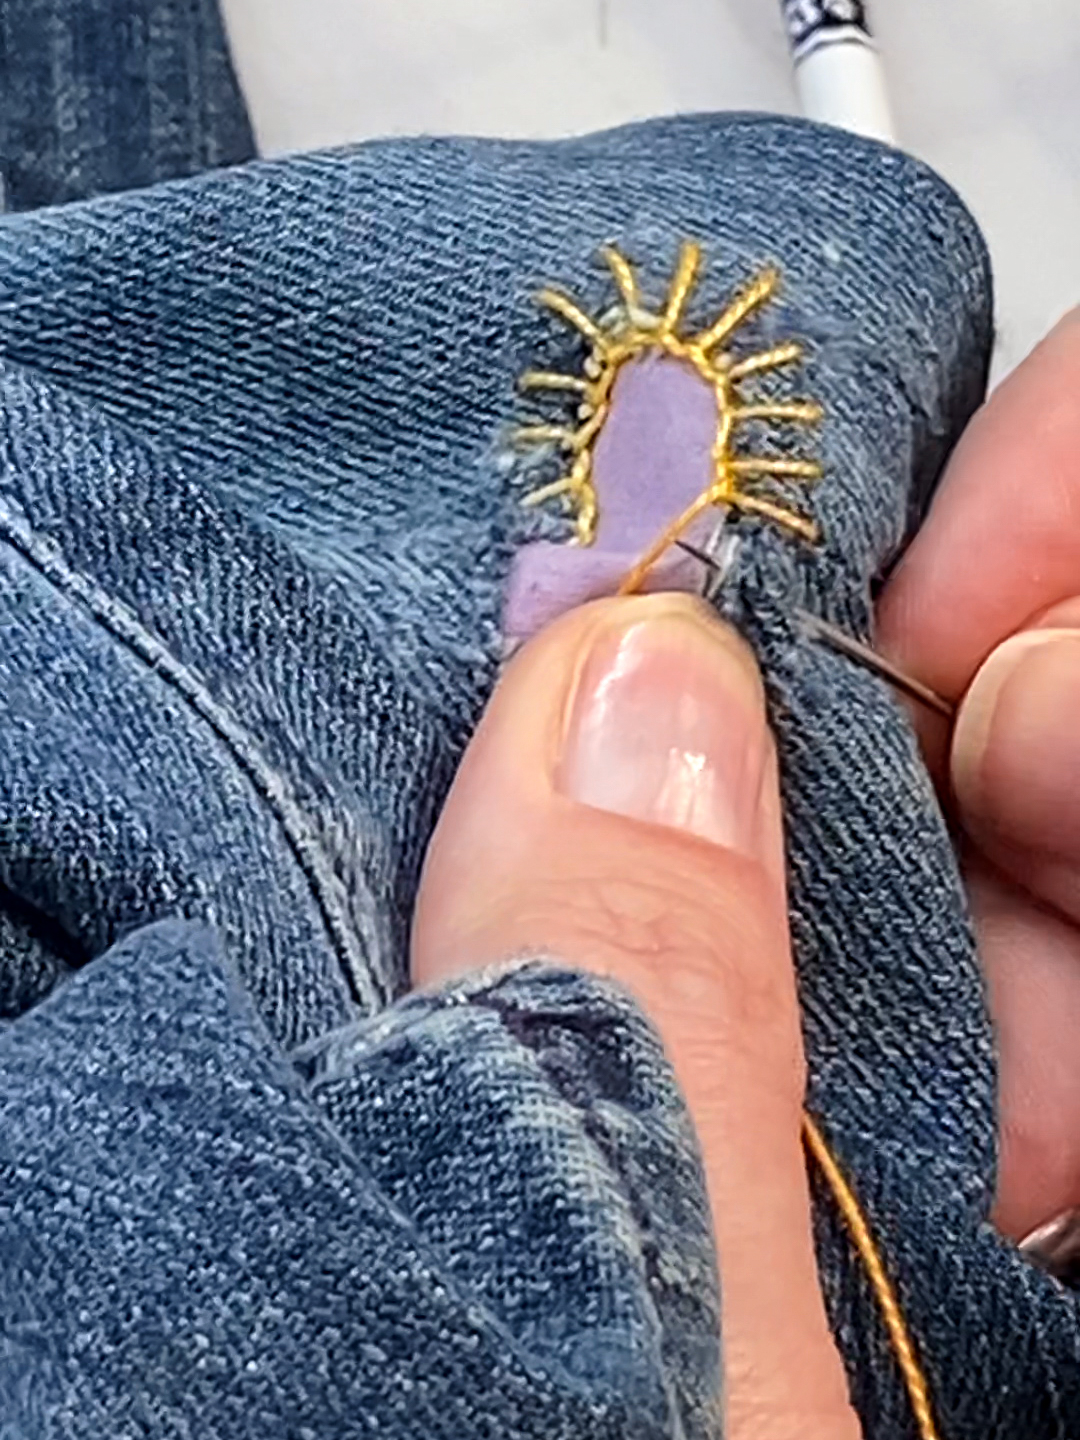
This month we’re patching a torn knee (or any other area of general wear and tear) with one of the hardest working hand stitches out there: the blanket stitch. And we are not hiding this repair…we’re framing it like a work of art in a museum. A pop of vibrant fabric peeking through the hole, a ring of bold perlé cotton around the edge, and suddenly the hole is the best part of the jeans. We’ll take that textile mishap and turn it into a masterpiece!

One Stitch, Two Jobs

Here’s what makes the blanket stitch such a clever little stitch. When you patch a hole, you actually have two problems to solve. First, the patch needs to be attached and second, the edge of the denim around the hole is raw, and raw edges fray. Leave it alone and that hole runs the risk of creeping outward every time you bend your knee. Now, that said, we love a good frayed edge but, for this patch, we’re going to let the perle cotton take center stage.

The blanket stitch handles both at once. The straight part of each stitch goes down through the denim and the patch, anchoring them together. The loop at the top of each stitch wraps over the raw edge of the hole, holding those cut threads in place so they stop unraveling. One stitch, two jobs. We do love an overachiever!

“Can’t I Just Use an Iron-On Patch?”

We hear this one every time we talk about hand stitched mending, and it’s a fair question. For some things, iron-on patches are fine. Play clothes that will be outgrown by spring? Go for it, no judgment here.

But in our studio experience, iron-on patches tend to lift at the corners on spots that flex all day, like knees and elbows, and they stiffen the fabric right where you need it to move. A hand stitched patch bends with you. It can be removed or replaced down the road if you want to change things up. And honestly? It looks a whole lot better.

Visible on Purpose

There’s a long and wonderful tradition of mending that doesn’t try to disappear. Visible mending says, “Yes, this was torn, and yes, someone cared enough to fix it.” We think that’s worth showing off.

This is the perfect place for that fabric scrap you love too much to let go of, and the thread color you’ve been saving for something special. A bright floral behind dark indigo? Gingham? A little piece of a favorite shirt that finally wore out? All yes! The patch sits behind the hole, so whatever you choose shows through like a window, and the blanket stitch becomes the frame around it.

What You’ll Need

  • Jeans or any garment with a hole. Ours had a torn knee, but this works on elbows, pockets, tote bags… if it has a worn spot or a rip, grab it and patch it up.
  • Fabric for the patch. Solid or patterned, your call. Since it shows through the hole, pick something you’ll enjoy looking at.
  • Presencia 8 weight perlé cotton. A twisted, non-divisible thread with a lovely sheen and enough body to wrap a raw denim edge and stand out against it. Contrast is your friend here.
  • John James embroidery needle. The sharp point gets through denim, and the long eye makes threading perle cotton a lot less fussy.
  • Thimble Crown. Stainless steel with a dimpled surface and a raised edge that keeps the needle from slipping. It sticks right to your finger with an adhesive pad, which means Shannon gets to keep her manicure. (Longtime readers know how we feel about this little thing. If you missed it, catch up [here].)
  • Roxanne Glue Stick. Water soluble and acid-free. It holds the patch in place while you stitch, so you can skip the pins.
  • Roxanne Quilter’s Choice White Marking Pencil. Pure chalk and water soluble, it shows up crisp on dark denim, which is exactly what you want for a stitching guide.
  • Scissors and an iron.

Let’s Stitch!

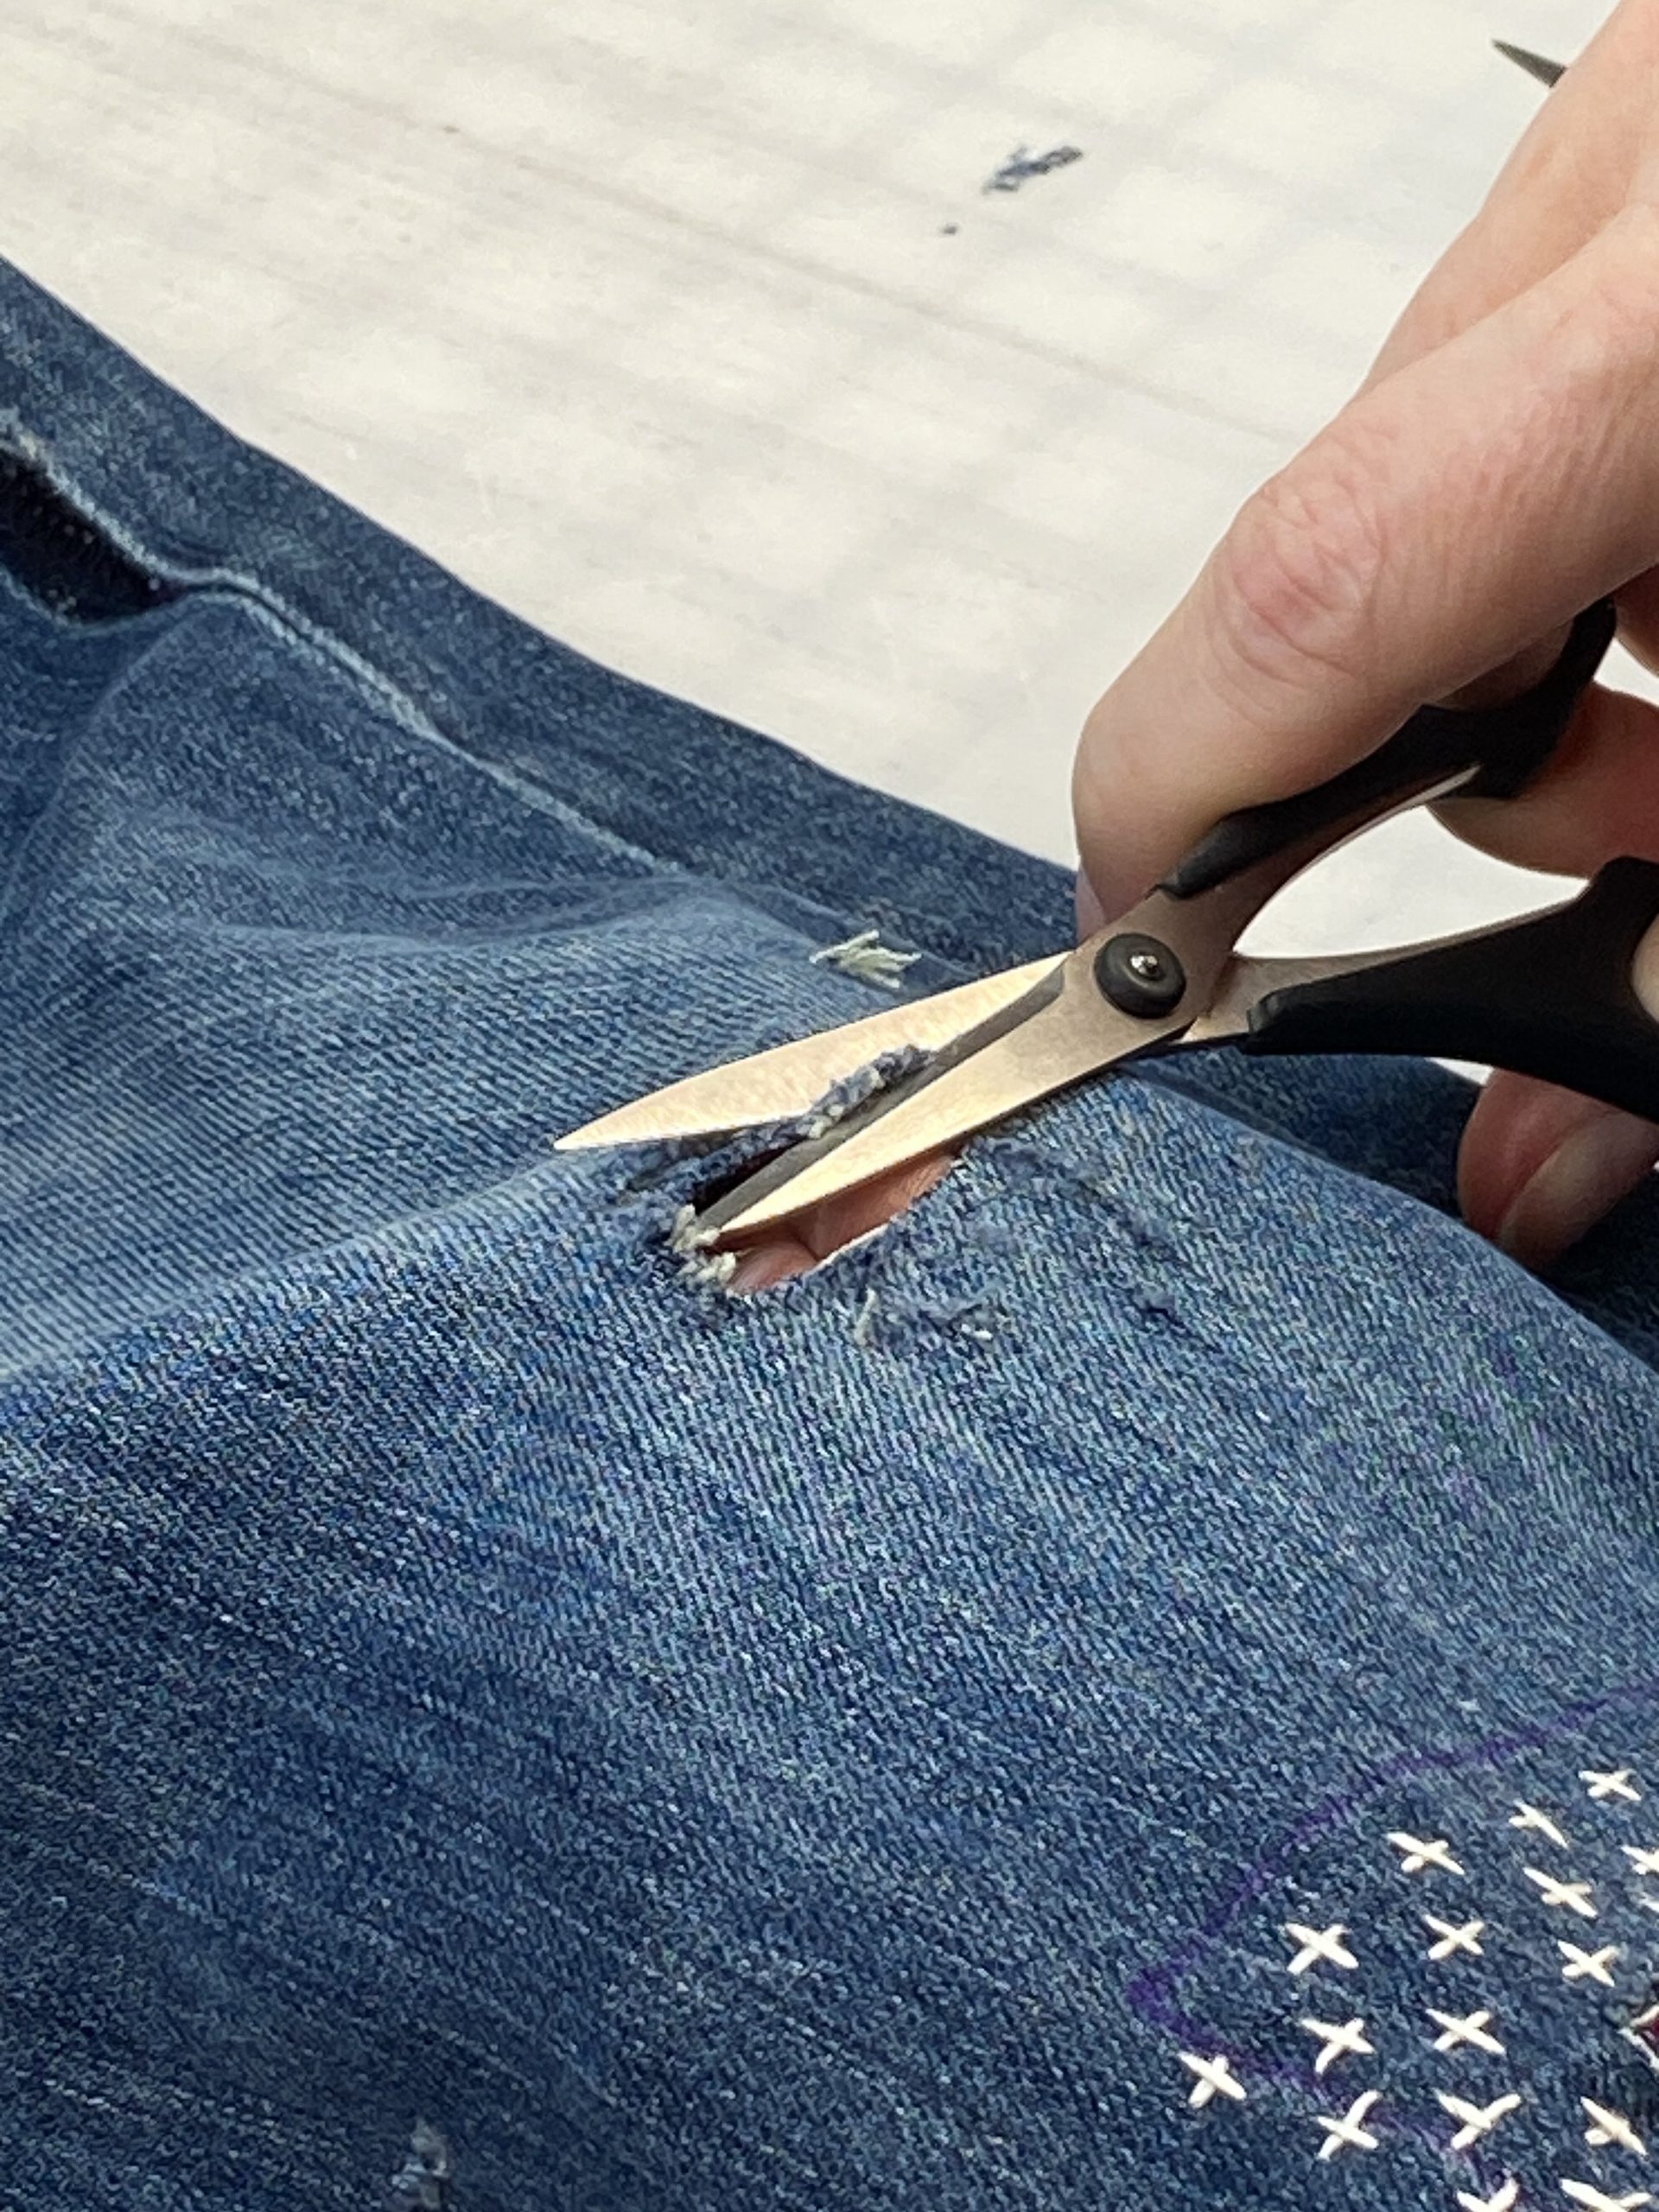
Step 1: Tidy Up the Hole

Scissors trimming loose threads

Trim away the loose, stringy threads hanging into the opening so you have a clean edge to stitch around. Don’t try to turn it into a perfect circle or square. Keep the shape your jeans gave you. It’s part of the story.

Step 2: Cut Your Patch

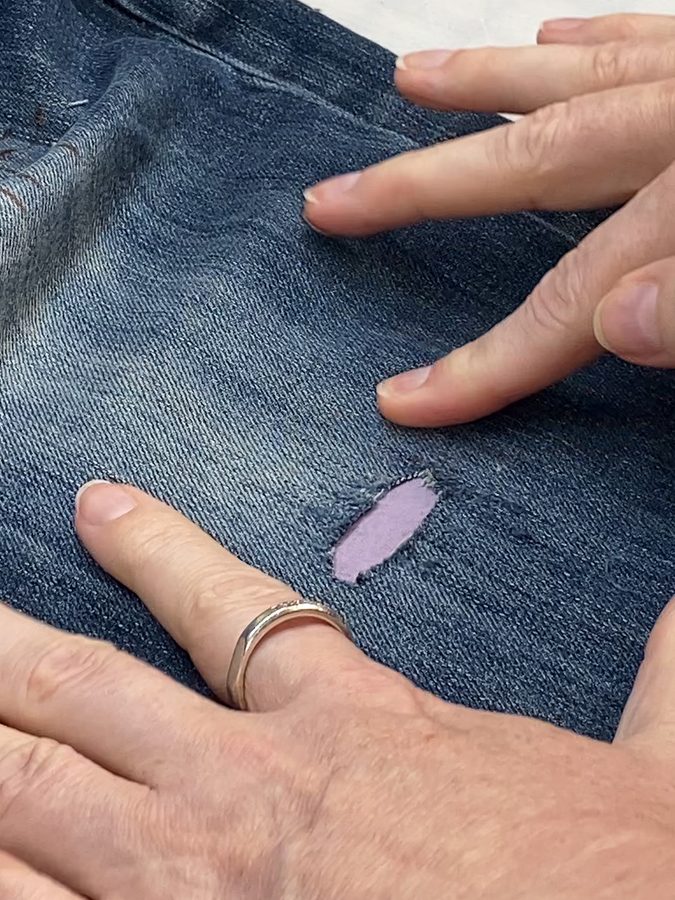
Cut your patch fabric about 1″ larger than the hole on all sides. That extra inch gives your stitches plenty to hold on to, and anything you don’t need gets trimmed away at the end.

Measuring fabric

Step 3: Glue It in Place

Gluing fabric in place

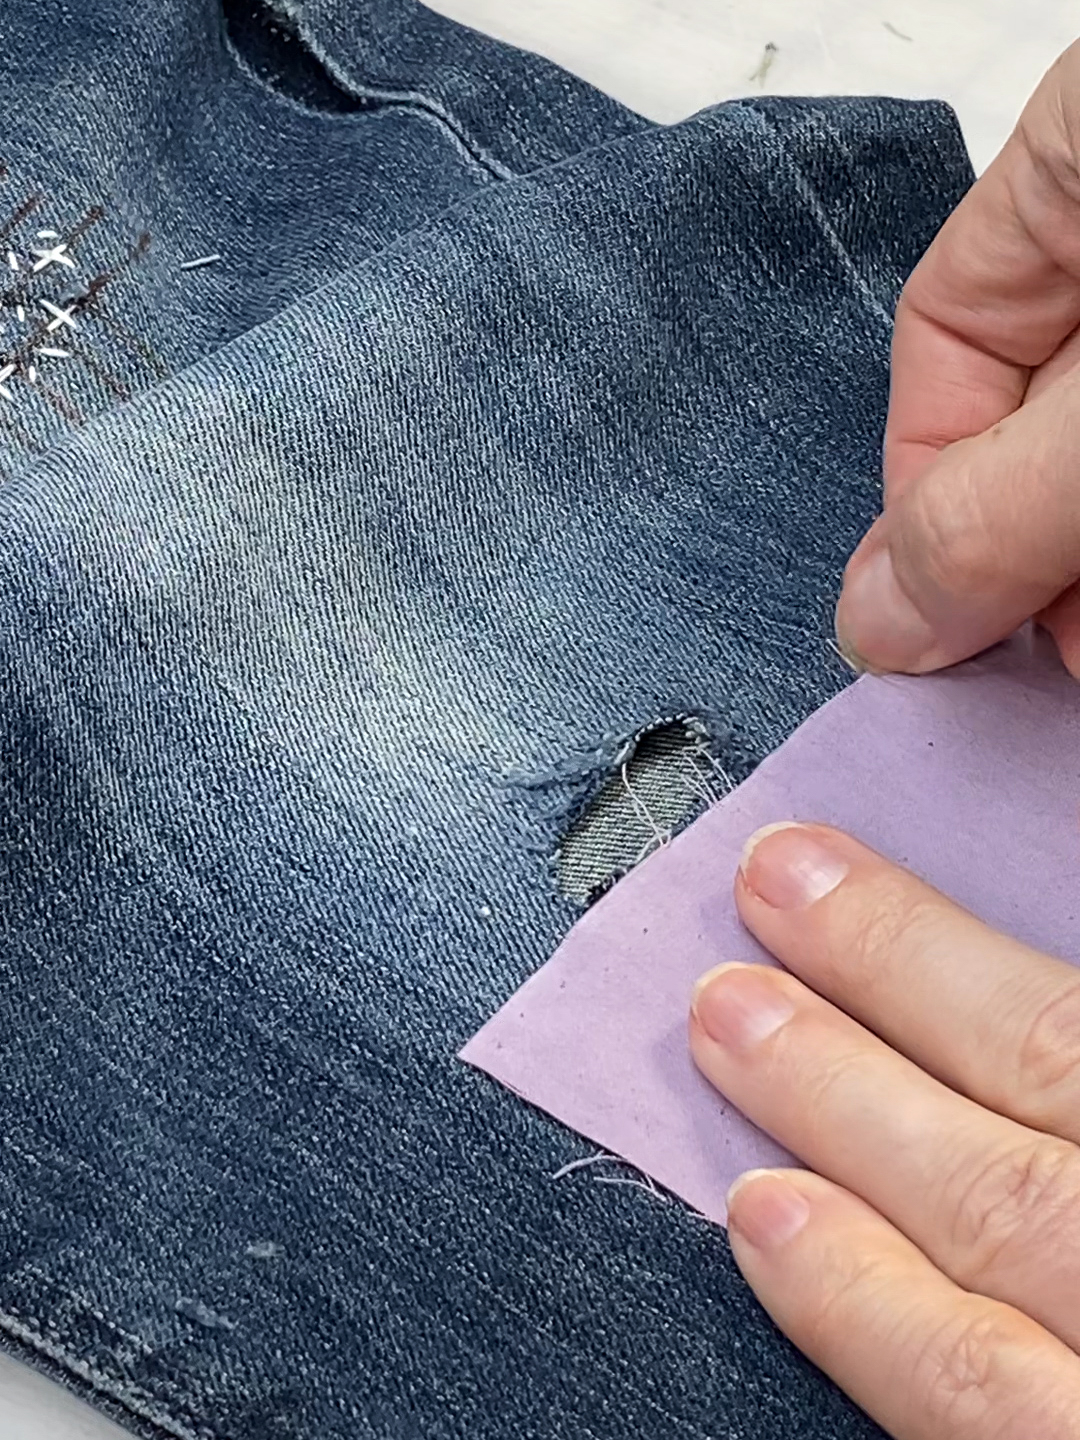
Turn the jeans inside out or reach up inside the leg. Before you glue anything, slide a piece of cardboard inside the leg. Trust us, you do not want to glue the front of your jeans to the back.

Run the Roxanne Glue Stick around the hole on the wrong side of the denim, then press the patch in place with its right side facing the hole. That way, the side you love is the side that shows.

Step 4: Heat Set

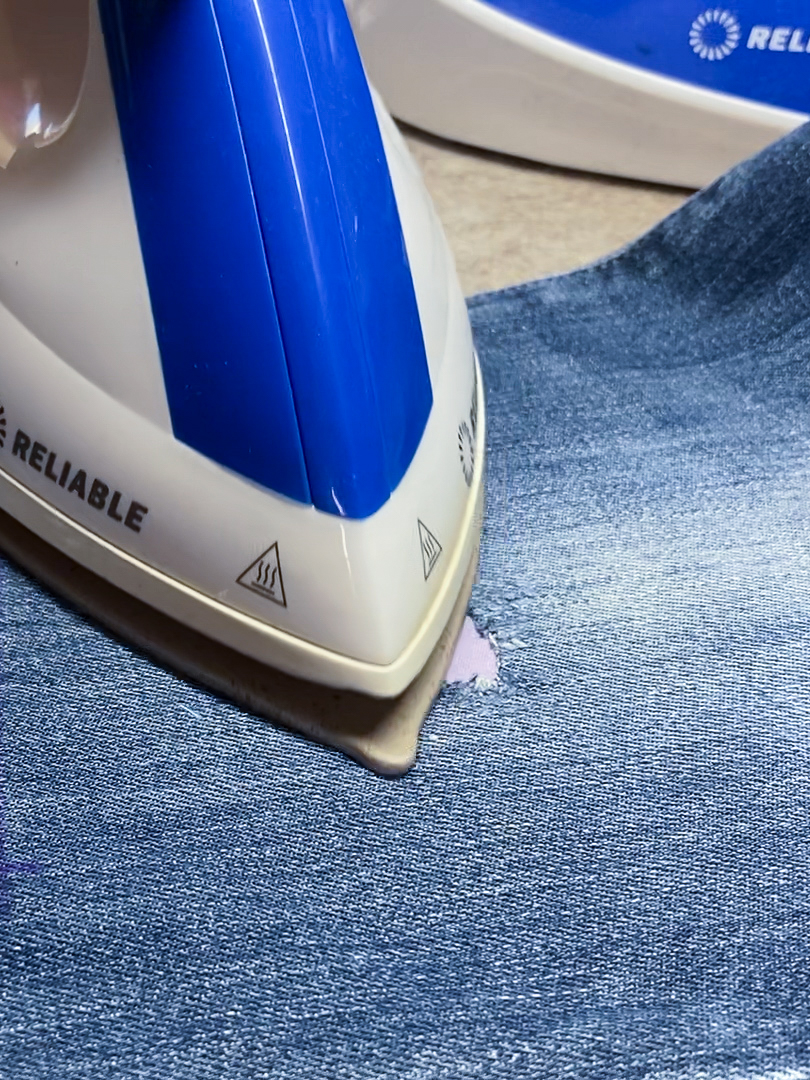
Give the patch a quick press with a dry iron. The heat sets the glue so the patch stays put while you stitch. Skip the steam here. The glue is water soluble, and moisture can soften it before it has a chance to set.

In our studio, this little step is the difference between stitching through denim feeling fiddly and feeling easy. No pins poking you. No layers sliding around. Just you, your needle, and a patch that stays exactly where you put it.

Step 5: Mark Your Stitching Line

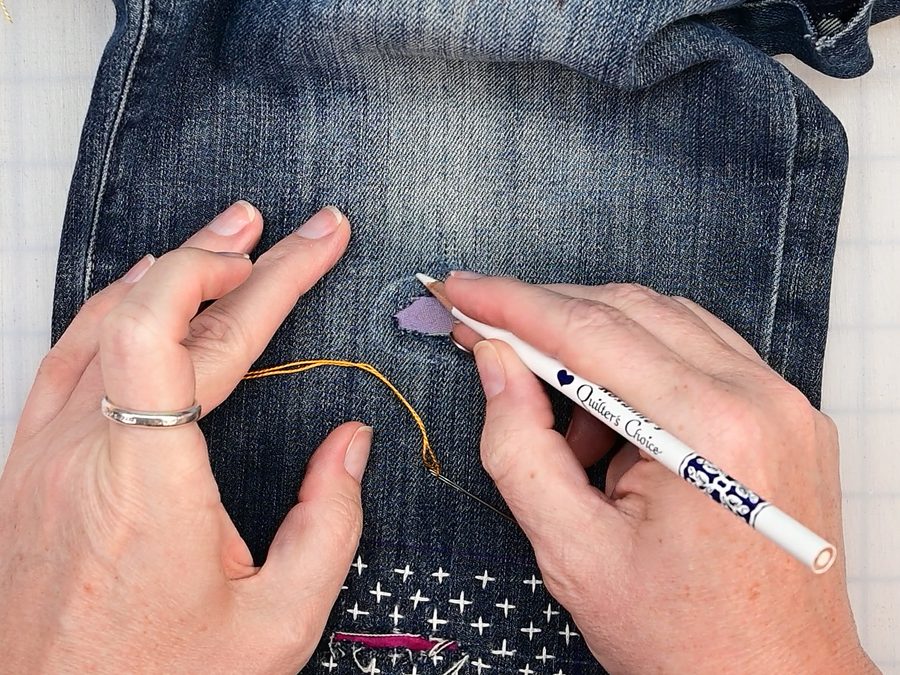
Use the white marking pencil to draw a line all the way around the hole, about 1/4″ back from the edge. This is your guide for stitch depth. Every stitch goes down on that line, so even if your hole is wonky (and let’s be real, it probably is), your stitches stay consistent all the way around. Bonus: the pencil mark is water soluble, so it rinses away when you’re done.

Step 6: Blanket Stitch Around the Hole

Thread your needle with about an arm’s length of perle cotton and knot the end. Then:

  1. Bring the needle up from the back, right at the edge of the hole.
  2. Go down on your pencil line, through both the denim and the patch.
  3. Come back up just inside the opening, through the patch, with the working thread looped under the needle tip.
  4. Pull through snugly. Watch the thread wrap over the raw edge. That’s your first blanket stitch!
  5. Move over about 1/4″ and repeat, working your way around the hole.

A few things we’ve learned along the way:

  • Snug, not tight. Denim at the knee needs to move. Pull your stitches too hard and the patch will pucker. If you are patching a different area or stitching through a lighter weight fabric, make sure your thread tension matches the fabric so the finished patch doesn’t pucker or pull at the surrounding area.
  • Mind the curves. Around tighter curves, take slightly smaller steps between stitches so the loops stay snug against the edge.
  • Let the thimble do the pushing. Denim plus a patch is two layers, and denim pushes back. Your fingertip will thank you.
  • Running out of thread? Take the old thread to the back and knot it. Start your new length by coming up inside the last loop and carry on like nothing happened.

Step 7: Close the Circle and Tie Off

When you’ve stitched all the way around, slip the needle under the loop of your very first stitch to connect the end to the beginning. Take the thread to the back, weave the tail under a few stitches before tying a knot and trimming the tail.

Step 8: Trim the Excess

Turn the jeans inside out and take a look. If there’s a lot of extra patch fabric beyond your stitching, trim it back, leaving about 1/2″. That keeps the inside of the knee smooth and comfy to wear.

Caring for Your Mend

Both the Roxanne glue and the chalk marks are water soluble, so they’ll come out in the wash. Just wash your jeans the way you normally would. If you like to baby your mends (we see you), turn the jeans inside out first but the Presencia Perle Cotton is strong enough to stand up to a lifetime of washes,

Every Hole Is an Invitation

Mending is one of the most quietly rebellious things you can do with a needle and thread. Every patch says this garment is worth keeping, and so is the time you spend on it. We call this way of thinking Wardrobe Architecture: treating the clothes you already own as something to build on, repair, and keep, instead of something to replace. If you want to dig deeper, our Mending Handbook is packed with techniques like this one.

So go dig out those jeans with the busted knee. Grab a scrap you love and a thread that makes you happy. Your favorite pair isn’t finished. It’s just getting started on its next chapter.

▶️ Watch the full tutorial on YouTube:

🧵 Shop Presencia perle cotton, John James needles, the Thimble Crown, and Roxanne tools https://colonialneedle.com/ .

STITCH ON!

Shannon & Jason

Blanket Stitch: A Beginner’s Guide to Beautiful, Finished Edges

There are some stitches you learn early and keep finding new uses for—and Blanket Stitch is one of them.

Recognizable by its neat line of loops along the edge of the fabric, Blanket Stitch combines function with decoration. It can help finish a raw edge while adding a handmade detail that deserves to be seen.

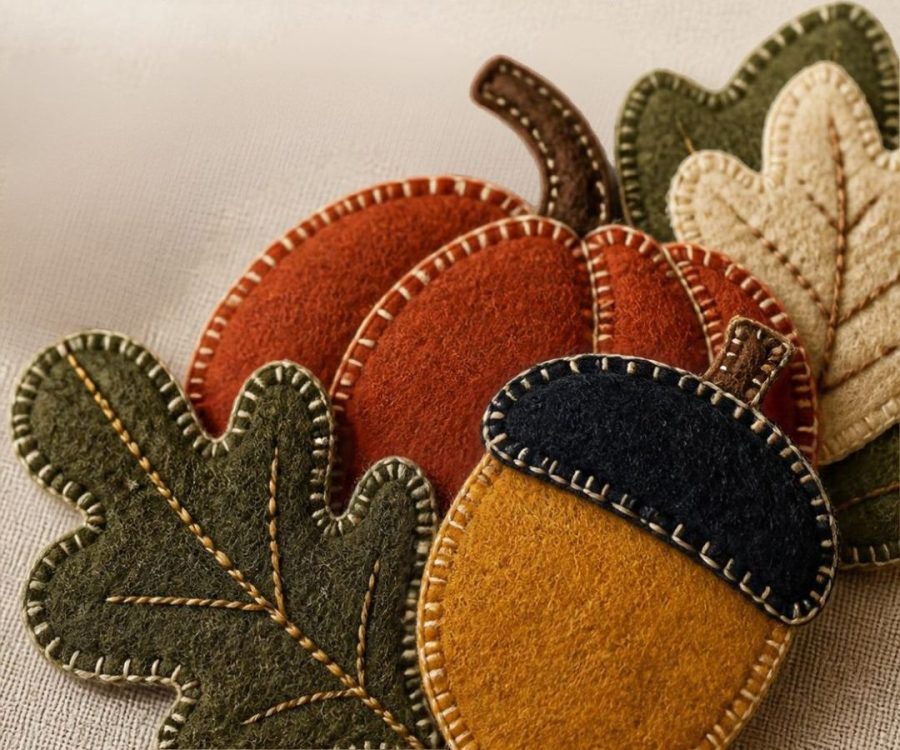
And while you certainly can find it along the edge of a blanket, its usefulness goes much further. From wool appliqué and felt ornaments to seasonal decorations and creative repairs, Blanket Stitch is a wonderful technique to revisit as we move into fall projects and heavier fabrics.

What Is Blanket Stitch?

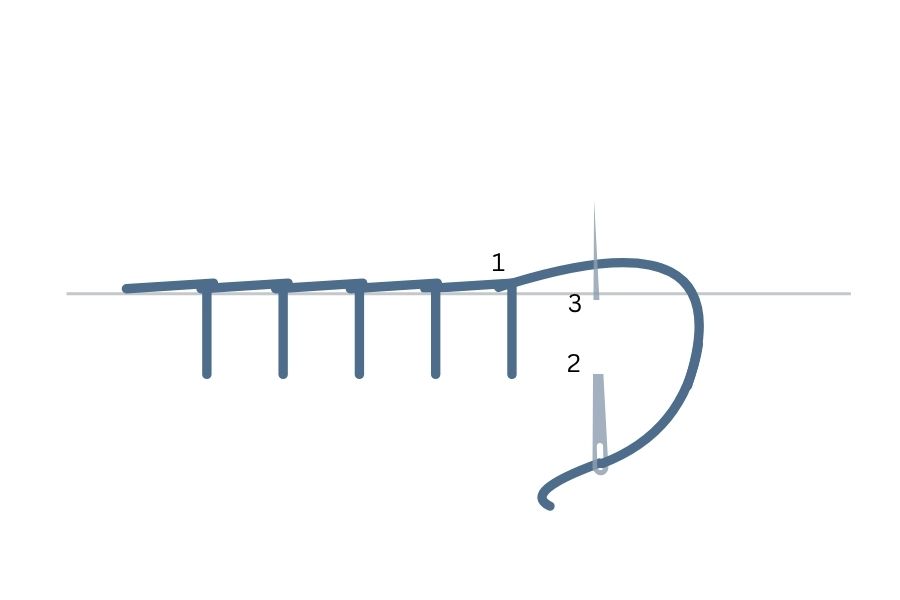
Blanket Stitch is an edge stitch made by creating a series of evenly spaced stitches with a loop of thread running along the fabric’s edge.

As each stitch is formed, the working thread is caught beneath the needle. This creates the characteristic continuous line along the edge.

Depending on the thread, spacing, and fabric you choose, Blanket Stitch can be subtle and functional or bold and highly decorative.

When to Use Blanket Stitch

Blanket Stitch is especially useful when you want the edge of your project to become part of the design.

Try it for:

  • Wool appliqué
  • Felt projects
  • Blankets and throws
  • Raw-edge appliqué
  • Fabric ornaments
  • Decorative patches
  • Seasonal decorations
  • Creative mending
  • Finishing heavier fabrics that don’t fray excessively

Fall is an especially good time to experiment with this stitch because it pairs beautifully with wool, felt, heavier threads, and layered textiles.

What You’ll Need

For a more decorative finish, try a heavier thread such as Presencia perlé cotton or Colonial Persian Yarn. The added weight makes the structure of the stitch much more visible.

Your needle should also suit the materials you’re using. Heavier thread and dense fabrics may require a needle with a larger eye or stronger shaft than you would choose for delicate embroidery.

How to Sew Blanket Stitch

Step 1: Begin at the Edge

Bring your needle up near the edge of the fabric, hiding your knot between layers whenever possible.

Step 2: Position Your Next Stitch

Insert the needle a short distance away from your first stitch and at a consistent depth from the fabric edge.

Step 3: Catch the Working Thread

Before pulling the needle completely through, position the working thread underneath the tip of the needle.

Step 4: Pull the Stitch Through

Gently pull the thread through. A small loop will form along the edge of the fabric.

Step 5: Continue Along the Edge

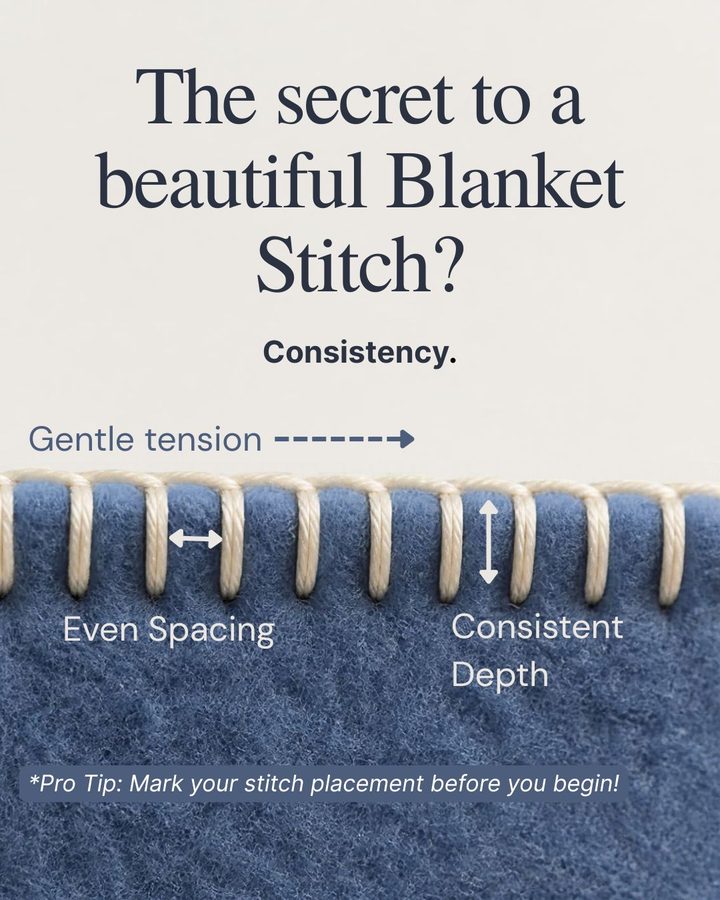
Repeat the process, keeping the distance between stitches—and their depth from the edge—as consistent as possible.

The connecting thread should create a continuous line along the edge.

Tips for a Beautiful Blanket Stitch

Watch your spacing. Consistent spacing is what gives Blanket Stitch its characteristic polished appearance.

Don’t pull too tightly. The thread should rest neatly against the edge without causing the fabric to pucker.

Mark your fabric. If evenly spaced stitches are difficult at first, use a removable fabric marker to create small placement guides.

Adjust for curves. Slightly shorten your stitches as you work around curves and corners.

Experiment with thread weight. Fine thread creates a subtle finish, while heavier thread makes the stitch a decorative feature.

Blanket Stitch vs. Buttonhole Stitch

If Blanket Stitch looks familiar, there’s a reason.

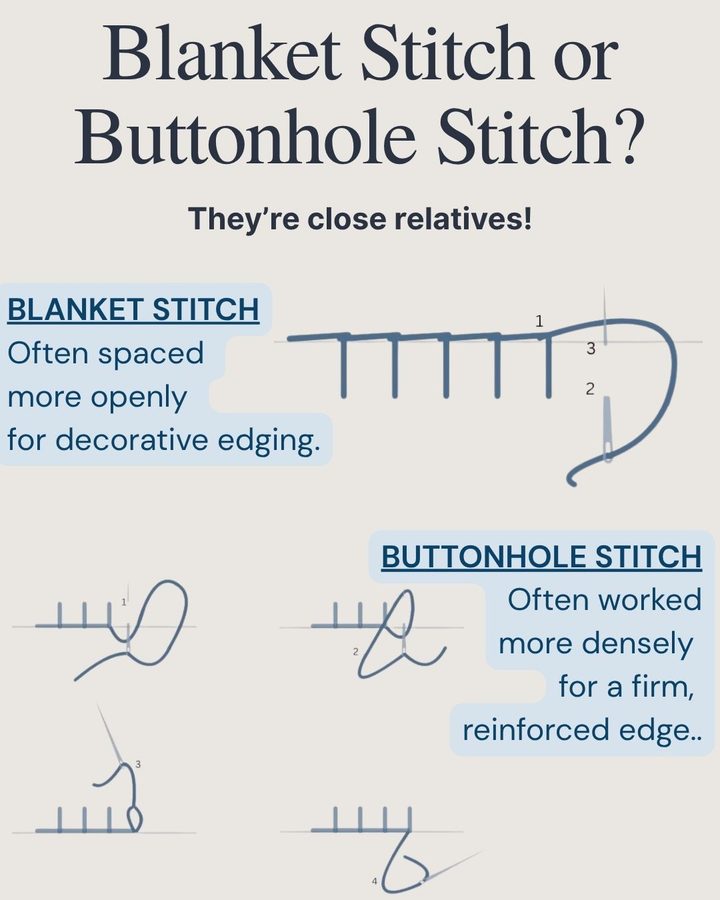
Blanket Stitch and Buttonhole Stitch are closely related looped-edge techniques, and their names and uses sometimes overlap. In modern sewing, Blanket Stitch is often worked with more open spacing for decorative edging, while Buttonhole Stitch is typically worked more densely to create a firm, reinforced edge around a buttonhole.

Rather than thinking of them as completely unrelated stitches, it can be helpful to think of them as close relatives whose spacing, scale, and intended purpose can change the finished result.

Change the Materials, Change the Look

One of the best things about revisiting a foundational stitch is discovering how much your material choices matter.

Try Blanket Stitch worked:

  • In matching thread for a subtle finish
  • In contrasting perlé cotton for a bold edge
  • Around wool appliqué
  • Along two layers of felt
  • Around a decorative patch
  • With deliberately longer or shorter stitches

The basic technique stays the same, but the finished effect can feel completely different.

Projects to Try This Fall

Put your Blanket Stitch skills to work on:

  • Wool appliqué
  • Felt pumpkins or ornaments
  • Fabric leaves
  • Decorative patches
  • Mug rugs
  • Needle books
  • Small wool or felt pouches
  • Handmade holiday decorations

It’s an approachable stitch for beginners, but there’s plenty of room for experienced stitchers to experiment with spacing, color, thread weight, and materials.

Sometimes a familiar stitch is worth another look—especially when changing the fabric or thread can turn it into something entirely new.