Itchin’ to Stitch

I have moved twice in the last two years, which is very positive, yet very stressful. Moving involves so much. Of course there’s the packing and storing, but there’s also the topsy-turvy life style as one adjusts, and dealing with mountains of paper work and address up-dates, etc. But, take a deep breath…it is all well worth the effort in so many ways. Change of any kind can be stressful, but change can also offer opportunities for seeing and doing things in new creative ways.

Sometimes the most difficult part of beginning something new for me, whether it is a new recipe, new sewing or gardening project, etc., is the starting part: Thing 1! But I have been so eager to sew during my “moving experiences” that I finally decided yesterday was the day to begin and I would treat myself periodically with positive reinforcement of cookies, ice cream, of sips of coffee from a favorite mug. Many times, I have to make a mess in order to bring order to that mess. Does anyone else identify with that process?

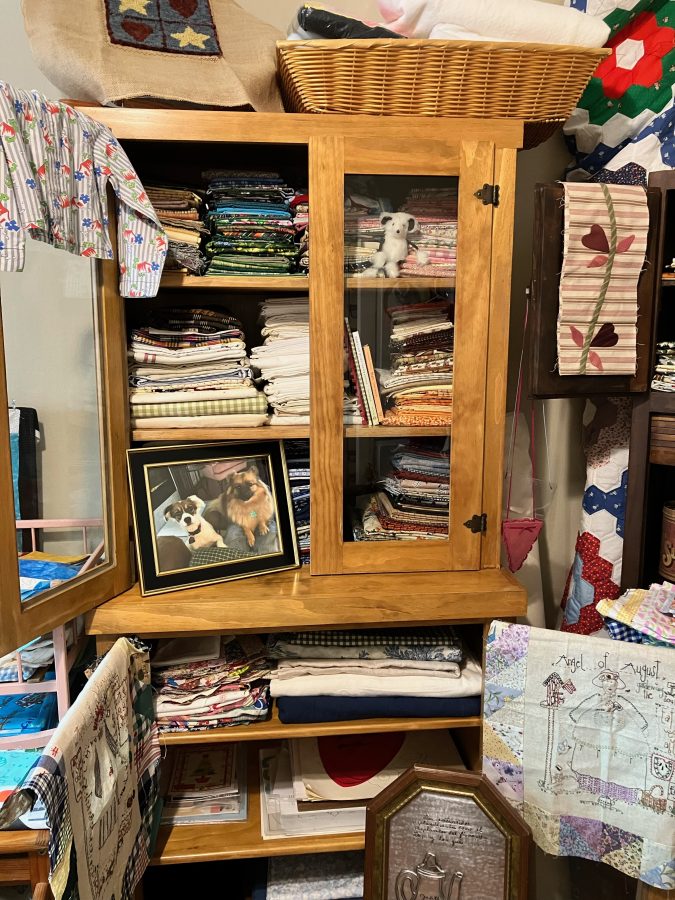
Thing 1 involved moving some pieces of furniture that I have acquired over the years that are great sources of memories as well as unique and fun for storage. In my mind, if I can move something one inch, I can move it across the room (given time and a treat or two). My vintage Half-Hoosier cabinet fit nicely placed diagonally next to my life-size mannequin, Lucy. Lucy wears one of my old high school cheerleading skirts and a straw hat. By now, you have probably guessed that my style of choice is wonky eclectic.

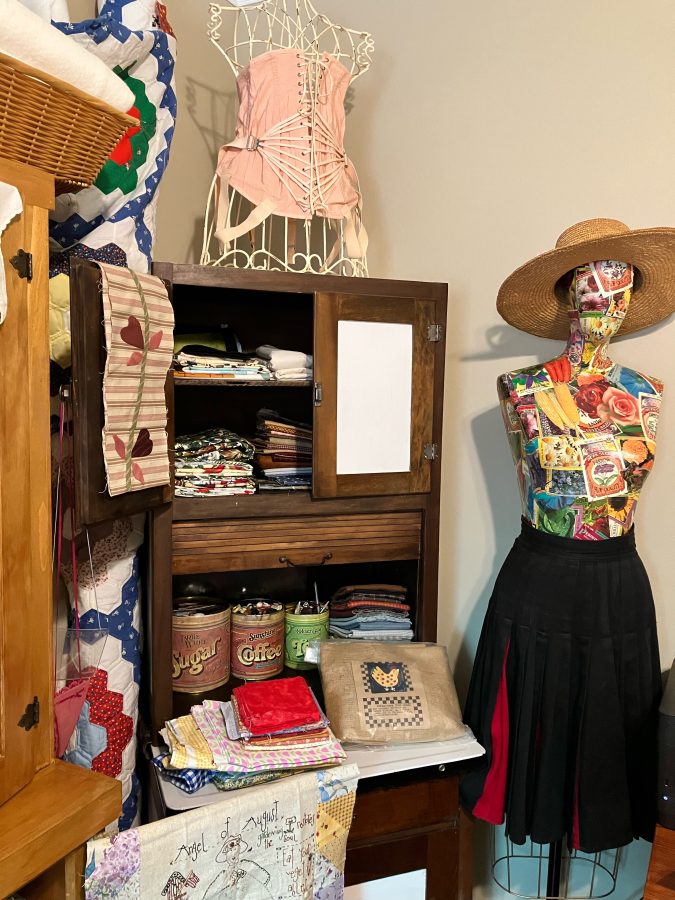
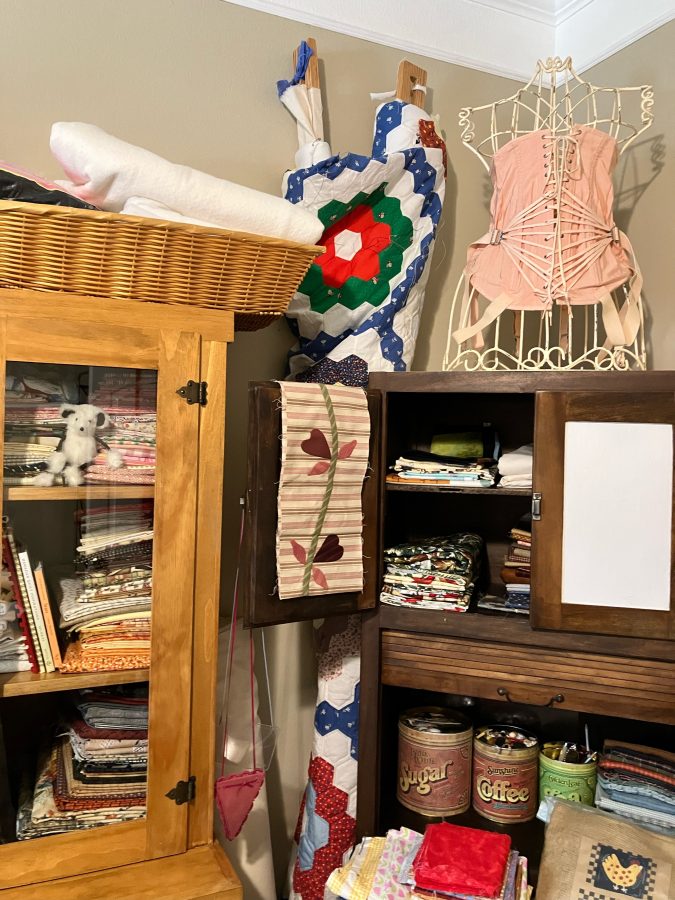
Sitting on top of this charming roll-top Half-Hoosier is a vintage wire dress form wearing an authentic vintage tightly laced and buckled corset. Propped against the other side of my new/old fabric stash cabinet is Grandmother’s Flower Garden, hand-pieced by my beautiful mother. It is layered and ready to continue hand quilting on the frames handmade by my dear sweet dad. I can hardly wait for warmer weather and sittin’ and stitchin’ outside on my covered patio on this beautiful quilt. I’ll be sitting on a vintage shoe store bench, acquired by bartering (for wool this time), while my fur baby Sadie Sue keeps me company and chases squirrels in the back yard.  

That is just one corner of my sewing room. The rest is still a work in progress. However, as I am sometimes attention deficit, I also began working on stashing some of my fabric stash on barrister’s shelves between books. Fabric and books…what’s not to love?! These shelves are in the living area, so I multi-tasked last evening, arranging fabric and books while watching a movie on tv. By the way, the word “stash” is both a noun and a verb. (Sorry, the retired teacher identity just popped out.)

I had set up my sewing machine cabinet last week but was rudely interrupted by the great need to do some not so much fun things, like vacuuming. So now I am ready to sew, even though there is more arranging to do. I have a wonderful closet with lots of shelves in my now-to-be-called Studio, but that closet is off limits for a while for reasons yet to be revealed.

Once I get started on a project, the next hurdle is stopping. But I am having so much fun creating my own personal creative space, even spilling over into other rooms of my new little home as well as outside! My precious little companion during all this moving is sweet precious Sadie Sue, a Jack Russell/Border Collie rescue and wonderful companion. She shadows and herds me, and is so much a part of my creative space and Studio. Time to feed Sadie Sue her cooked breakfast. She is also so patient with me. More to come as more is accomplished in my moving experience while I am itchin’ to stitch!

Happy stitchin’, and scratch that itch!

Judy Moore Pullen

Stumpwork Embroidery & Thread Painting

We are so excited to announce a guest contributor to our blog this week, Megan Zaniewski! Megan has recently authored a new book sharing her techniques, tips, and tricks for stitching 3D Nature Motifs. This book is an absolute delight and includes beautiful pictures and easy-to-follow descriptions and instructions to create your own thread masterpieces. We are truly inspired by her work and are thrilled to be able to share a digital copy of her book with one lucky winner!

*To Enter: Follow us and Megan on Instagram and be sure to like the contest post. For additional entries, tag a friend in the comments. Each tag = one additional entry so be sure to share the love!

Hi! I’m Megan Zaniewski, author of Stumpwork Embroidery & Thread Painting: Stitch 3D Nature Motifs and I’m guest writing for Colonial Needle today to discuss my favorite needles for thread painting and stumpwork embroidery techniques and share some tips for selecting the correct needle size for your project.

Embroidery tablescape with stitching tools

Why is needle choice important?

Even though the differences between different types of needles and their sizes may seem slight or insignificant, choosing the appropriate needle for your project can make a big difference in your stitching experience and the quality and look of your finished work. 

The type of embroidery you are doing will help determine the type of needle you select. John James Sharps and Embroidery needles are both well-suited, high-quality choices for most hand embroidery with 6-strand cotton embroidery thread, including thread painting and stumpwork techniques. 

What is thread painting?

Thread painting refers to an embroidery style where long and short stitches are used to blend threads, similar to the way a painter blends paint with brushstrokes. Thread painted designs are most often worked in stranded cotton embroidery thread or silk split down to 1 or 2 strands at a time. This blending technique allows the artist to create depth and shadows that render their subjects in realistic, precise detail. This type of detailed embroidery requires a thin needle with a sharp point profile to achieve the best amount of coverage and detail in your work. When thread painting with a single thread of stranded cotton, a size 10 John James Sharp needle is my preferred needle. For 2 strands, I use a size 9 John James Sharp needle. 

A thread painted hummingbird body.
A Hummingbird stitched using Megan Zaniewski’s thread painting technique.

What is stumpwork?

Stumpwork embroidery includes a variety of techniques that produce a 3-dimensional effect. Padded stumpwork and wire slips are two embroidery techniques I use in my work and teach in my book. The John James Sharps needles are my preferred needles for these projects as well because of their sharp point profile. Their thinness and sharpness allow you to precisely couch wireslips in place and stitch through multiple layers of padded felt with very little resistance. Again, I recommend a John James Sharps size 10 for 1-stranded work involving wireslips and padding. The dependably high-quality of these needles will also help ensure your work is clean, consistent, and precise.

A stumpwork pink and purple violet.
A flowery example of Megan’s stumpwork.

How to select needle size

The size of the needle you select in your own embroidery will depend on the number of strands you are stitching with. Follow this general guideline choosing the correct needle size Note: there is some flexibility between sizes. The brand of stranded cotton embroidery floss you are using may affect your needle selection slightly. For example: a size 9 needle can be used for 1 strand as well if you are having difficulty threading it. 

  • 1 strand – size 10
    • 2 strands – size 9
  • 3 strands – size 8
  • 4 strands – size 7
  • 5 strands – size 5
  • 6 strands – size 3

How do I know if my needle is too small?

If you’ve mixed up your needles and cannot confidently identify their size, here are some signs to look out for that might indicate the needle you are using is too small:

  • You have more-than-usual difficulty threading the needle. Smaller needles have smaller eyes to accommodate fewer threads, so if you are trying to thread multiple strands through a smaller needle, like a size 9 or 10, you will find it is very difficult, if not impossible. 
  • You experience resistance when pulling the needle through the fabric. If you have to tug or pull to get your needle and thread through the fabric, your needle is too small. 
  • You lose fabric tension and notice your fabric is denting or puckering around the needle as you pull it through the fabric. 
  • A slight popping sound when the needle pushes through the fabric is often normal and okay, but loud or abrasive sounds as you pull the thread through might indicate that your needle is too small. The hole the needle creates should be large enough to accommodate your thread so that it glides smoothly through the fabric without a lot of rubbing or abrasion.
  • Your thread is becoming fuzzy-looking, breaking, or tangling easily. This happens when the hole is too small for the thread to glide through smoothly, causing the thread to rub excessively against the fabric and wear down with each pass.
  • Sore hands. If you are having to work harder to get the thread through the fabric, the additional strain on your hands can cause them to hurt or tire easily. 

If you encounter any of these issues and suspect your needle is too small, try the next size down (ex. switch from a size 9 to a size 8). Remember, needles get larger as the size # decreases.

How do I know if my needle is too large?

Alternatively, here are some signs that might indicate the needle you are using is too large:

  • Visible holes left in the fabric around the thread are a sign that your needle is too large. The needle should create a hole wide enough for the thread to pass through comfortably without resistance, but not much larger than that. 
  • Stitches that are loose.

If you suspect your needle is too large, try the next size up (ex. switch from a size 8 to a size 9), which will be a slightly smaller needle.

I hope these tips help take some of the guesswork out of choosing the correct needle size for your hand embroidery project. Remember, stitching should be comfortable and fun above all else. If your needle is causing you hand strain or frustration, try out different sizes until you find what works best for you. 

Happy Stitching!

Book Cover: Stumpwork Embroidery & Thread Painting