
MAKING MASKS MORE EASILY WITH ROXANNE’S GLUE STICK!
I began making masks when our lives changed in a heartbeat due to the Covid-19 virus. When I feel helpless, even hopeless at times, I have to DO something productive. The word was put out in our neighboring communities that hundreds of masks were needed, asap, or sooner.
I perused the internet, emailed, and talked with friends about how to make a face mask. Most mask instructions called for 1/4” elastic to hook around the ears, and interfacing to place inside, or a two-flap pocket on the wrong side of the mask for extra protection. Having neither elastic nor interfacing, and not wanting to wait for a delivery, I made a prototype mask with two, 2” width of fabric cut ties for each side of the mask. I located a 1” bias tape maker among my drawer of notions. You do NOT have to cut fabric on the bias to successfully run it through a bias tape maker.
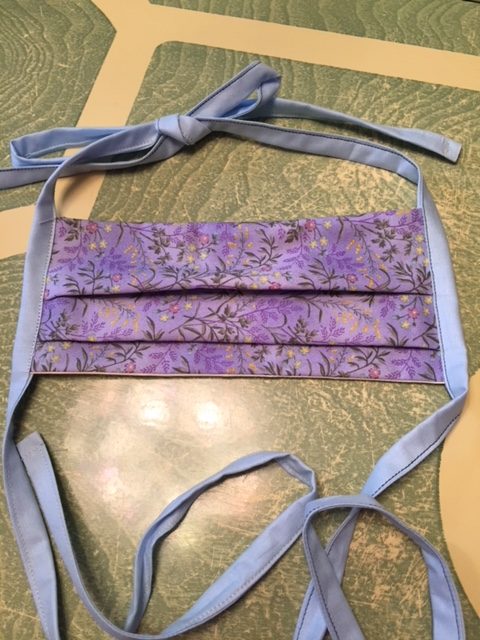
I began by cutting and stitching two 6” x 9” rectangles of 100% cotton along the long sides, right sides together. I turned them right side out and pressed. I pinned a template to my ironing board that was 4 1/4” x 9” for pressing two lengthwise pleats in the mask. My first attempt with three pleats was too bulky and time consuming, and two pleats worked just as well.
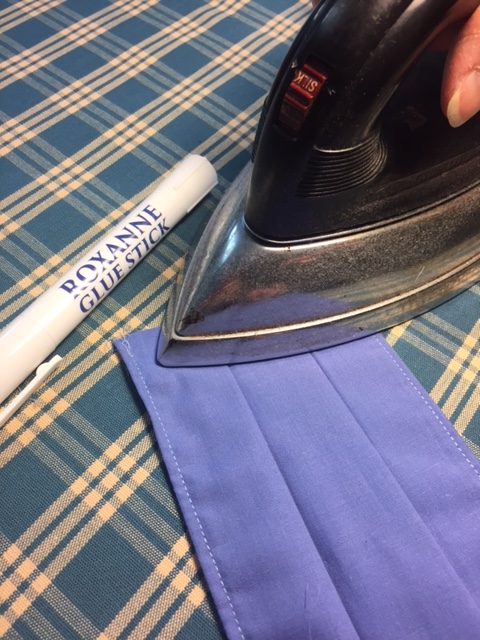
For my prototype mask, I decided to make a simple pocket for the back of the mask so that either a coffee filter cut to size or folded sheet of paper towel could be inserted for greater protection. I did not want to create too much bulk in the mask by making two overlapping flaps in the back. I cut a 4 1/2” x 9” rectangle of 100% cotton muslin, pre-washed and dried, the finished size of the mask, to make one light-weight pocket. At my ironing board, I pressed under 1/4” along each 9” side, then an additional 1/2” on one of those sides. Pressing alone did not hold down those narrow hems well, so Roxanne’s Glue Stick to the rescue! I ran the glue stick along the wrong side where hems would later be stitched, then pressed with a hot dry iron. I then top stitched the ½” hem in place—much easier than pressing and stitching hems.
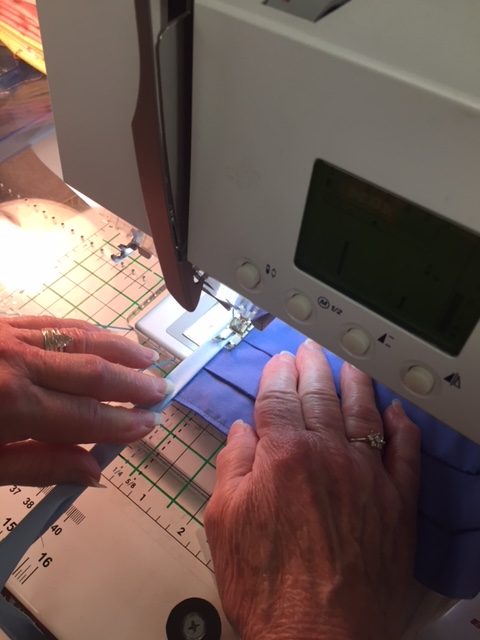
The two layers of mask were stitched, now to stitch the pocket to the back. Roxanne’s Glue Stick to the rescue again! I ran the glue stick along one 9” length of the back of the mask, placed the 1/4” hem on top, wrong side of muslin to back of mask, pressed, and then back to my sewing machine to stitch in place.
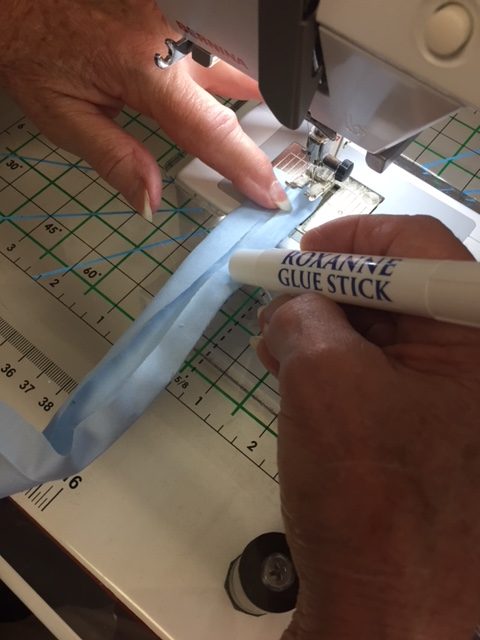
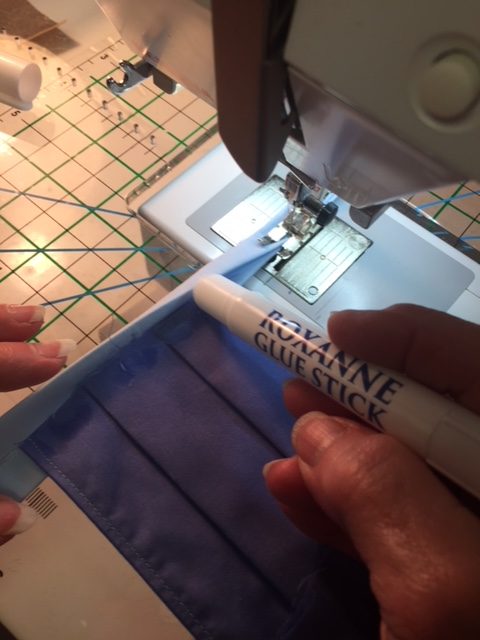
I ran one tie strip of 100% cotton, pre-washed and dried, through the bias tape maker, pressing with a hot dry iron, and folding under the lengthwise raw edges of fabric. To make a narrow tie, I still needed to fold over the strip again, lengthwise down the middle and press. To mark the middle of the strip for insertion of the mask, I folded the strip crosswise and marked 3” on either side of the middle with a Roxanne’s Marking Pencil. At my sewing machine, I opened the long tie strip, and ran Roxanne’s Glue Stick several inches down the middle, then stitched closely to the folded edges. When I came near the middle of the strip, I pressed the Glue Stick to the pleated edges of the mask, positioned the mask inside the strip, and top stitched the tie on each side of the mask pleated ends. Roxanne’s Glue Stick made stitching at the machine so much easier and more accurate.
That worked so well, that I tried a modification of my prototype mask. For the ties, at the ironing board, after pulling the strip through the bias tape maker and pressing, I marked the center of the tie, half way between the ends, with a Roxanne Marking Pencil, and about 3” on either side, where the mask will be inserted and stitched. Then I ran the Glue Stick from one tie end to the first 3” mark, folded the strip, and pressed with a hot dry iron. This secured both sides of the tie for machine stitching. About 6” down, I ran the Glue Stick to the opposite tie end, folded over and pressed. So, I could either glue as I stitched at the machine, or glue at the ironing board. Both methods work well.
Roxanne’s Glue Stick is one of my favorite tools and my very favorite glue. It goes on clear, so no worry about the color of glue fading through fabric to the right side or showing up at a later time. It glides across fabric like the ice skater I wish I was. Pressing with a hot iron adheres fabric to fabric quickly and securely. Roxanne’s Glue Stick does NOT gum up my sewing machine or get the needle sticky. These masks are meant to be washed following every use, and Roxanne’s Glue Stick is washable.
One more important thing: pre-wash your fabric, for two good reasons.
- You want to make sure that the fabric is as clean as possible to help prevent the spread of the virus.
- After washing, the mask will more readily return to its shape, not shrink out of shape.
And finally: Presencia 50-weight is the best thread for machine and hand sewing. It is virtually lint free, so your machine will love it and you. It is 3-ply, which means it is strong and great for construction and top stitching. We want these masks to be washed frequently and hold up well.
We have a need, and that need can more readily be filled by using your gifts, skills, talents, and sewing machines to make masks. Not only do you provide a barrier of safety for yourself and others, but you participate in a worthwhile project that can be done while nesting at home.
Stay Well and Happy Stitching,
Judy Moore Pullen