Judy, do you have a spool of white thread?

Do I have thread? Yes, but not just any old thread. This request by a dear quilting friend, Sue, reminds me of my mother and neighbors borrowing and loaning a cup of sugar, flour, or stick of butter. It’s just something neighbors do, especially when you live in the country as Sue and I do. 

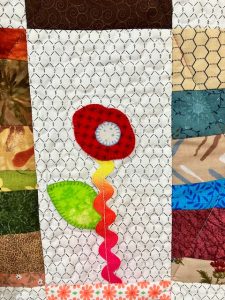
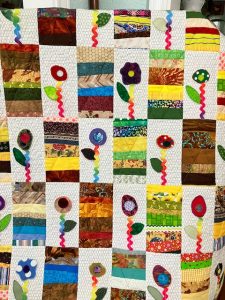
Sue had ever so generously offered to machine quilt a huggable quilt for a child that another dear quilting friend, Debbie, had lovingly hand appliqued. Debbie created colorful, one-of-a-kind lollipop flowers atop variegated jumbo rick rack stems. She is as amazingly creative with small scraps of fabric as Sue is when she performs machine magic stipple quilting. 

Hand applique quilt with Presencia

Stipple quilting looks somewhat like connected jigsaw puzzle pieces. The feed dogs of the sewing machine are disengaged, allowing the quilter to freely move about the quilt sandwich and stitch curvy lines. This quilting technique is perfect for quilting the background of each block, while making the appliqued flowers “pop”. Sue has generously offered to teach me to machine stipple quilt, and I look forward to practicing by making lots of pot holders. Sue’s stipple quilting was the perfect finishing touch to make those happy flowers come alive on that cheerful child’s quilt. And…the Presencia 40-weight thread that Sue borrowed was the perfect thread for quilting. 

A few days later, I received a call from Sue, and she was so excited. She had completed the machine quilting and was raving about what a difference the thread made in the process as well as the appearance of the completed quilt. To paraphrase Sue: “The thread did not break! It is so strong! The stipple quilting was more consistent, and there was virtually no lint in the bobbin area when finished. Tell me more about this spool of white thread!” I simply could not contain myself. I happily told Sue about the thread she “borrowed,” and I am happy to share with you as well.

Presencia is the name of that wonderful thread, and yes, not all thread is alike. There is a definite difference. Presencia begins with the very best 100% long staple Egyptian cotton, mercerized for strength, and is both colorfast and shrinkfast. The long staple fiber and superior quality of Egyptian cotton results in the very best quality thread. Somewhat like making a from-scratch lemon meringue pie, when you begin with fresh eggs, a real lemon, and the best ingredients, you simply cannot eat just one piece of that pie.

Also keep in mind, that the bigger the number on the spool, the finer the sewing thread (and hand sewing needles). I “loaned” Sue a spool of 40-weight Presencia thread for machine quilting. Presencia sewing thread comes in 40, 50 and 60-weights.  All three weights are 3-ply, which means that 3 strong strands are twisted together for extra strength, even the finest 60-weight. The strength and consistency of Egyptian fibers also make Presencia excellent for even bobbin stitches. Just fill your bobbin with the same weight as the top thread.

Presencia also comes in a variety of spool sizes, from 100, 500 and 600 meters, as well as cones. Check out Colonial Needle Company’s website for detailed information, as well as an assortment of color packs. Many beautiful colors are available.

Sue is sold on the ease of stitching with Presencia as well as the beauty of the finished quilting. The child who receives this happy quilt will also be able to love and drag it around and snuggle and snooze beneath its comfort for a long time.

Quilting with Presencia thread

Since my quilting neighbors and I live in the country, stocking up on Presencia thread is always a good idea when field trips to town and quilt shops are our destination. However, we are happy to share with dear quilting friends in need. Sometimes the best-learned lessons are hands on. Take someone under your wings and “loan” a spool of Presencia. Both you and your friends will be happy you did. It’s as good as, maybe even better than, loaning a cup of sugar. Now, to begin that from-scratch lemon meringue pie for Sue and Mike…

Happy stitching,

Judy Moore Pullen

DIY Mask-Making Tips

MAKING MASKS MORE EASILY WITH ROXANNE’S GLUE STICK!

I began making masks when our lives changed in a heartbeat due to the Covid-19 virus. When I feel helpless, even hopeless at times, I have to DO something productive. The word was put out in our neighboring communities that hundreds of masks were needed, asap, or sooner.

I perused the internet, emailed, and talked with friends about how to make a face mask. Most mask instructions called for 1/4” elastic to hook around the ears, and interfacing to place inside, or a two-flap pocket on the wrong side of the mask for extra protection. Having neither elastic nor interfacing, and not wanting to wait for a delivery, I made a prototype mask with two, 2” width of fabric cut ties for each side of the mask. I located a 1” bias tape maker among my drawer of notions. You do NOT have to cut fabric on the bias to successfully run it through a bias tape maker.

I began by cutting and stitching two 6” x 9” rectangles of 100% cotton along the long sides, right sides together. I turned them right side out and pressed. I pinned a template to my ironing board that was 4 1/4” x 9” for pressing two lengthwise pleats in the mask. My first attempt with three pleats was too bulky and time consuming, and two pleats worked just as well.

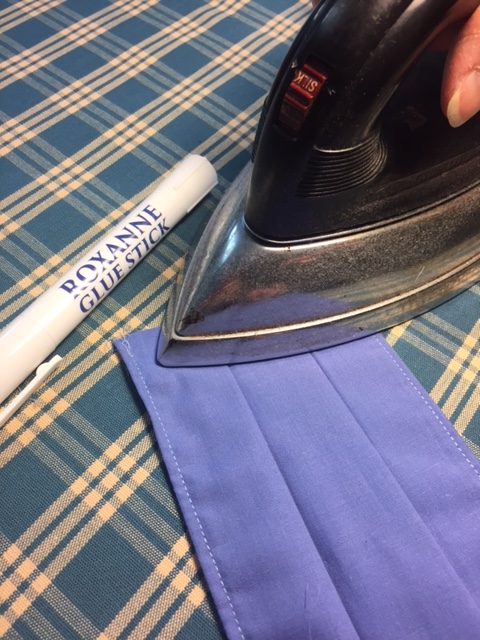
Place Roxanne’s Glue on ends of pleats and press with iron to hold in place for stitching.

For my prototype mask, I decided to make a simple pocket for the back of the mask so that either a coffee filter cut to size or folded sheet of paper towel could be inserted for greater protection. I did not want to create too much bulk in the mask by making two overlapping flaps in the back. I cut a 4 1/2” x 9” rectangle of 100% cotton muslin, pre-washed and dried, the finished size of the mask, to make one light-weight pocket. At my ironing board, I pressed under 1/4” along each 9” side, then an additional 1/2” on one of those sides. Pressing alone did not hold down those narrow hems well, so Roxanne’s Glue Stick to the rescue! I ran the glue stick along the wrong side where hems would later be stitched, then pressed with a hot dry iron. I then top stitched the ½” hem in place—much easier than pressing and stitching hems.

The two layers of mask were stitched, now to stitch the pocket to the back. Roxanne’s Glue Stick to the rescue again! I ran the glue stick along one 9” length of the back of the mask, placed the 1/4” hem on top, wrong side of muslin to back of mask, pressed, and then back to my sewing machine to stitch in place.

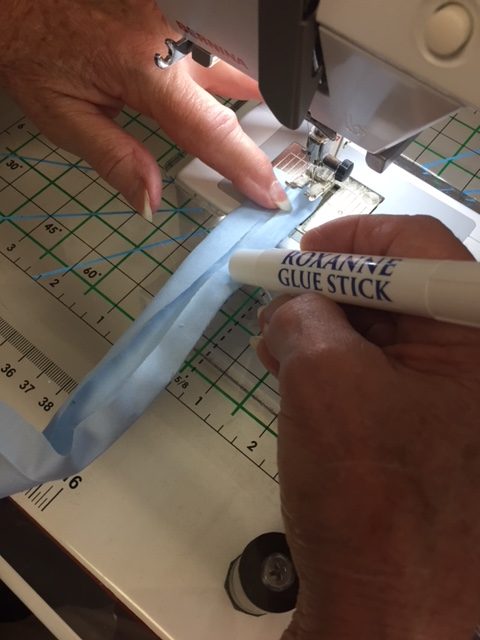
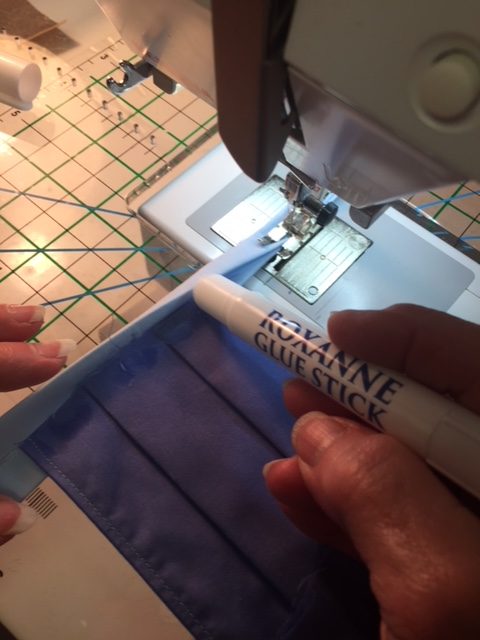
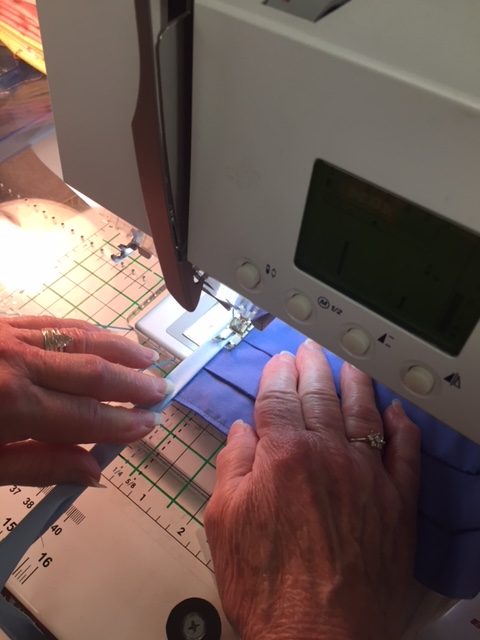
I ran one tie strip of 100% cotton, pre-washed and dried, through the bias tape maker, pressing with a hot dry iron, and folding under the lengthwise raw edges of fabric. To make a narrow tie, I still needed to fold over the strip again, lengthwise down the middle and press. To mark the middle of the strip for insertion of the mask, I folded the strip crosswise and marked 3” on either side of the middle with a Roxanne’s Marking Pencil. At my sewing machine, I opened the long tie strip, and ran Roxanne’s Glue Stick several inches down the middle, then stitched closely to the folded edges. When I came near the middle of the strip, I pressed the Glue Stick to the pleated edges of the mask, positioned the mask inside the strip, and top stitched the tie on each side of the mask pleated ends. Roxanne’s Glue Stick made stitching at the machine so much easier and more accurate.  

After pulling strip through bias tape maker, run Roxanne’s Glue Stick down the middle.  Fold over strip and stitch.
Place Glue on fold of tie to hold in place for stitching
Roxanne’s Glue Stick holds fabric in place for easier and more accurate stitching.

That worked so well, that I tried a modification of my prototype mask. For the ties, at the ironing board, after pulling the strip through the bias tape maker and pressing, I marked the center of the tie, half way between the ends, with a Roxanne Marking Pencil, and about 3” on either side, where the mask will be inserted and stitched. Then I ran the Glue Stick from one tie end to the first 3” mark, folded the strip, and pressed with a hot dry iron. This secured both sides of the tie for machine stitching. About 6” down, I ran the Glue Stick to the opposite tie end, folded over and pressed. So, I could either glue as I stitched at the machine, or glue at the ironing board. Both methods work well.

 Roxanne’s Glue Stick is one of my favorite tools and my very favorite glue. It goes on clear, so no worry about the color of glue fading through fabric to the right side or showing up at a later time. It glides across fabric like the ice skater I wish I was. Pressing with a hot iron adheres fabric to fabric quickly and securely. Roxanne’s Glue Stick does NOT gum up my sewing machine or get the needle sticky. These masks are meant to be washed following every use, and Roxanne’s Glue Stick is washable.

One more important thing: pre-wash your fabric, for two good reasons.

  1. You want to make sure that the fabric is as clean as possible to help prevent the spread of the virus.
  2. After washing, the mask will more readily return to its shape, not shrink out of shape.

And finally:  Presencia 50-weight is the best thread for machine and hand sewing. It is virtually lint free, so your machine will love it and you. It is 3-ply, which means it is strong and great for construction and top stitching. We want these masks to be washed frequently and hold up well.

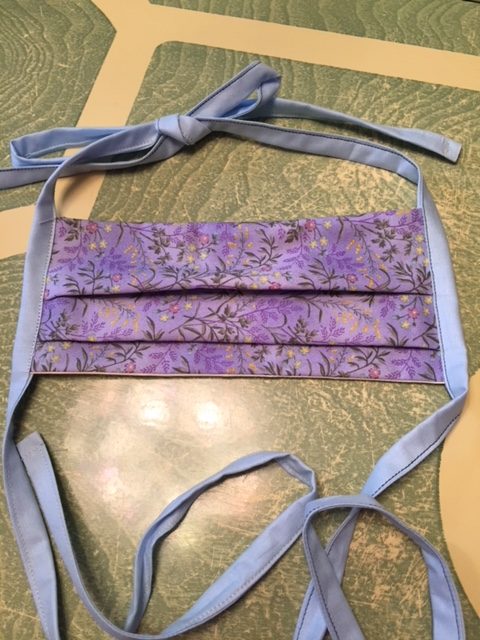
Ta-da! Finished mask!

We have a need, and that need can more readily be filled by using your gifts, skills, talents, and sewing machines to make masks. Not only do you provide a barrier of safety for yourself and others, but you participate in a worthwhile project that can be done while nesting at home.

Stay Well and Happy Stitching,

Judy Moore Pullen

Big Stitch Quilting

Big Stitch Quilting

Thoughts on Big Stitch Quilting from Pepper Cory

Big Stitch Quilting

Pepper Cory with her Big Stitch Quilt

Many times I hand sew because I find the rhythm of handling the needle—in, out, back down, in, out while gathering stitches— very therapeutic. The action requires total focus but my hands know more what to do than my brain. After a short while, the work happens without effort. I find myself stitching and my mind wandering. Call it a ‘mental vacation with a needle.’

This summer I pieced and Big Stitch quilted a small, simple quilt. After five days of work, it was done and I felt a sense of accomplishment and peace. The small quilt is coming with me to the upcoming Houston Quilt Market.  If you’re attending, please stop by and see us—the quilt, me, and all the Colonial Needle family—in booths 1328 and 1329.

Line Marking Techniques

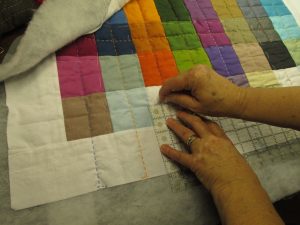
Line marking technique used by Pepper on this quilt.

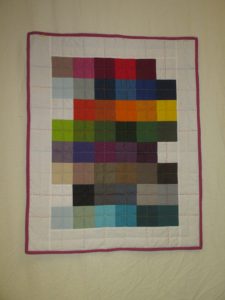
The quilt was pieced from 44 different colors (plus white) of the Peppered Cottons line of Shot Cottons from StudioE Fabrics cut into 3″ squares. The threads used to Big Stitch were varying colors of Size 8 Perle cotton by Presencia (found here).  For the hand stitching I used the largest needle from the Big Stitch sampler pack by Colonial Needle (found here). I marked the lines to follow with stitches by using a big fat tapestry needle (their tips are not sharp) and scoring the fabric alongside a ruler.

The quilting covers the quilt in a plaid of different colors of stitching—just the thing for those of us who love to quilt but bore easily when the work is too much the same.

Big Stitch Quilt

Pepper’s Finished Big Stitch Quilt

Spring Quilt Market Classes

Pepper Cory’s Spring Quilt Market Class

Apronista!

Presencia Embroidery

Embroidery in Progress!

At the upcoming Spring Quilt Market in St. Louis, Pepper Cory will be talking about taking pride in your work and showing that pride in your store. She chose the common work apron as the canvas for this effort. She’s leading a Take & Teach session for shop owners called “Hand Embroidery for Modern Quilters and Sewists!” that takes place before Quilt Market opens (8-9:30 AM) on Friday May 19.

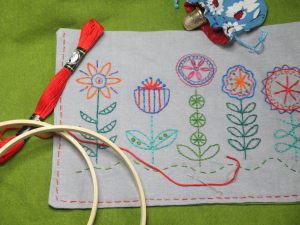
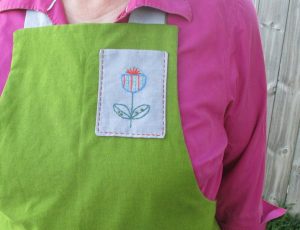
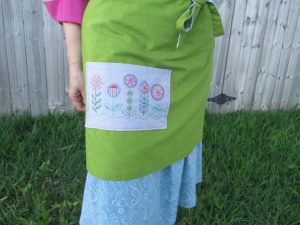
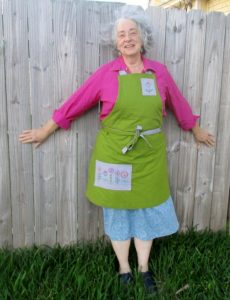
This apron is a chef’s apron, downloadable free all over the web. It’s super easy to make! This one is lined and features two embroidered pockets. The lower pocket is a sweet little row of flowers stitched in brightly-colored Presencia floss. Click here to see Presencia color options.

Embroidery Detail

Upper Pocket Embroidery Detail

The embroidery pattern is a heat-transfer from one of the Colonial Pattern Company’s “Stitcher’s Revolution“ series—#SR24 called ‘Flower Power.’ The upper eyeglass pocket is a single posey from the row. Outline Big Stitch quilting over machine stitching completes the embellishment.

Embroidery Detail

Lower Pocket Embroidery Detail

While both companies are called Colonial something- that’s just serendipity! We, Colonial Needle, are in White Plains, New York while Colonial Pattern is out of Kansas City, Missouri. A link to their website can be found here. The two companies cooperate nicely as they print the patterns while we have the needles and thread to finish them!

The wind was blowing when the pictures were taken but we hope you can see the details!

And just in case you need it, a DMC to Presencia conversion chart can be found here!


Embroidered Apron

Pepper Cory modeling her completed Apron

Hand Painted Frames

Custom Hand-Painted Frames

KCA39-18 - Country Moonrise

KCA39-18 – Country Moonrise with Custom Painted Frame

Heirloom Designs helps create beautiful custom frames for your needlepoint canvases

Our friends at Heirloom Designs shared these fantastic painted frames, custom made for two of Kelly Clark’s pieces. We love how well the frames compliment the canvases – it’s hard to tell where the canvas ends and the frame starts.

And the best part? They’re self-finishing which means no more sending canvases out to be framed.  It doesn’t get much better than that!

Canvases are available for purchase through your LNS.

And to order a custom frame for your favorite needlepoint canvas, contact Heirloom Designs

KCA26-18 - Sheep-Crow Sampler

KCA26-18 – Sheep-Crow Sampler with Custom Painted Frame

Bonnie Rose Baby Bonnet

Welcoming a New Bundle of Joy this Summer?

You’re in luck!

•Presencia Fincrochet Cotton, size 60, 1 ball of White for the Bonnie Rose Baby Bonnet to Crochet by Laura Ricketts Credit: Photograph by Joe Coca from the May/June 2016 issue of Interweave’s PieceWork magazine. Copyright © F+W Media 2016

Credit: Photograph by Joe Coca from the May/June 2016 issue of Interweave’s PieceWork magazine. Copyright © F+W Media 2016

PieceWork Magazine’s May/June 2016 issue includs a pattern for this adorable baby bonnet by Laura Ricketts. The pattern features our very own Presencia Fincrochet Cotton, size 60, in white and can be found at http://www.needleworktraditions.com/

The Presencia Fincrochet Cotton can be purchased at your favorite specialty store or direct through our website http://colonialneedle.com