We’ll be honest: we almost overlooked these.
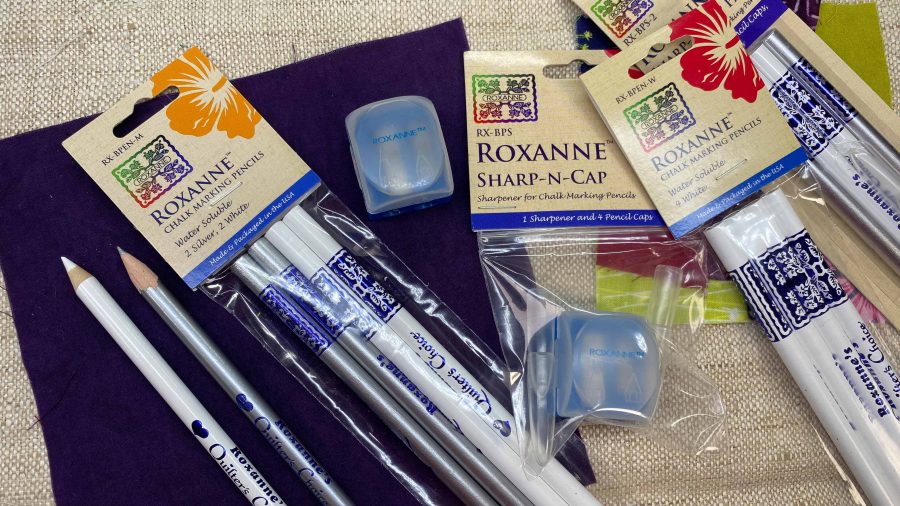
For years, the Roxanne Chalk Marking Pencils sat in our tool kit like wallflowers at a dance—present, but not particularly noticed. We assumed they were just another marking pencil, nothing special, nothing different from the dozens of other chalks and markers cluttering our workspace.
We were so wrong.
It wasn’t until we really dug into what these pencils are made of and why they behave the way they do that we had our revelation. These aren’t just marking tools—they’re problem-solvers, game-changers, and (in the case of that silver pencil) actual unicorns.
Let us explain.
The Problem With Most Marking Tools
If you’ve been making for any length of time, you’ve probably been betrayed by a marking tool. Maybe it was the wax chalk that melted into your quilt when you accidentally hit it with an iron. Or the “disappearing” pen that left a permanent yellow ghost after washing. Or the heat-erasable marker that reappeared the moment your finished project hit cold storage.
We’ve all been there. It’s heartbreaking to spend hours—sometimes days—on a piece, only to have your marking tool leave a permanent scar.
The truth is, most marking tools involve a trade-off:
- Wax-based chalks are durable and don’t rub off easily, but they can become permanent if heat is applied, and they’re notoriously difficult to remove completely.
- Heat-erasable pens give you fine lines that vanish with an iron, but they often leave white “ghost” shadows or reappear in cold temperatures.
- Water-erasable pens are easy to see and precise, but their chemicals can react with detergents to leave permanent yellow or brown stains if not thoroughly rinsed.
It’s a minefield. And for those of us working with precious fabrics, heirloom projects, or pieces destined for exhibition, the stakes are high.
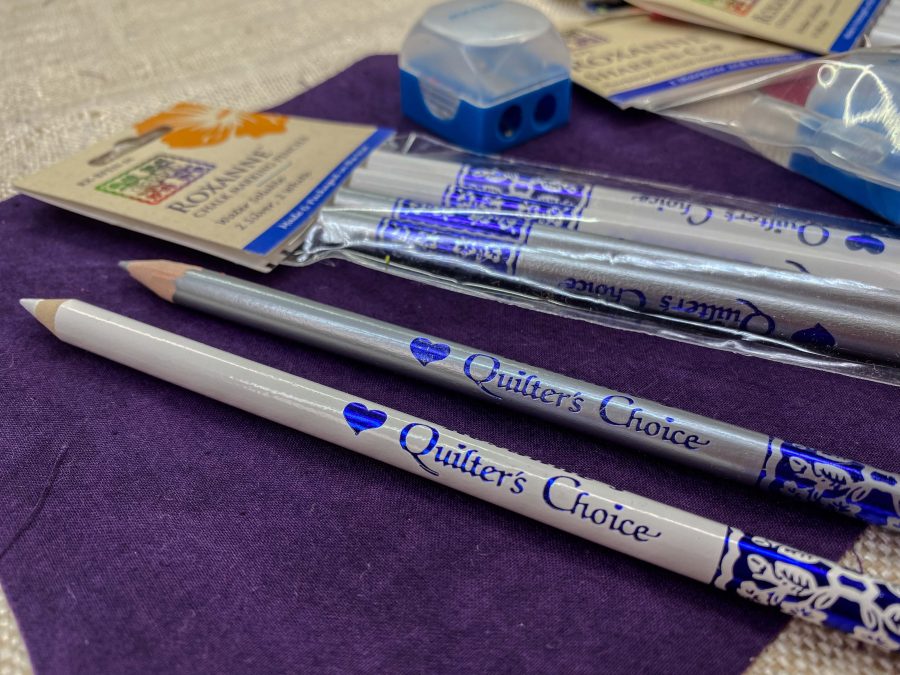
What Makes Roxanne Different: The Chemistry of Clean
Here’s where Roxanne Chalk Marking Pencils break the mold entirely.
- Pure Chalk, Zero Wax
Unlike most marking pencils, Roxanne pencils contain **no wax binders**. None. This means marks will never “set” into your fabric if you accidentally iron over them. The chalk stays on the surface of the fibers rather than melting into them. - Chemically Inert
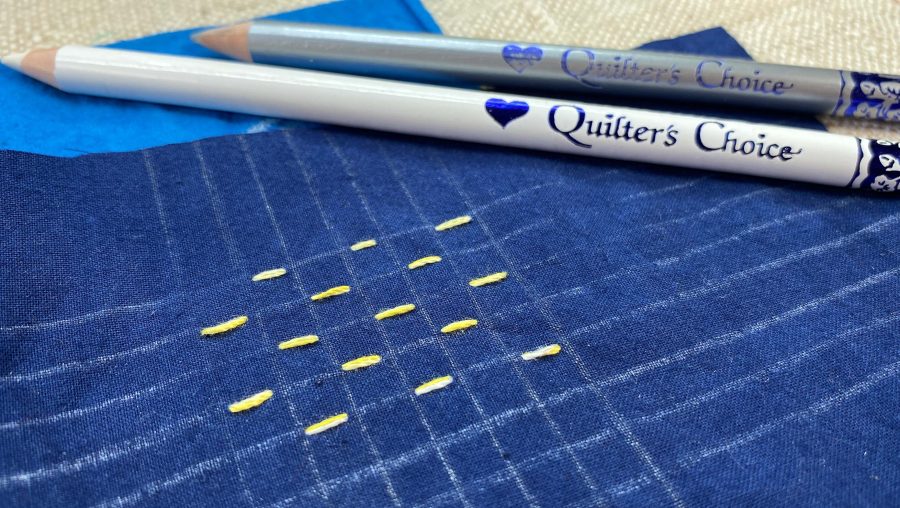
These pencils are mineral-based, not dye-based. There are no chemicals to react with your detergent, no dyes to oxidize over time, no “chemical roulette” that might leave rust-colored stains months after you thought your project was finished. The marks are just chalk—pure, simple, inert. - 100% Water Soluble
Because there’s no wax or chemical binder holding the chalk in place, Roxanne marks brush off easily or disappear completely with a damp cloth. When you’re done stitching, the roadmap vanishes—no ghosts, no shadows, no evidence it was ever there. - Archival Quality
For textile artists concerned about the longevity of their work, Roxanne pencils are acid-free. Your marks won’t degrade or discolor the fabric over time, making them safe for heirloom quilts, museum-quality pieces, and everything in between.
The “Silver Unicorn” & Why It Changed Everything
If you work with dark fabrics—indigo for sashiko, black cottons, navy solids—you know the struggle. Most marking tools are either invisible on dark fabric or rub off the moment your hand touches the surface.
Enter the **Roxanne Silver Pencil**, which we now affectionately call “the unicorn.”
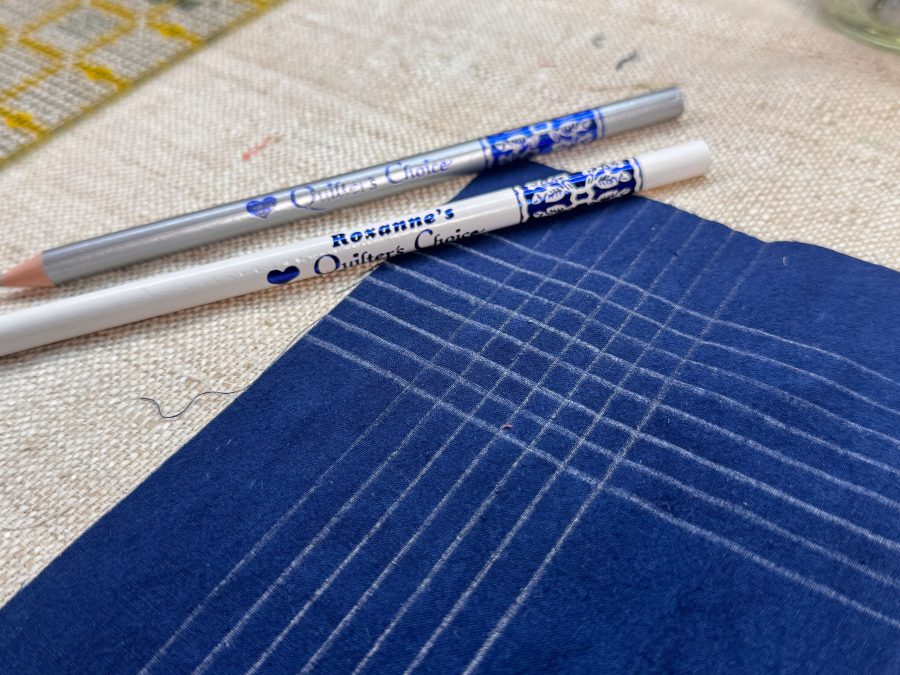
- It Works on Everything
The silver pencil uses a light-reflective mineral that creates a metallic sheen on fabric. On dark indigo or black, it glows like a beacon. On light cream or white, it shows as a soft grey. This means you can work across high-contrast patchwork—going from a dark navy sashiko block to bright white cotton—without ever switching tools.
Let that sink in for a moment. One pencil. All your fabrics. - It Survives the Handling
For sashiko artists and hand quilters, this is critical. The metallic mineral base “grips” the fiber better than standard chalk, staying crisp and visible through the heavy handling that complex stitching requires. We tested this by aggressively rubbing our hand across marked fabric—the Roxanne line stayed sharp while a standard white chalk line nearby smeared into oblivion. - It Still Disappears Completely
Despite its tenacious hold during the stitching process, the moment you’re done, a damp cloth or a quick wash makes it vanish. In the video, you can see the mark literally pop off the fabric with zero effort and zero residue.
It’s magic. Truly.
The Artistic Revelation: Permanent When You Want It
Here’s where things get really exciting for mixed media artists, embroiderers, and textile artists who work freehand.
Because these pencils are water-soluble, you can use them wet—dipping the tip in water and painting directly onto fabric like you would with watercolor pencils or graphite. The effect is soft, blendable, and beautifully artistic.
Once the marks dry, you can heat-set them to make them permanent. Suddenly, these aren’t just marking tools—they’re design tools. You can sketch freehand, shade, blend, and create dimensional effects that become a permanent part of your textile work.
For artists who want to move beyond rigid patterns and embrace spontaneous, organic design, this opens up an entirely new way of working.
The Bottom Line: Confidence in Every Mark
We spent years thinking Roxanne Chalk Marking Pencils were just another option in an overcrowded market. We were wrong.
These pencils solve problems we didn’t even realize we’d been working around:
– The frustration of switching between light and dark fabrics
– The anxiety of wondering if marks will truly disappear
– The heartbreak of accidental permanence
– The limitation of working only from traced patterns
Whether you’re a quilter who needs marks that survive hours of hand-stitching, a sashiko artist working on dark indigo, or a textile artist who wants to sketch and paint directly on fabric, Roxanne Chalk Marking Pencils deliver precision, versatility, and—most importantly—peace of mind.
Mark with confidence. Create with joy. Let Roxanne take care of the rest.
Ready to Try Them Yourself?
👉 Shop Roxanne Chalk Marking Pencils here.
📺Watch the full video demonstration on YouTube to see the silver pencil in action and learn how to use these tools for both temporary marking and permanent artistic effects.
Have you tried Roxanne Chalk Marking Pencils? We’d love to hear about your experience! Share your thoughts in the comments or tag us on social media with your projects.