DIY Mask-Making Tips

MAKING MASKS MORE EASILY WITH ROXANNE’S GLUE STICK!

I began making masks when our lives changed in a heartbeat due to the Covid-19 virus. When I feel helpless, even hopeless at times, I have to DO something productive. The word was put out in our neighboring communities that hundreds of masks were needed, asap, or sooner.

I perused the internet, emailed, and talked with friends about how to make a face mask. Most mask instructions called for 1/4” elastic to hook around the ears, and interfacing to place inside, or a two-flap pocket on the wrong side of the mask for extra protection. Having neither elastic nor interfacing, and not wanting to wait for a delivery, I made a prototype mask with two, 2” width of fabric cut ties for each side of the mask. I located a 1” bias tape maker among my drawer of notions. You do NOT have to cut fabric on the bias to successfully run it through a bias tape maker.

I began by cutting and stitching two 6” x 9” rectangles of 100% cotton along the long sides, right sides together. I turned them right side out and pressed. I pinned a template to my ironing board that was 4 1/4” x 9” for pressing two lengthwise pleats in the mask. My first attempt with three pleats was too bulky and time consuming, and two pleats worked just as well.

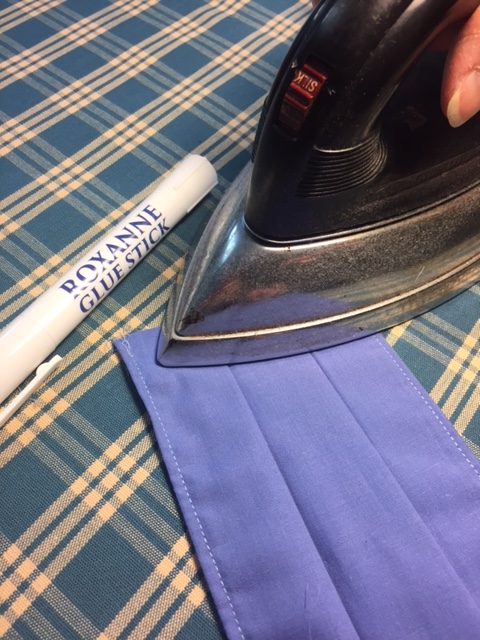
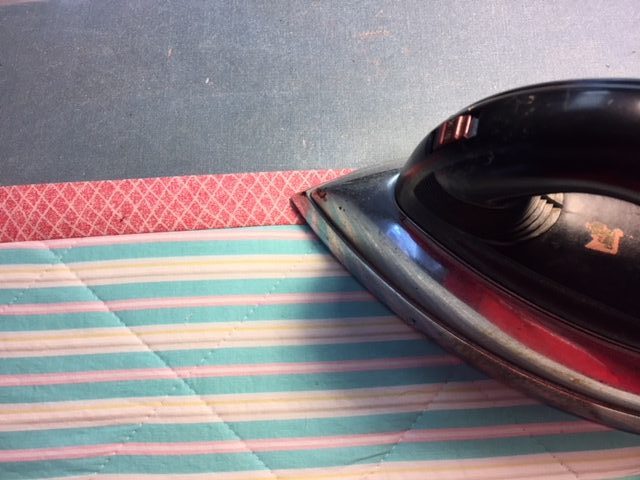
Place Roxanne’s Glue on ends of pleats and press with iron to hold in place for stitching.

For my prototype mask, I decided to make a simple pocket for the back of the mask so that either a coffee filter cut to size or folded sheet of paper towel could be inserted for greater protection. I did not want to create too much bulk in the mask by making two overlapping flaps in the back. I cut a 4 1/2” x 9” rectangle of 100% cotton muslin, pre-washed and dried, the finished size of the mask, to make one light-weight pocket. At my ironing board, I pressed under 1/4” along each 9” side, then an additional 1/2” on one of those sides. Pressing alone did not hold down those narrow hems well, so Roxanne’s Glue Stick to the rescue! I ran the glue stick along the wrong side where hems would later be stitched, then pressed with a hot dry iron. I then top stitched the ½” hem in place—much easier than pressing and stitching hems.

The two layers of mask were stitched, now to stitch the pocket to the back. Roxanne’s Glue Stick to the rescue again! I ran the glue stick along one 9” length of the back of the mask, placed the 1/4” hem on top, wrong side of muslin to back of mask, pressed, and then back to my sewing machine to stitch in place.

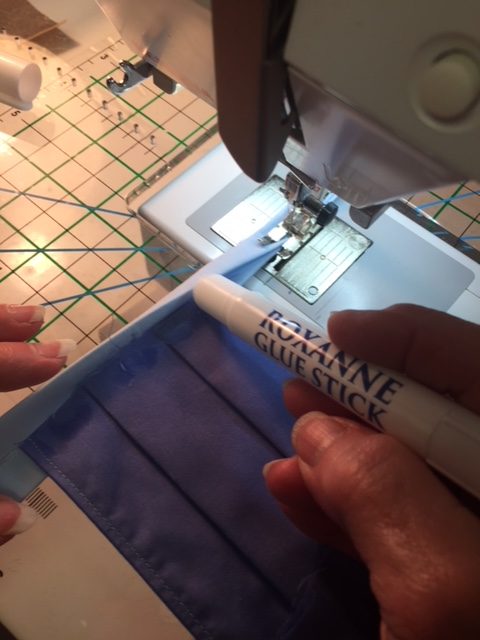
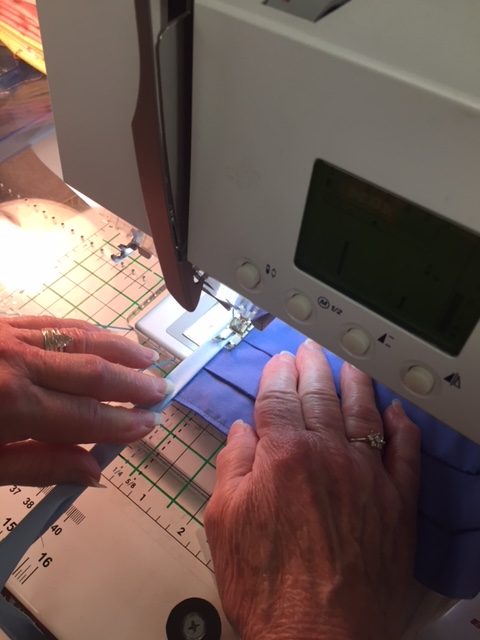
I ran one tie strip of 100% cotton, pre-washed and dried, through the bias tape maker, pressing with a hot dry iron, and folding under the lengthwise raw edges of fabric. To make a narrow tie, I still needed to fold over the strip again, lengthwise down the middle and press. To mark the middle of the strip for insertion of the mask, I folded the strip crosswise and marked 3” on either side of the middle with a Roxanne’s Marking Pencil. At my sewing machine, I opened the long tie strip, and ran Roxanne’s Glue Stick several inches down the middle, then stitched closely to the folded edges. When I came near the middle of the strip, I pressed the Glue Stick to the pleated edges of the mask, positioned the mask inside the strip, and top stitched the tie on each side of the mask pleated ends. Roxanne’s Glue Stick made stitching at the machine so much easier and more accurate.  

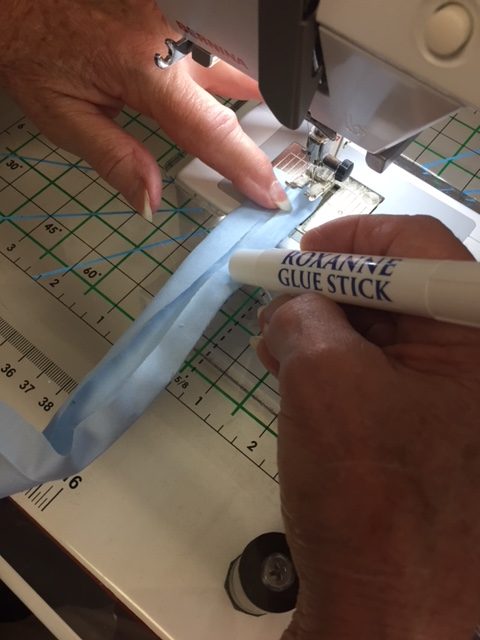
After pulling strip through bias tape maker, run Roxanne’s Glue Stick down the middle.  Fold over strip and stitch.
Place Glue on fold of tie to hold in place for stitching
Roxanne’s Glue Stick holds fabric in place for easier and more accurate stitching.

That worked so well, that I tried a modification of my prototype mask. For the ties, at the ironing board, after pulling the strip through the bias tape maker and pressing, I marked the center of the tie, half way between the ends, with a Roxanne Marking Pencil, and about 3” on either side, where the mask will be inserted and stitched. Then I ran the Glue Stick from one tie end to the first 3” mark, folded the strip, and pressed with a hot dry iron. This secured both sides of the tie for machine stitching. About 6” down, I ran the Glue Stick to the opposite tie end, folded over and pressed. So, I could either glue as I stitched at the machine, or glue at the ironing board. Both methods work well.

 Roxanne’s Glue Stick is one of my favorite tools and my very favorite glue. It goes on clear, so no worry about the color of glue fading through fabric to the right side or showing up at a later time. It glides across fabric like the ice skater I wish I was. Pressing with a hot iron adheres fabric to fabric quickly and securely. Roxanne’s Glue Stick does NOT gum up my sewing machine or get the needle sticky. These masks are meant to be washed following every use, and Roxanne’s Glue Stick is washable.

One more important thing: pre-wash your fabric, for two good reasons.

  1. You want to make sure that the fabric is as clean as possible to help prevent the spread of the virus.
  2. After washing, the mask will more readily return to its shape, not shrink out of shape.

And finally:  Presencia 50-weight is the best thread for machine and hand sewing. It is virtually lint free, so your machine will love it and you. It is 3-ply, which means it is strong and great for construction and top stitching. We want these masks to be washed frequently and hold up well.

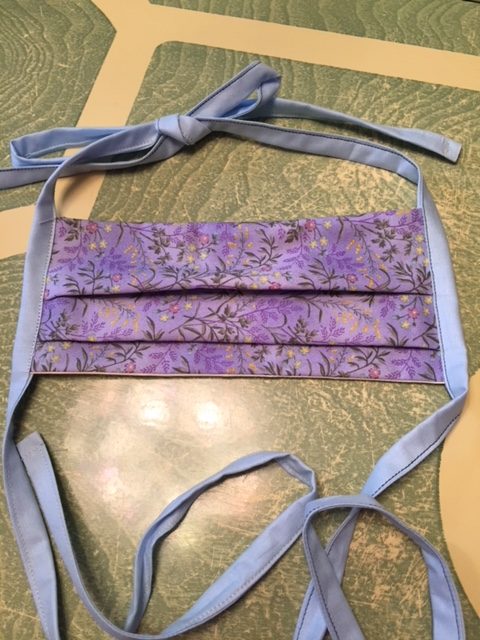
Ta-da! Finished mask!

We have a need, and that need can more readily be filled by using your gifts, skills, talents, and sewing machines to make masks. Not only do you provide a barrier of safety for yourself and others, but you participate in a worthwhile project that can be done while nesting at home.

Stay Well and Happy Stitching,

Judy Moore Pullen

Sew…What’s New?

By Judy Moore Pullen

It is the end of January, and I have already broken, amended, and forgotten most of the New Year’s resolutions I made. That is nothing new. However, using one of the best new tools of the quilters’ trade, Roxanne’s Glue Stick has stuck with me (pardon the pun). 

Roxanne’s Glue Stick has so many wonderful qualities. To begin with, it adheres quickly and well. I love the process of making a project, quilt, table runner, mug rug, etc. However, sometimes I have a deadline, dear hubby is down to his last clean pair of socks, there is enough dog hair on the floor to make another 4-legged critter, and it’s time to prepare lunch while breakfast dishes are still drying. So, I need a product that is efficient and helps me cross off some of the things on my To Do List for the day. I do not like to sit around waiting for glue to stick, the way dear hubby waits around for paint to dry. 

Roxanne’s Glue Stick helps me to be more efficient with my time, and complete the many baby quilts on which I am working that need bindings and labels. I stitch French fold bindings to the backing layer of baby quilts, then press the binding away from the quilt.

Stitch French fold binding to back of quilt, then press binding away from quilt.

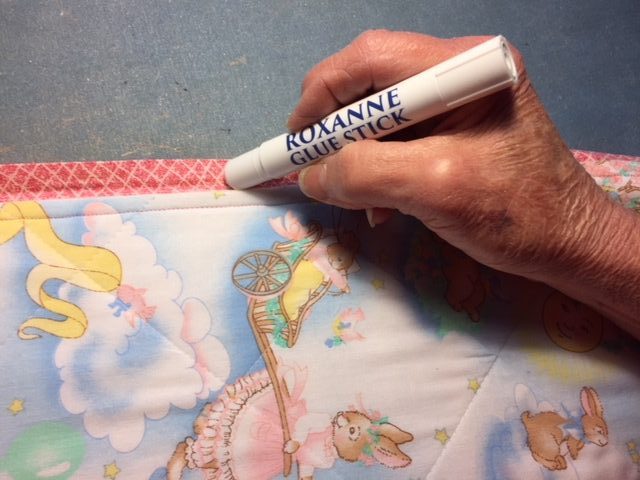
Next, I turn the quilt to the top side, and press the binding fold just over the stitching line, about a 10” length of   binding at a time. It glides on sooo smoothly, another great attribute.

Turn quilt to right side and apply Roxanne’s Glue Stick to binding.

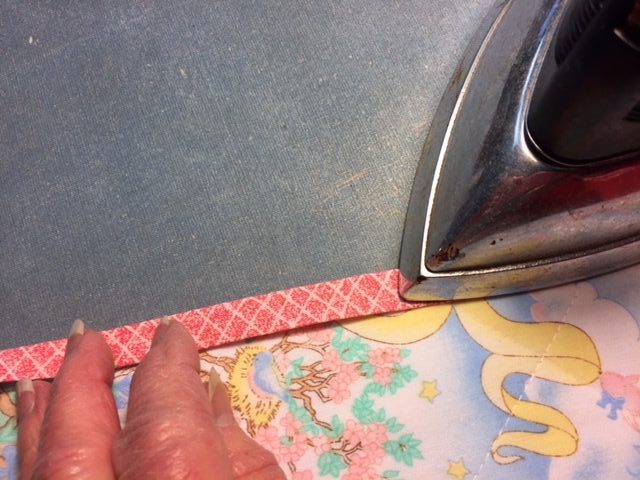
Then, with a hot dry iron, I press the binding fold over the cut edges of the quilt to just cover the stitching line again – continue applying glue and pressing the binding around the quilt.

Fold binding over cut edges of quilt, placing fold of binding at line of stitching.  Press.  Hand or machine stitch binding in place.

Works so well when you get to the mitered corners, too. Then hand or machine stitch. 

Roxanne’s Glue Stick does not gum up your hand or machine needle, making hand or machine stitching a breeze. When pressing my binding and label with an iron, the glue is dry right away, and hand or machine needles will not be gooey. I certainly do not want to gum up the innards of my sewing machine which I baby as much as my car. The fabric is easy to pierce with a needle when the glue is dry. I also recommend John James Gold n’ Glide Applique needles for hand stitching.

At times, I need to reposition fabric after using Roxanne’s Glue Stick. This can easily be done. I glued a label, pressed, and then discovered it was in the wrong corner. I just lifted a corner and peeled back the label. The same was true for a section of binding that I positioned in a wonky way. Fabric is not steel; it stretches and eases in. The glue also washes out, leaving no residue. 

Roxanne’s Glue Stick is soooo easy to use. It glides smoothly over fabric, does not lump or clump. The glue is clear, so I do not have to be concerned about color from the glue stick fading through to the right side of fabric when using for applique. I use a task light directly over my work, and can see a shine of the glue where I place it. 

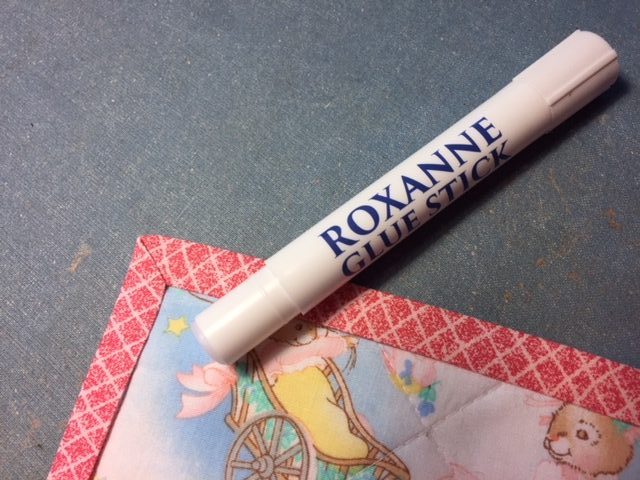
Roxanne’s Glue is a great tool for mitering corners on binding.  Apply glue and press with hot dry iron.

Since Roxanne’s Glue Stick is a “new” product, introduced at Houston International Quilt Market last fall, I am eager to use on projects that are currently taking back seat to my baby quilts. But making baby quilts is so much fun, and they provide so much comfort for little ones. However, using Roxanne’s Glue Stick to quickly hem dear hubby’s new jeans will allow me to check “hem jeans” off my To Do List, and get back to the joy of making baby quilts!

Happy Stitching!

Judy

The Best Thread for the Job

By Judy Moore Pullen

I have a passion for hand applique, so when I discovered Presencia thread a number of years ago, it was like a banana split on top of a devil’s food cake with chocolate frosting and sprinkles!

Something that helps me remember the thread sizes is this: As I am getting older, my number is getting bigger and I consider myself as getting “finer.” The same thing is true of needles and thread; the bigger the number, the finer the thread and hand sewing needles. Machine sewing needle are the opposite. The bigger the number, the bigger the needle.

There are several reasons why I believe that Presencia is simply the best for both hand and machine sewing. 

THING 1: Presencia thread begins with the very finest 100% long staple Egyptian cotton. When you begin with a superior fiber, the result is an outstanding finished product. A long-staple fiber means that the thread is virtually lint-free, a plus for you and your sewing machine. Do your own testing: clean out the bobbin race of your machine. Fill a bobbin and thread the top of the machine with Presencia. Sew to your heart’s content. When your bobbin is empty, judge for yourself how clean the bobbin case and area around the needle are. 

THING 2: All three weights of Presencia hand and machine sewing thread (40, 50, and 60 weight) are 3-ply. Plying, twisting three individual fibers together, makes the thread stronger. As a hand and machine sewing enthusiast, strong thread is important to me for the process of sewing as well as for the construction of the finished product. Not all 50 and 60 weight brand X threads are 3-ply.   

THING 3: Presencia 40 weight thread is strong, comes in many colors, and works well for hand and machine quilting, including long-arm machine quilting. I recommend using a John James size 90 machine quilting needle. For hand quilting, I use John James Gold ‘n Glide Big Eye size 10. These needles easily pierce the three layers of a quilt sandwich. The size of the Big Eye makes threading much easier for my AARP-age eyes.

THING 4: Presencia 50 weight thread, also 3-ply, is  smaller in diameter than 40 weight. It is great for general hand and machine sewing, and is beautiful for machine applique. I generally recommend it for beginning hand applique students, since it is slightly larger than 60 weight and easier to see hand stitches. A Mary Arden Applique size 10 needle is recommended. This needle is sharp, pierces rather than pushes the fabric, and stays strong and straight. I also use 50 weight for top stitching because of its larger diameter and the large number of colors available.

THING 5: I had great difficulty with machine piecing accuracy when I first began quilt making. I had sewn and made garments for years, but quilt making is somewhat different. My first quilt, a baby log cabin, had ruffles…Machine piecing was so stressful, and the completed quilt was not a pretty sight. When I discovered Presencia 60 weight thread, my accuracy improved and my frustration disappeared! Because 60 weight is so fine and 3-ply strong, it does not take up the extra threads when machine piecing. I also prefer it for hand applique. It also comes in so many colors, and virtually disappears when doing hand applique. I use a Mary Arden Appliquers needle, size 10 for hand applique, and John James size 70 or 80 for machine sewing with 60 weight thread.

Stitching with Presencia threads makes hand and machine sewing most satisfying for me. Using the best products results in a satisfying experience as well as a quality product. I highly recommend Presencia threads as well as John James and Mary Arden needles. Now to the refrigerator to make that super-duper banana split, then sit and sew to my heart’s delight.

Hot Fudge Sunday Inspiration!

Great Gifts for a Good Friend

Great Gifts for a Good Friend

By Judy Moore Pullen

Sometimes we just want to do something nice for a good friend who is a quilter or stitcher, and it is not even her birthday. One of my suggestions is a gift basket full of notions and sewing-related items.

I love to collect old baskets to use as containers for gifts. Finding just the right size and shape container is part of the fun of gift giving. Anyone can wrap a package with paper, but a basket makes it more personal. What quilter doesn’t need an extra basket for holding supplies and a project? And what’s more, a basket is part of the gift!

I try to pay close attention to the interests and likes of my friends. I observe colors, designs, and kinds of fabrics that friends use when working on projects. Are they brights, 1800’s civil war, batiks, or whimsical fabric shoppers? Do they prefer solids, stripes, florals, large or small prints? When we gather for our monthly JABS applique group (JUST ASK BERTA SOCIETY) I listen to other JABBERS as they discuss fabric purchases, works in progress, future and even completed projects. As we show what we are working on, I take mental notes about each JABBER’S preferences. At quilt guild and club meetings, members show and share projects that inspire and encourage. Mary, one of my dear friends, loves blues. Sue, another quilting friend, has a passion for owls and orange fabrics. Jo loves batiks. Janis and I are fans of all things wonky. I look forward to learning more about Kathy Jo, a new friend, and her choices.

The word “stash” is both a noun and a verb. I enjoy going through my stash (noun) of fabrics that I have stashed (past tense verb), and selecting a set of coordinating fabrics that my friends will enjoy. Purchasing yardage rather than fat quarters allows me to cut lengthwise and/or crosswise as well as bias strips for sashing and binding. I can cut my own fat quarters from yardage of fabric to place as a liner for a gift basket.

I enjoy filling gift baskets for friends with Presencia perle cotton and floss. They come in beautiful solid colors as well as variegated. The range of sizes, 3, 5, 8, 12, and 16, allows so many choices for friends who hand applique and enjoy stitchery. I include both perle cotton and floss for cotton and wool applique. It is also great fun and a surprise to combine a strand of perle cotton with a few strands of floss of a contrasting color. Perle cotton and floss encourage my friends to play with threads.

Roxanne’s Quilter’s Choice marking pencils in white and gray also make a nice addition to a friend’s gift basket. I love needle turn hand applique and using freezer paper on top of applique pieces. Trace the applique design on the dull side of freezer paper. Cut out freezer paper on the drawn line, and press the shiny side to the right side of the fabric with a hot, dry iron. Position the wrong side of the fabric on top of sandpaper to hold fabric in place.

Tracing Applique with Roxanne Marking Pencils

Using Roxanne’s Quilter’s Choice marking pencil, trace around the cut edge of the freezer paper. Cut away fabric a scant ¼ inch from the freezer paper for your seam allowance. You can always trim away more. Peel away the freezer paper from the applique fabric and position the applique fabric on the background. Secure in place with Roxanne’s Glue Baste-It, straight pins, or thread baste. Using a John James or Mary Arden Applique size 10 needle threaded with 50 or 60 weight thread, tuck under the seam allowance so that the mark from the marking pencil does not show.

I love giving gifts. Part of the fun of gift giving is collecting containers to hold the gift, and selecting items that are personal and of high quality. Gift giving is kind of like taking a trip – part of the fun is the preparation, and the other part is the participation. Gifts for a quilter or hand stitcher do not have to be pricey, but of good quality and genuine thoughtfulness.

Finished Gift Basket!

Awesome Appliquers

Awesome Appliquers

By Judy Moore Pullen

Turn hand applique into awesome instead of awful. Many quilters are very good at machine piecing and applique, but tend to shy away from hand applique. I had the pleasure of spending a day with five quilters who wanted to learn to hand applique at Uptown Blanco Textile Studio in Blanco, Texas.

The Textile Studio is located directly across the street from the historic Old Blanco Courthouse, where monthly Market Days was being held in this charming hill country town. The interior of the building is a step or two back in time, featuring floor to high ceiling shelves, finely restored and packed with fabulous name-brand fabrics, and antique and new quilts suspended from poles and heavy ropes. Plentiful samples inspire one to try something new in an old-timey setting.

A very happy Judy, sharing her trunk show at Uptown Blanco Textile Studio

The five ladies who I had the joy of spending the day with wanted to learn needle turn applique. I did not have to coerce them. They were ready to try any and all techniques. Pam was a true beginner, Jan wanted to expand and learn wool applique, Kathy works and plays at the shop, and Carol brought her friend Christine. “Tips, Tricks, and Techniques” was the title of the class, and we also worked and played with tools. Using one of my original designs for a table runner, we jumped right in learning about using freezer paper for things other than wrapping for food preservation.

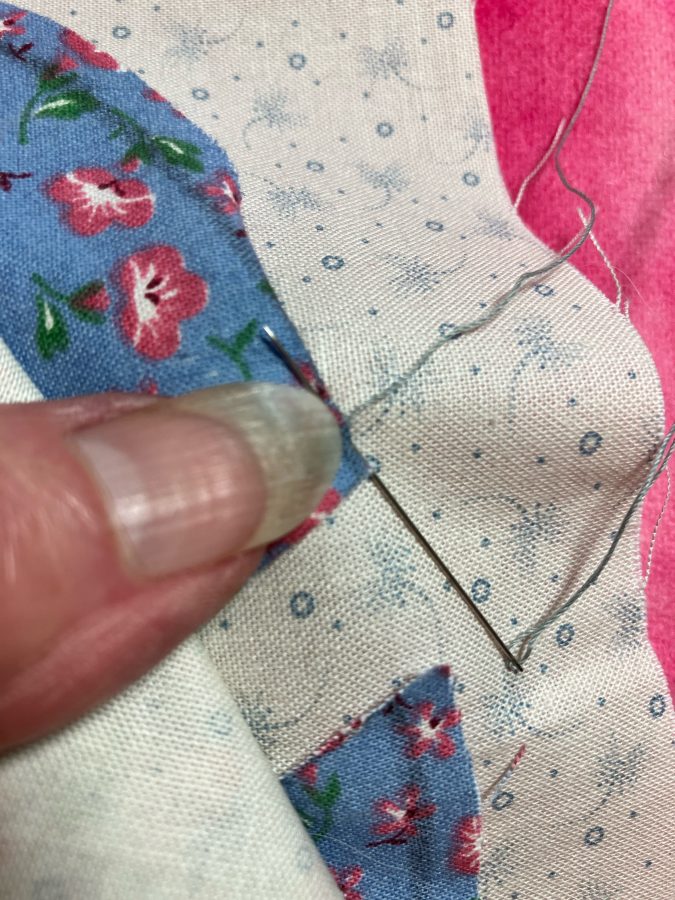
I also conducted a demo that I call “Needle Threading 101” using white fabric on top of a pillow, standing the needle straight up and down, and thereby having both hands free to thread a needle. White fabric allows you to see the eye of the needle more clearly. Using Presencia 50 weight 100% cotton, cut the thread straight across, moisten, pinch flat, and insert the thread into the needle. If the needle does not thread the first time, rotate the pillow, as a needle eye is punched and there is a right and wrong side to the eye of the needle. Repeat: cut, moisten, pinch, and thread the needle. Pull about 4” of thread through the eye of the needle. Hold the eye between your fingertips and pull the spool of thread to up to your muscle, about 18”, and cut. Make a quilter’s knot in the cut end.

We began by threading a John James Applique Needle size 10. Just as some people prefer Fords and others prefer Chevrolets, I wanted my students to test drive a milliners needle and quilters betweens needle. I occasionally switch off to different needles just for a change. It gives my fingers and hands a rest. For hand applique, you want a needle that is so smooth and slender that it readily punctures the fabric rather than pushes. If your eyesight is better than mine, perhaps you might try a size 11. The bigger the number, the finer the thread and hand sewing needles- just like us, as we “mature” we get finer. Using Needle Grip-Its also helps with hand stress that is the result of the repetitive motion of gripping and pulling a needle. I also shared information about the ergonomic benefits of a Roxanne thimble and using the side motion of one’s finger for pushing a needle through fabric.

We discussed placement of applique pieces, using a light box and/or clear plastic with the design traced on the plastic with a permanent fine tip marker. The design offered opportunities to practice placement of a curved bias-cut vine, leaves, and three petals of a flower. For portability and ease of applique, students could use Roxanne’s Glue Baste-It with or without the addition of straight pins and basting. I love to applique thin stems, so students were shown how to overcut stem fabric on the bias and trim it down to make a slender stem, or one that was smaller at the end that tucked under the flower. If you want the tip of a leaf to just touch the stem, there is a trick for that as well.

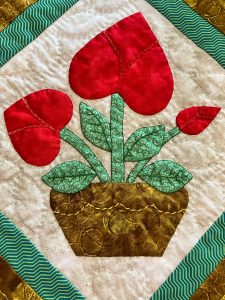
The flower consisted of three heart shapes, two of which were tucked under the center heart. A heart shape offers the opportunity to stitch straight sides, curves, innie and outie points. Having three heart shapes in the flower gave the gals plenty of practice, and I must say they all did so very well.

Two smiling “Awesome Appliquers”

The day was not only spent discussing the finer points of needle turn applique. We talked about children, grandchildren, recipes, gardening, and many other things so dear to our hearts. One of the best parts of spending the day with friends and stitching is building rapport or womanship. Customers peeked in, curious to see what we were doing. Many thanks to Ruth, shop manager, and Monica, her helper for the day. They provided encouragement and cut fabric before we left. One must not leave without taking fabric home, or patterns, or supplies, or some memory of this wonderfully welcoming quilt shop and Textile Studio. This is an unspoken rule of and for all quilters.

Rule #1: Never Leave Empty Handed

I am so happy to have been a part of converting machine piecers and quilters into hand appliquers, and these new appliquers are truly awesome. There was no whining, nary a word of complaint, just fun and learning a new skill. I also feel as if I made some new friends, which is such a joy. And, I learned things from my students as well. They shared tips, tricks, and techniques with me that I can use and that will improve the quality of my work and play.


Designing & Playing with Wool

Designing & Playing with Wool

By Judy Moore Pullen

If one plays around with fabric and threads, one can discover her own inner creative child, which is what gracious members of the Wimberley Quilt Guild in Wimberley, Texas, did last week. I had been invited to do a lecture and trunk show featuring wool applique, followed by an afternoon workshop. I passed around samples of hand applique using felted wool from the bolt and re-cycled wool. We also cooked/over-dyed wool in crock pots using onion skins, Kool-Aid, and a color transfer technique.

In the afternoon, after a discussion of becoming aware of designs all around us, guild members began thinking and talking about how they could transform several pieces of wool and a bag full of wool scraps into their own personal designs. I just love the process part of a project, and the easy-going interaction of the ladies was an important part of that process. They were encouraged to do “walk-abouts”, and see what others were doing, offer suggestions and comments. Some wanted their design ideas complete before beginning to stitch, while others jumped right in and took needle and thread to fabric.

wool applique prep

Prepping!

Wool applique prep

We also discussed tools: John James and Mary Arden Chenille Needles for wool applique and Tapestry Needles for wrap stitching. Chenille needles work so well with wool. They are strong, have a sharp point, and the shaft opens the fibers of wool so that the thread glides easily through. The elongated eye makes threading easy with Presencia’s Perle Cotton and Embroidery Floss. Tapestry needles are blunt, therefore make sliding the needle under stitches and not penetrating the fabric much easier. Wrapping stitches with contrasting colors of thread with a tapestry needle is part of the fun.

The ladies also played and experimented with Colonial Needle Felting Needles and Box Wool Roving. Needle felting and roving opens up the door to so many design possibilities.

wool roving

Coloinal’s Paint Box Wool

One of the secrets of using roving is to separate the roving into little see-through wisps. Place a piece of wool on a 2”-3” thick block of foam rubber. Layer of wisp of roving on top. Hold the felting needle straight up and down and punch the roving gently into the wool. Add more wisps of different colors to create texture. Gently sweep the tip of the needle against the wisps to make shapes. Couch with Presencia Perle Cotton or Embroidery Floss in a variegated or solid color if you desire.

Eleanor, who is going into the second grade this fall, created a one-of-a-kind piece of over-dyed wool by layering 3 colors of 100% wool and brown onion skins.

Eleanor's Dyed Wool

Eleanor showing off her dyed wool

She rolled up the layers and tied the bundle with strips of wool, then cooked the bundle in a crock pot. She also had great fun cutting her own shapes of wool and stitching with Perle Cotton. Eleanor took to needle felting and hand applique like a proverbial duck to water.

wool applique

“Just Play and have fun!”

Just play and have fun! If it is not perfect and you are, call it a one-of-a-kind piece of folk art. You will improve with practice and play. In my opinion, there is great value in work done by the human hand and not “perfect”. I was so inspired by Eleanor and all of the gracious members of the Wimberley Quilt Guild. They are great teachers, eager to learn, and demonstrate great community spirit and creativity.