Peace ~ Piece by Piece

By Judy Moore Pullen

I love the peace and serenity of our back yard; serenaded by birds and the rustle of leaves in the trees, early in the morning before lawn mowers get cranked up. Even on gray rainy days, the sound of raindrops on the roof provides a sense of peace and tranquility while I sip morning coffee and stay snug and dry under the extended roof over the back porch. I look up from my hand stitching when Sable and Sadie race and chase after squirrels that they will never catch, as those annoying little fluffy- tailed critters leap from tree to tree, taunting our furry little girls.

Making quilts for children also provides a wonderful sense of peace and fulfillment for me. A dear friend and I love to make charity children’s quilts. There are children in need, and we want to help provide the comfort of a quilt for as many children as we can. Debbie has a very large sewing room at her house, so she cuts the tops and backings, layers with batting, pin-bastes the layers together, and marks a diagonal grid with Roxanne’s marking pencils for machine quilting. She passes the quilts to me and I machine quilt and stitch the binding to the top. Debbie and I hand stitch the folded edge of the French fold bindings while binge-watching streamed TV in the evenings.

I love the process of doing something (except for the process of vacuuming and dusting.) I need a bumper sticker that tells the person behind me that “I would rather be sewing,” or “I would rather be shopping for fabric.” What would you rather be doing? What would your bumper sticker say about you?

Back to enjoying process…

I find that machine quilting the grid on these children’s quilts is so peaceful. Most of the tops are whole cloth, 36” x width of fabric, although some are lap size larger. Debbie creatively and artistically extends panels and darling children’s prints for tops by piecing, adding borders, turning plain-Jane fabrics into something fun for a child. Debbie is also a master at piecing scraps and strips together to make the bindings. Piece by piece, we hope to provide comfort and peace for children. This process provides a sense of peace for us as well. As I machine quilt the layers, I sometimes listen to audio books borrowed from our local library. At other times, I listen to music on my laptop. And sometimes, I simply savor the peace and quiet of the hum of my machine.

The peace acquired by hand stitching bindings is enhanced by the newest John James Signature Collection Needles from Colonial Needle Company. I had an opportunity to try the John James Signature Collection Milliners, size 10, for needle turn applique, one of my passions. What a joy! This needle is so sharp and glides so smoothly—easily piercing the turned edge of fabric rather than pushing or distorting it, which provides more accuracy and much greater ease of stitching. These needles are so user friendly that some of my “I don’t do hand applique” friends may even take up the art, joy, and passion of hand applique.

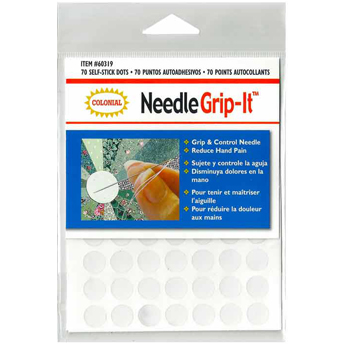
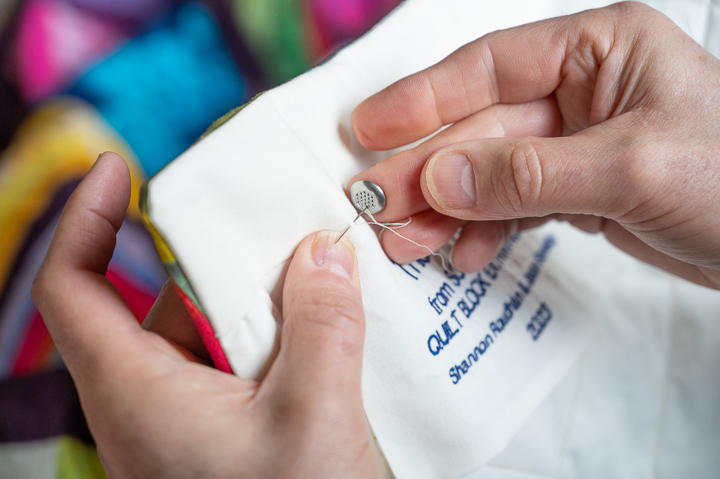
Threading the new John James Signature Collection Milliners, size 10, with Presencia 60-weight thread was also easy. Presencia 60 weight thread is 3-ply, long staple, so very strong while also very fine, perfect for hand applique and hiding those stitches. The length of this John James Signature Collection Milliners also made it perfect for swooping under and turning the seam allowance. One more thing I highly recommend is using two Needle Grip-Its to more easily grip the needle. Adhere one to your forefinger and one to your thumb tip on the hand with which you grip the needle. The repeated motion of gripping and pulling a needle can result in pain in hands and fingers over time. These great grips enable me to stitch for hours pain-free, also adding to my peace of mind whether I am doing hand applique or hand stitching a binding on a quilt.

One more thing…

I also tried stitching bindings with the newest John James Signature Collection Sharps, size 10. What a joy to easily pierce the backing, glide through the batting, and pierce upward to catch the fold of the binding. These needles are also strong, sharp, glide easily, and enhance my time of peace and quiet while listening to the sounds of chirping birds or a best seller book, peaceful music or the sound of silence. I’m eager to try these new John James Signature Collection Needles on hand piecing, too.

The process of sewing and creating is both peaceful and exciting for me. I enjoy the doing part of a project, not just the finished product. Using the best tools enhances both the process and the product. I highly recommend these new John James Signature Collection Needles. Just when you thought needles could not get any better ~ they did, they do, and they are!!

Peace be, piece by piece.

Happy Stitching!

Judy Moore Pullen

The Work of My Hands and My Heart (Plus a Roxanne’s Glue Tip!)

By Judy Moore Pullen

I have my parents’ hands and hearts, and for that I am so grateful. My parents’ work with their hands was so connected to their hearts. As I observe and listen to others during these last several months, I am convinced that those who quilt, embroider, knit, crochet, sew or do any kind of handwork do so with a connection of their hearts and hands. During this time of so much uncertainty and concern, many people are pulling together, reaching out with their hearts and hands to help others.

My parents grew up during the time of the Great Depression in Appalachia, a place of great natural beauty, but also great poverty. “Make do or do without” was an expression that defined their daily lives. Times were tough, and so were they. But their hard, laborious work done by hand, also produced soft hearts that reached out willingly to their family, friends, and neighbors.

My mother taught me to sew by hand at an early age on a dishtowel, to mend and sew on buttons, and to fashion clothes for a rag doll from her quilt scraps. I grew up with quilts made from left overs of clothing, pieced and quilted by hand. I remember going to the feed store before entering first grade with my mother to hopefully find enough feed sacks of the same print to make a new dress for my first day of school. Today, those feed sacks are quiltmakers’ collectors items, treasured as much as my new dress in the 1940’s. The feed sacks were chosen and stitched lovingly by my mother’s hands and heart.

My dad instilled in me the pleasure of fixing things instead of tossing aside and buying something new. My dad never had a brand-new car, but I well remember helping him bleed brakes, set the gap of spark plugs, and mend the fence for the chicken’s pen. I still have a strand of braided twine from a feed sack that my dad gave me. He saved the chain-stitched closure on each feed sack. I remember watching him braid three strands together, while sharing with me the lesson of how much stronger we are when we work together. My dad never saw a stranger, always willing to help when and where help was needed.

My quilting friends today are also an example of how individuals work with their hands and hearts to help others. Quilters used their skills and problem-solving abilities to be some of the first to make face masks when it was learned how helpful they can be. They dug into their scraps and stashes to provide fabrics once intended for quilts, table runners, wall hangings, or gifts for others to make and give away face masks, the work of their hands and hearts. They designed a variety of face coverings, some using elastic for ear pieces and others strips that tied the masks in place. Quilters readily shared ideas about what worked best for them. Designs were modified and masks were made for children using colorful and fun prints. And, all the time and efforts on the part of quilters has been freely given using the work of their hands and their hearts to help others.

I firmly believe that we are always being prepared for a turn or fork in the road, or a diversion that allows us to use our individual gifts and talents. Amid so much concern during the last several months, quilters have been using their experiences, gifts, and talents and the work of their hands and their hearts, turning time spent at home and their resources at hand to help others. What a joy to be able to use the lessons learned at an early age from my parents to use my hands and heart as a source of joy and fulfillment.

ROXANNE’S GLUE TIP

I was pressing a 2 1/2” strip for a bias binding using a dry iron, being careful to not stretch the strip out of shape. With steam, I can turn a fat quarter into nearly a half yard. I noticed Roxanne’s Glue Stick in a pretty little container while waiting for the heat of the iron to create a sharp crease in the fold of the binding strip. Then a light bulb went off in my head! I gently swiped the Glue Stick across the wrong side of the binding strip near the cut edge, and gently nudged the other cut edge over to match.

Then I pressed down firmly, not ironing back and forth. A smooth, flat, stable bias resulted! Hmmmm….wonder if that will help prevent the “bubble” that rises up ahead of my walking foot when I machine stitch binding to the right side of my quilt?  A walking foot is so helpful when machine stitching a binding to a quilted project, but I still must frequently stop, lift the presser foot, give a tug front and back on the binding, flatten the binding in place, stitch a few inches, and repeat the process. So, over to my machine to do a field test. BINGO!!!! So much smoother, easier, quicker, and neater! Wonder if it will work on binding that is cut on the straight of grain, cross grain?

Back to my ironing board to glue and press straight and cross grain strips. Stitched the binding in place for a few inches, and BINGO again!! The top layer of cross grain binding stayed in place!!

No “bubble”! I do like bubbles, but not on my bindings. Thank you, Roxanne’s Glue Stick!!

Happy Stitching,

Judy Moore Pullen

DIY Mask-Making Tips

MAKING MASKS MORE EASILY WITH ROXANNE’S GLUE STICK!

I began making masks when our lives changed in a heartbeat due to the Covid-19 virus. When I feel helpless, even hopeless at times, I have to DO something productive. The word was put out in our neighboring communities that hundreds of masks were needed, asap, or sooner.

I perused the internet, emailed, and talked with friends about how to make a face mask. Most mask instructions called for 1/4” elastic to hook around the ears, and interfacing to place inside, or a two-flap pocket on the wrong side of the mask for extra protection. Having neither elastic nor interfacing, and not wanting to wait for a delivery, I made a prototype mask with two, 2” width of fabric cut ties for each side of the mask. I located a 1” bias tape maker among my drawer of notions. You do NOT have to cut fabric on the bias to successfully run it through a bias tape maker.

I began by cutting and stitching two 6” x 9” rectangles of 100% cotton along the long sides, right sides together. I turned them right side out and pressed. I pinned a template to my ironing board that was 4 1/4” x 9” for pressing two lengthwise pleats in the mask. My first attempt with three pleats was too bulky and time consuming, and two pleats worked just as well.

Place Roxanne’s Glue on ends of pleats and press with iron to hold in place for stitching.

For my prototype mask, I decided to make a simple pocket for the back of the mask so that either a coffee filter cut to size or folded sheet of paper towel could be inserted for greater protection. I did not want to create too much bulk in the mask by making two overlapping flaps in the back. I cut a 4 1/2” x 9” rectangle of 100% cotton muslin, pre-washed and dried, the finished size of the mask, to make one light-weight pocket. At my ironing board, I pressed under 1/4” along each 9” side, then an additional 1/2” on one of those sides. Pressing alone did not hold down those narrow hems well, so Roxanne’s Glue Stick to the rescue! I ran the glue stick along the wrong side where hems would later be stitched, then pressed with a hot dry iron. I then top stitched the ½” hem in place—much easier than pressing and stitching hems.

The two layers of mask were stitched, now to stitch the pocket to the back. Roxanne’s Glue Stick to the rescue again! I ran the glue stick along one 9” length of the back of the mask, placed the 1/4” hem on top, wrong side of muslin to back of mask, pressed, and then back to my sewing machine to stitch in place.

I ran one tie strip of 100% cotton, pre-washed and dried, through the bias tape maker, pressing with a hot dry iron, and folding under the lengthwise raw edges of fabric. To make a narrow tie, I still needed to fold over the strip again, lengthwise down the middle and press. To mark the middle of the strip for insertion of the mask, I folded the strip crosswise and marked 3” on either side of the middle with a Roxanne’s Marking Pencil. At my sewing machine, I opened the long tie strip, and ran Roxanne’s Glue Stick several inches down the middle, then stitched closely to the folded edges. When I came near the middle of the strip, I pressed the Glue Stick to the pleated edges of the mask, positioned the mask inside the strip, and top stitched the tie on each side of the mask pleated ends. Roxanne’s Glue Stick made stitching at the machine so much easier and more accurate.  

After pulling strip through bias tape maker, run Roxanne’s Glue Stick down the middle.  Fold over strip and stitch.
Place Glue on fold of tie to hold in place for stitching
Roxanne’s Glue Stick holds fabric in place for easier and more accurate stitching.

That worked so well, that I tried a modification of my prototype mask. For the ties, at the ironing board, after pulling the strip through the bias tape maker and pressing, I marked the center of the tie, half way between the ends, with a Roxanne Marking Pencil, and about 3” on either side, where the mask will be inserted and stitched. Then I ran the Glue Stick from one tie end to the first 3” mark, folded the strip, and pressed with a hot dry iron. This secured both sides of the tie for machine stitching. About 6” down, I ran the Glue Stick to the opposite tie end, folded over and pressed. So, I could either glue as I stitched at the machine, or glue at the ironing board. Both methods work well.

 Roxanne’s Glue Stick is one of my favorite tools and my very favorite glue. It goes on clear, so no worry about the color of glue fading through fabric to the right side or showing up at a later time. It glides across fabric like the ice skater I wish I was. Pressing with a hot iron adheres fabric to fabric quickly and securely. Roxanne’s Glue Stick does NOT gum up my sewing machine or get the needle sticky. These masks are meant to be washed following every use, and Roxanne’s Glue Stick is washable.

One more important thing: pre-wash your fabric, for two good reasons.

  1. You want to make sure that the fabric is as clean as possible to help prevent the spread of the virus.
  2. After washing, the mask will more readily return to its shape, not shrink out of shape.

And finally:  Presencia 50-weight is the best thread for machine and hand sewing. It is virtually lint free, so your machine will love it and you. It is 3-ply, which means it is strong and great for construction and top stitching. We want these masks to be washed frequently and hold up well.

Ta-da! Finished mask!

We have a need, and that need can more readily be filled by using your gifts, skills, talents, and sewing machines to make masks. Not only do you provide a barrier of safety for yourself and others, but you participate in a worthwhile project that can be done while nesting at home.

Stay Well and Happy Stitching,

Judy Moore Pullen

Sew…What’s New?

By Judy Moore Pullen

It is the end of January, and I have already broken, amended, and forgotten most of the New Year’s resolutions I made. That is nothing new. However, using one of the best new tools of the quilters’ trade, Roxanne’s Glue Stick has stuck with me (pardon the pun). 

Roxanne’s Glue Stick has so many wonderful qualities. To begin with, it adheres quickly and well. I love the process of making a project, quilt, table runner, mug rug, etc. However, sometimes I have a deadline, dear hubby is down to his last clean pair of socks, there is enough dog hair on the floor to make another 4-legged critter, and it’s time to prepare lunch while breakfast dishes are still drying. So, I need a product that is efficient and helps me cross off some of the things on my To Do List for the day. I do not like to sit around waiting for glue to stick, the way dear hubby waits around for paint to dry. 

Roxanne’s Glue Stick helps me to be more efficient with my time, and complete the many baby quilts on which I am working that need bindings and labels. I stitch French fold bindings to the backing layer of baby quilts, then press the binding away from the quilt.

Stitch French fold binding to back of quilt, then press binding away from quilt.

Next, I turn the quilt to the top side, and press the binding fold just over the stitching line, about a 10” length of   binding at a time. It glides on sooo smoothly, another great attribute.

Turn quilt to right side and apply Roxanne’s Glue Stick to binding.

Then, with a hot dry iron, I press the binding fold over the cut edges of the quilt to just cover the stitching line again – continue applying glue and pressing the binding around the quilt.

Fold binding over cut edges of quilt, placing fold of binding at line of stitching.  Press.  Hand or machine stitch binding in place.

Works so well when you get to the mitered corners, too. Then hand or machine stitch. 

Roxanne’s Glue Stick does not gum up your hand or machine needle, making hand or machine stitching a breeze. When pressing my binding and label with an iron, the glue is dry right away, and hand or machine needles will not be gooey. I certainly do not want to gum up the innards of my sewing machine which I baby as much as my car. The fabric is easy to pierce with a needle when the glue is dry. I also recommend John James Gold n’ Glide Applique needles for hand stitching.

At times, I need to reposition fabric after using Roxanne’s Glue Stick. This can easily be done. I glued a label, pressed, and then discovered it was in the wrong corner. I just lifted a corner and peeled back the label. The same was true for a section of binding that I positioned in a wonky way. Fabric is not steel; it stretches and eases in. The glue also washes out, leaving no residue. 

Roxanne’s Glue Stick is soooo easy to use. It glides smoothly over fabric, does not lump or clump. The glue is clear, so I do not have to be concerned about color from the glue stick fading through to the right side of fabric when using for applique. I use a task light directly over my work, and can see a shine of the glue where I place it. 

Roxanne’s Glue is a great tool for mitering corners on binding.  Apply glue and press with hot dry iron.

Since Roxanne’s Glue Stick is a “new” product, introduced at Houston International Quilt Market last fall, I am eager to use on projects that are currently taking back seat to my baby quilts. But making baby quilts is so much fun, and they provide so much comfort for little ones. However, using Roxanne’s Glue Stick to quickly hem dear hubby’s new jeans will allow me to check “hem jeans” off my To Do List, and get back to the joy of making baby quilts!

Happy Stitching!

Judy

Let’s Get to the Point (about hand sewing needles)

By Judy Moore Pullen

Yes, there is a difference in hand sewing needles, just like there is a difference between driving a 5-speed standard transmission car or an automatic. When I was younger and my vision was better, my hands steadier, I used whatever needle was easy to thread. Over the years, and after dabbling in many different kinds of sewing projects, I have learned several things about hand sewing needles.

I find that for needle turn applique, I prefer Mary Arden or John James applique needles, size 10. I can thread these needles with Presencia 50 or 60 weight cotton, sometimes needing to use a threader. These needles are so sharp that they pierce, rather than push the fabric, making my applique more accurate, my stitches smaller and more consistent. They also glide easily through the fabric, rather than distorting it. The shafts of these needles are smooth and strong. They do not bend and help prevent my hands and fingers from cramping. 

A friend who does beautiful hand applique prefers using betweens, generally thought of as hand quilting needles. These work well for her. For me and my chubby fingers, I need a longer needle, hence applique needles. Another good choice for hand applique is milliners needles, which are longer still. Sometimes I switch to a milliners needle after extended sessions of hand stitching. This is somewhat like changing your shoes to a different heel height during the day – it gives you a rest. 

Another passion of mine is wool applique by hand. My needles of choice are John James chenille and tapestry needles. They come in sizes 18-26. The bigger the number, the finer, smaller the needle. Somewhat like us – the bigger our number/age, the finer we are, right? That is my story, and it helps me remember. This applies to hand sewing needles and thread sizes. John James chenille needles are sharp and easily pierce wool. The eye is elongated for ease of threading perle cotton or several strands of floss. The larger shaft opens the fibers of wool, allowing the thread to be drawn through, then the opening closes around the thread. 

If you tap, tap, tapped a chenille needle on a hard surface, over time, the tip would become dull, and this helps me remember that a tapestry needle serves well for needlepoint and wrap embroidery stitches when you do want a blunt needle, and do not want to separate fibers of your background or embroidery threads. I can easily thread a John James tapestry needle with contrasting colors of Presencia Perle Cotton or Floss and create fun and unique designs by wrapping previously stitched threads. 

I must also add a note about Needle Grip-its. These tiny adhesive circles have enabled me to stitch for hours without hand pain. The repetitive motion of gripping and pulling a needle can cause hand and finger pain. You do not notice it right away, but over time, it can become a problem. I want to continue happily hand stitching, and these little sticky dots are inexpensive, unobtrusive, and what I consider a necessary “tool”.

Happy Stitching!

Judy

Quilters, Step Out of Your Box

By Judy Moore Pullen

Let’s play a word association game. What is the first word that comes to mind when you hear or see the word “quilt”? Perhaps you think: bed covering, something old and pretty, shopping at a special fabric store, a treasure made by one’s mother or grandmother. A non-quilter would say blanket.

The next word in this game is “yarn”: knit and crochet, needlepoint, handmade scarf, hat, or sweater. I think of quilt making using yarn, especially Colonial Needle Persian Wool Yarn. 

As quilters we are artists. We create something of beauty that is also functional. Some of us follow directions to the letter. Others find ways to make a traditional design unique and different. Still others enjoy using materials that are unique and different. And then some just flat out like to play and see what happens. 

When Colonial Needle Company first offered Persian Wool Yarn, I immediately thought of wool applique. I have a passion for hand work, anything applique, and I love to play. A heart shape is a good design on which to begin playing. It has straight lines, curves, innie and outie points. I also like “wonky” as a design element so I cut out a symmetrical heart shape from freezer paper (as I learned to do in first grade…in the last century.) Then I trim one side to make it wonky, as in one-of-a-kind. With a dry iron, I lightly press the shiny side of my wonky freezer paper heart to felted wool, and cut out the shape next to the cut edge of the freezer paper. Then I cut a piece of green wool on the bias, about 3/8” wide to make a stem that I could shape and bend.  

Colonial Persian Wool Yarn now comes in 8-yard cards. It is 3-ply and easy to separate into individual strands. I arrange my wonky wool heart and stem on a background, and glue in place with Roxanne’s Glue Baste-It. Using one strand of wool yarn, I thread a John James needle, size 20, and begin stitching diagonal lines from the bottom of the stem to the top. Then I turn the stem around and repeat stitching on the diagonal down the stem so that the yarn crosses somewhat in the middle. I tack the center of the x-stitches with yarn, Presencia Perle Cotton, or floss or a bead. 

All of that worked well, so I began to blanket stitch around the heart with wool yarn. I also like to applique wool by making  running stitches with Perle Cotton size 8. Then, I thread a John James Tapestry needle, size 20, with Persian Wool Yarn in a contrasting color. Next, I slide the threaded needle under the running stitches left to right and continue around the wool applique. One can also thread under the running stitches by going back the other direction with yet another contrasting color of Persian Wool Yarn. Or I can weave the yarn in and out from left to right/right to left.

Playing with Persian Wool Yarn also allows me to make French knots, colonial knots, and all sorts of other embroidery stitches. If you are a little on the side of caution, practice first on scraps of fabric…real quilters do have scraps. If you are a new quilter, just ask an “old” quilter who is probably more than willing to share. I am beginning to think that scraps breed in my scrap basket overnight. 

Wool applique and embroidery using wool yarn. Leaves on the left were originally wool fabric rather than embroidery.

I love words, playing with them and stitching them, both using hand embroidery stitches and hand applique. Write your name on a piece of lined paper, using at least 4 lines for capital letters and 2 lines for lower case. Tape the paper to a light box or a window. Place background fabric on top, right side up and secure with tape. Trace your name with a fine point mechanical pencil. Remove background. Thread needle with wool yarn and embroider on the lines with a backstitch, stem/outline stitch, or running stitch. You may want to use a hoop to stabilize the fabric or baste a layer of muslin to the wrong side before stitching. 

There is so much more you can do with Colonial Needle Persian Wool Yarn as a quilter. This is just the tip of the proverbial iceberg. Get out of your quilt box and try using wool yarn for embellishing, sewing on buttons, couching, and braiding in addition to applique and embroidery. Considering that each package contains 8 yards of 3-ply excellent quality wool yarn, and comes in many wonderful colors, you can also become a quilt artist.

Happy Stitching!

Sadie Sue and Sable Ann mooching peanuts

Judy Moore Pullen