As spring projects become more creative and expressive, it’s the perfect time to introduce a stitch that goes beyond basic threadwork.
The couching stitch allows you to work with thicker threads, yarns, and even ribbons by securing them to the fabric surface with small stitches. The result? Bold texture, striking lines, and endless creative possibilities.
If you’re looking to add dimension and personality to your stitching, couching is a technique worth exploring.
What Is a Couching Stitch?
The couching stitch is a technique where a thicker thread (or material) is laid on top of the fabric and secured in place with smaller stitches using a separate thread.
Instead of passing the main thread through the fabric, it “rests” on the surface — while the smaller stitches anchor it down.
This makes couching ideal for materials that are too thick, delicate, or decorative to stitch through the fabric directly.
When & How It’s Used
Couching is incredibly versatile and works well in both traditional and modern stitching.
It’s best for:
- Decorative outlines and bold lines
- Working with thick threads, yarn, or ribbon
- Adding texture to embroidery designs
- Highlighting shapes or lettering
- Mixed-media or creative textile projects
It’s especially popular in contemporary embroidery and fiber art, where texture and layering play a big role.
What You’ll Need
- Needle (sharp or embroidery needle)
- Two types of thread:
– A thicker thread, yarn, or ribbon (the “couched” thread)
– A finer thread to secure it - Fabric (medium to heavy weight works best)
- Embroidery hoop (optional but helpful)
- Scissors
Pro Tip: Choose a fine thread that either blends in or contrasts intentionally with your thicker thread.
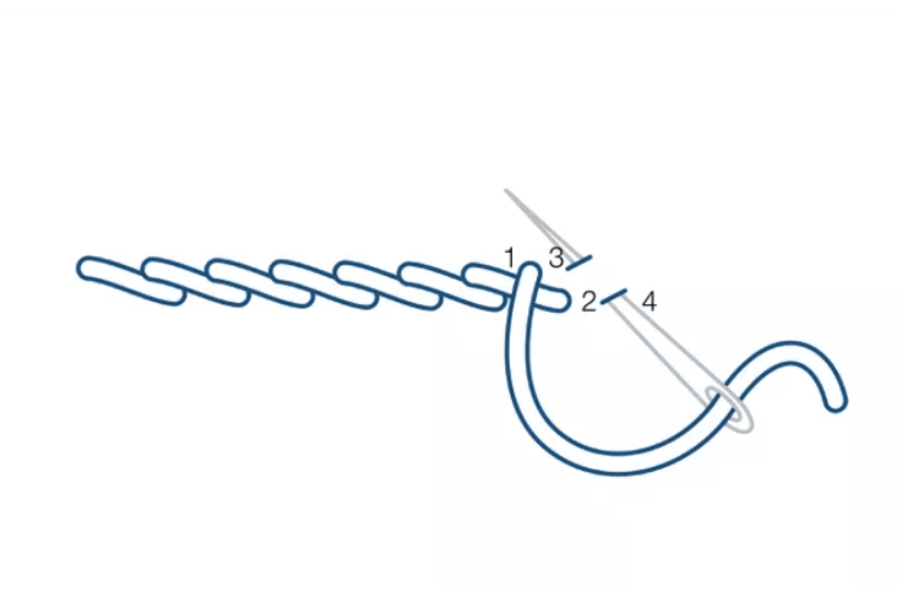
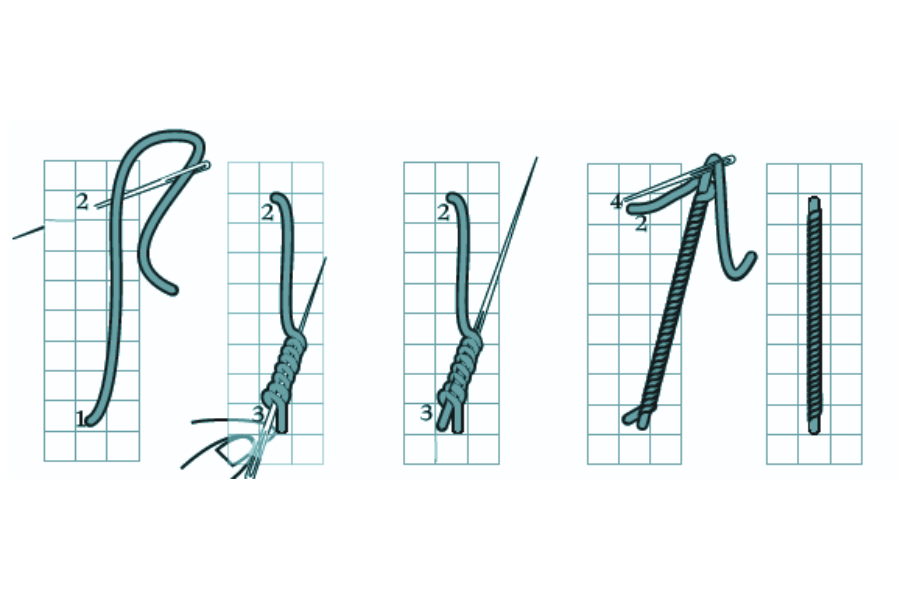
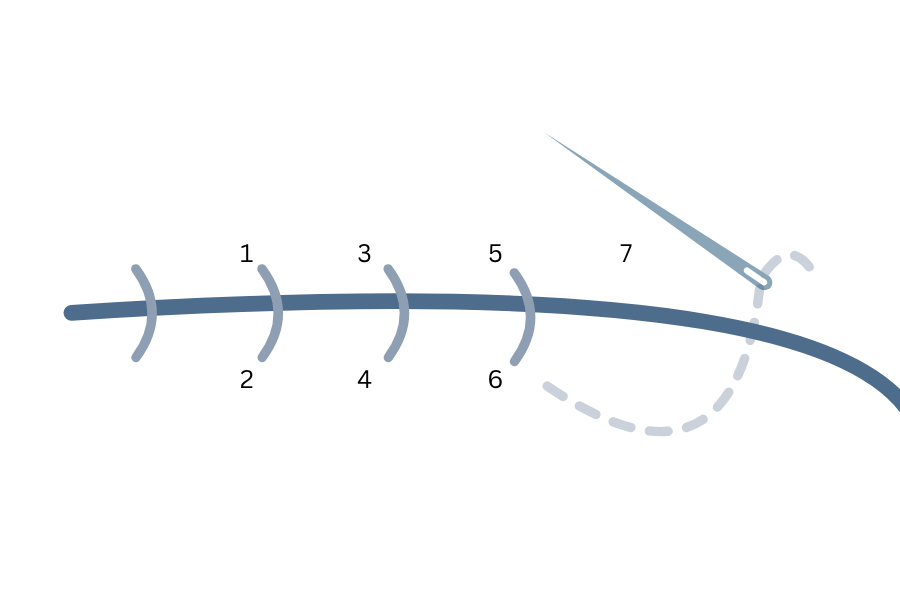
How to Sew a couching stitch
- Step 1: Lay the Thread – Place your thicker thread or yarn along the surface of your fabric in your desired shape or line.
- Step 2: Bring Needle Up – Bring your needle (with the finer thread) up next to the thicker thread.
- Step 3: Anchor the Thread – Make a small stitch over the thicker thread, securing it to the fabric.
- Step 4: Repeat at Intervals – Continue making small stitches over the thicker thread at regular intervals to hold it in place.
- Step 5: Follow Your Design – Shape the couched thread as you go, guiding it into curves, lines, or patterns.
Tips for Successful Couching
- Keep anchoring stitches evenly spaced
- Don’t pull too tightly — allow the top thread to sit naturally
- Experiment with contrast vs. matching thread
- Use shorter anchoring stitches for curves
- Try different materials (metallics, wool, ribbon)
Couching is all about experimentation — there’s no single “right” look.
Common Projects Using Couching Stitch
Couching is perfect for projects that benefit from bold texture:
- Decorative embroidery and hoop art
- Lettering and monograms
- Outlines in modern embroidery
- Textile art and mixed-media pieces
- Embellishing garments or accessories
It’s a great stitch for stepping outside traditional embroidery and exploring more creative techniques.
Next Month:
We’ll explore Long & Short Stitch, a technique that brings shading and soft color blending to your embroidery.