Why You Should Never Struggle to Thread a Needle Again
We’ve all been there: you’re in the flow of a beautiful Sashiko piece or a delicate EPP project, and then… you have to re-thread. Suddenly, you’re squinting, snipping thread ends, and losing your “stitching zen.”
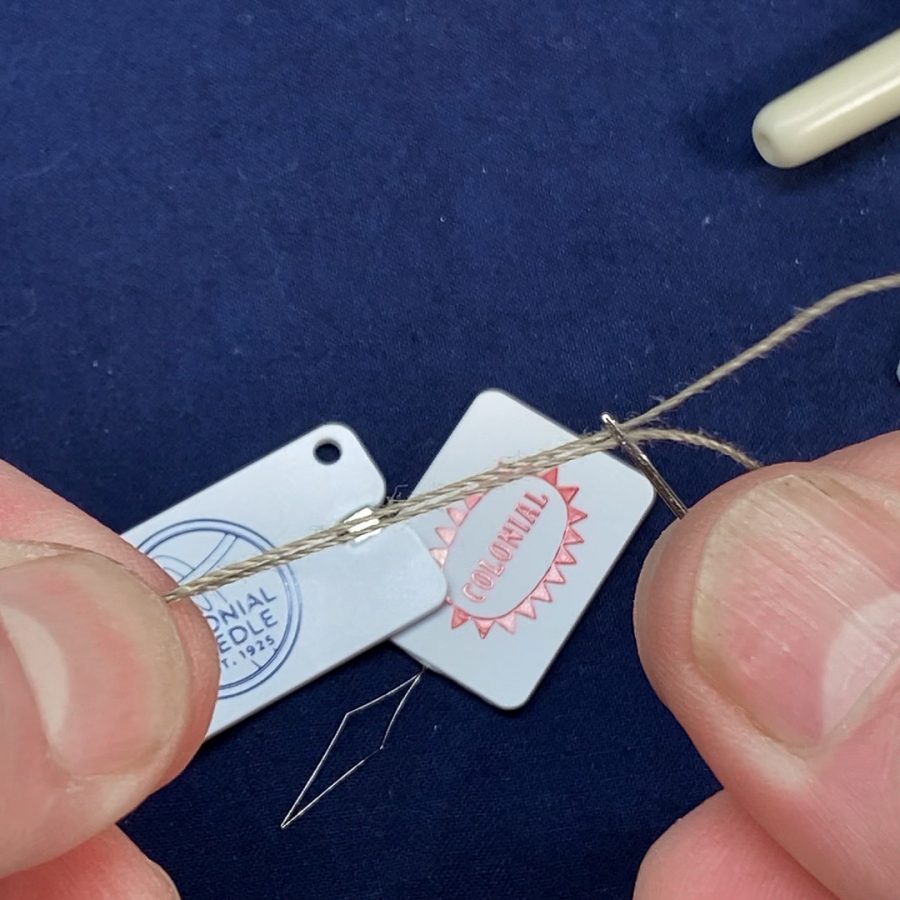
At a recent workshop, we realized that while most of us know what a needle threader is, many of us aren’t using the right one or we weren’t taught how to use them. Since our friends at Colonial Needle Company sent us their full lineup to test, we’re breaking down which threader belongs in your kit and how to use them for both hand and machine sewing.
Meet the Lineup
Not all needle threaders are created equal. Depending on your project, you might need a different “wand”:
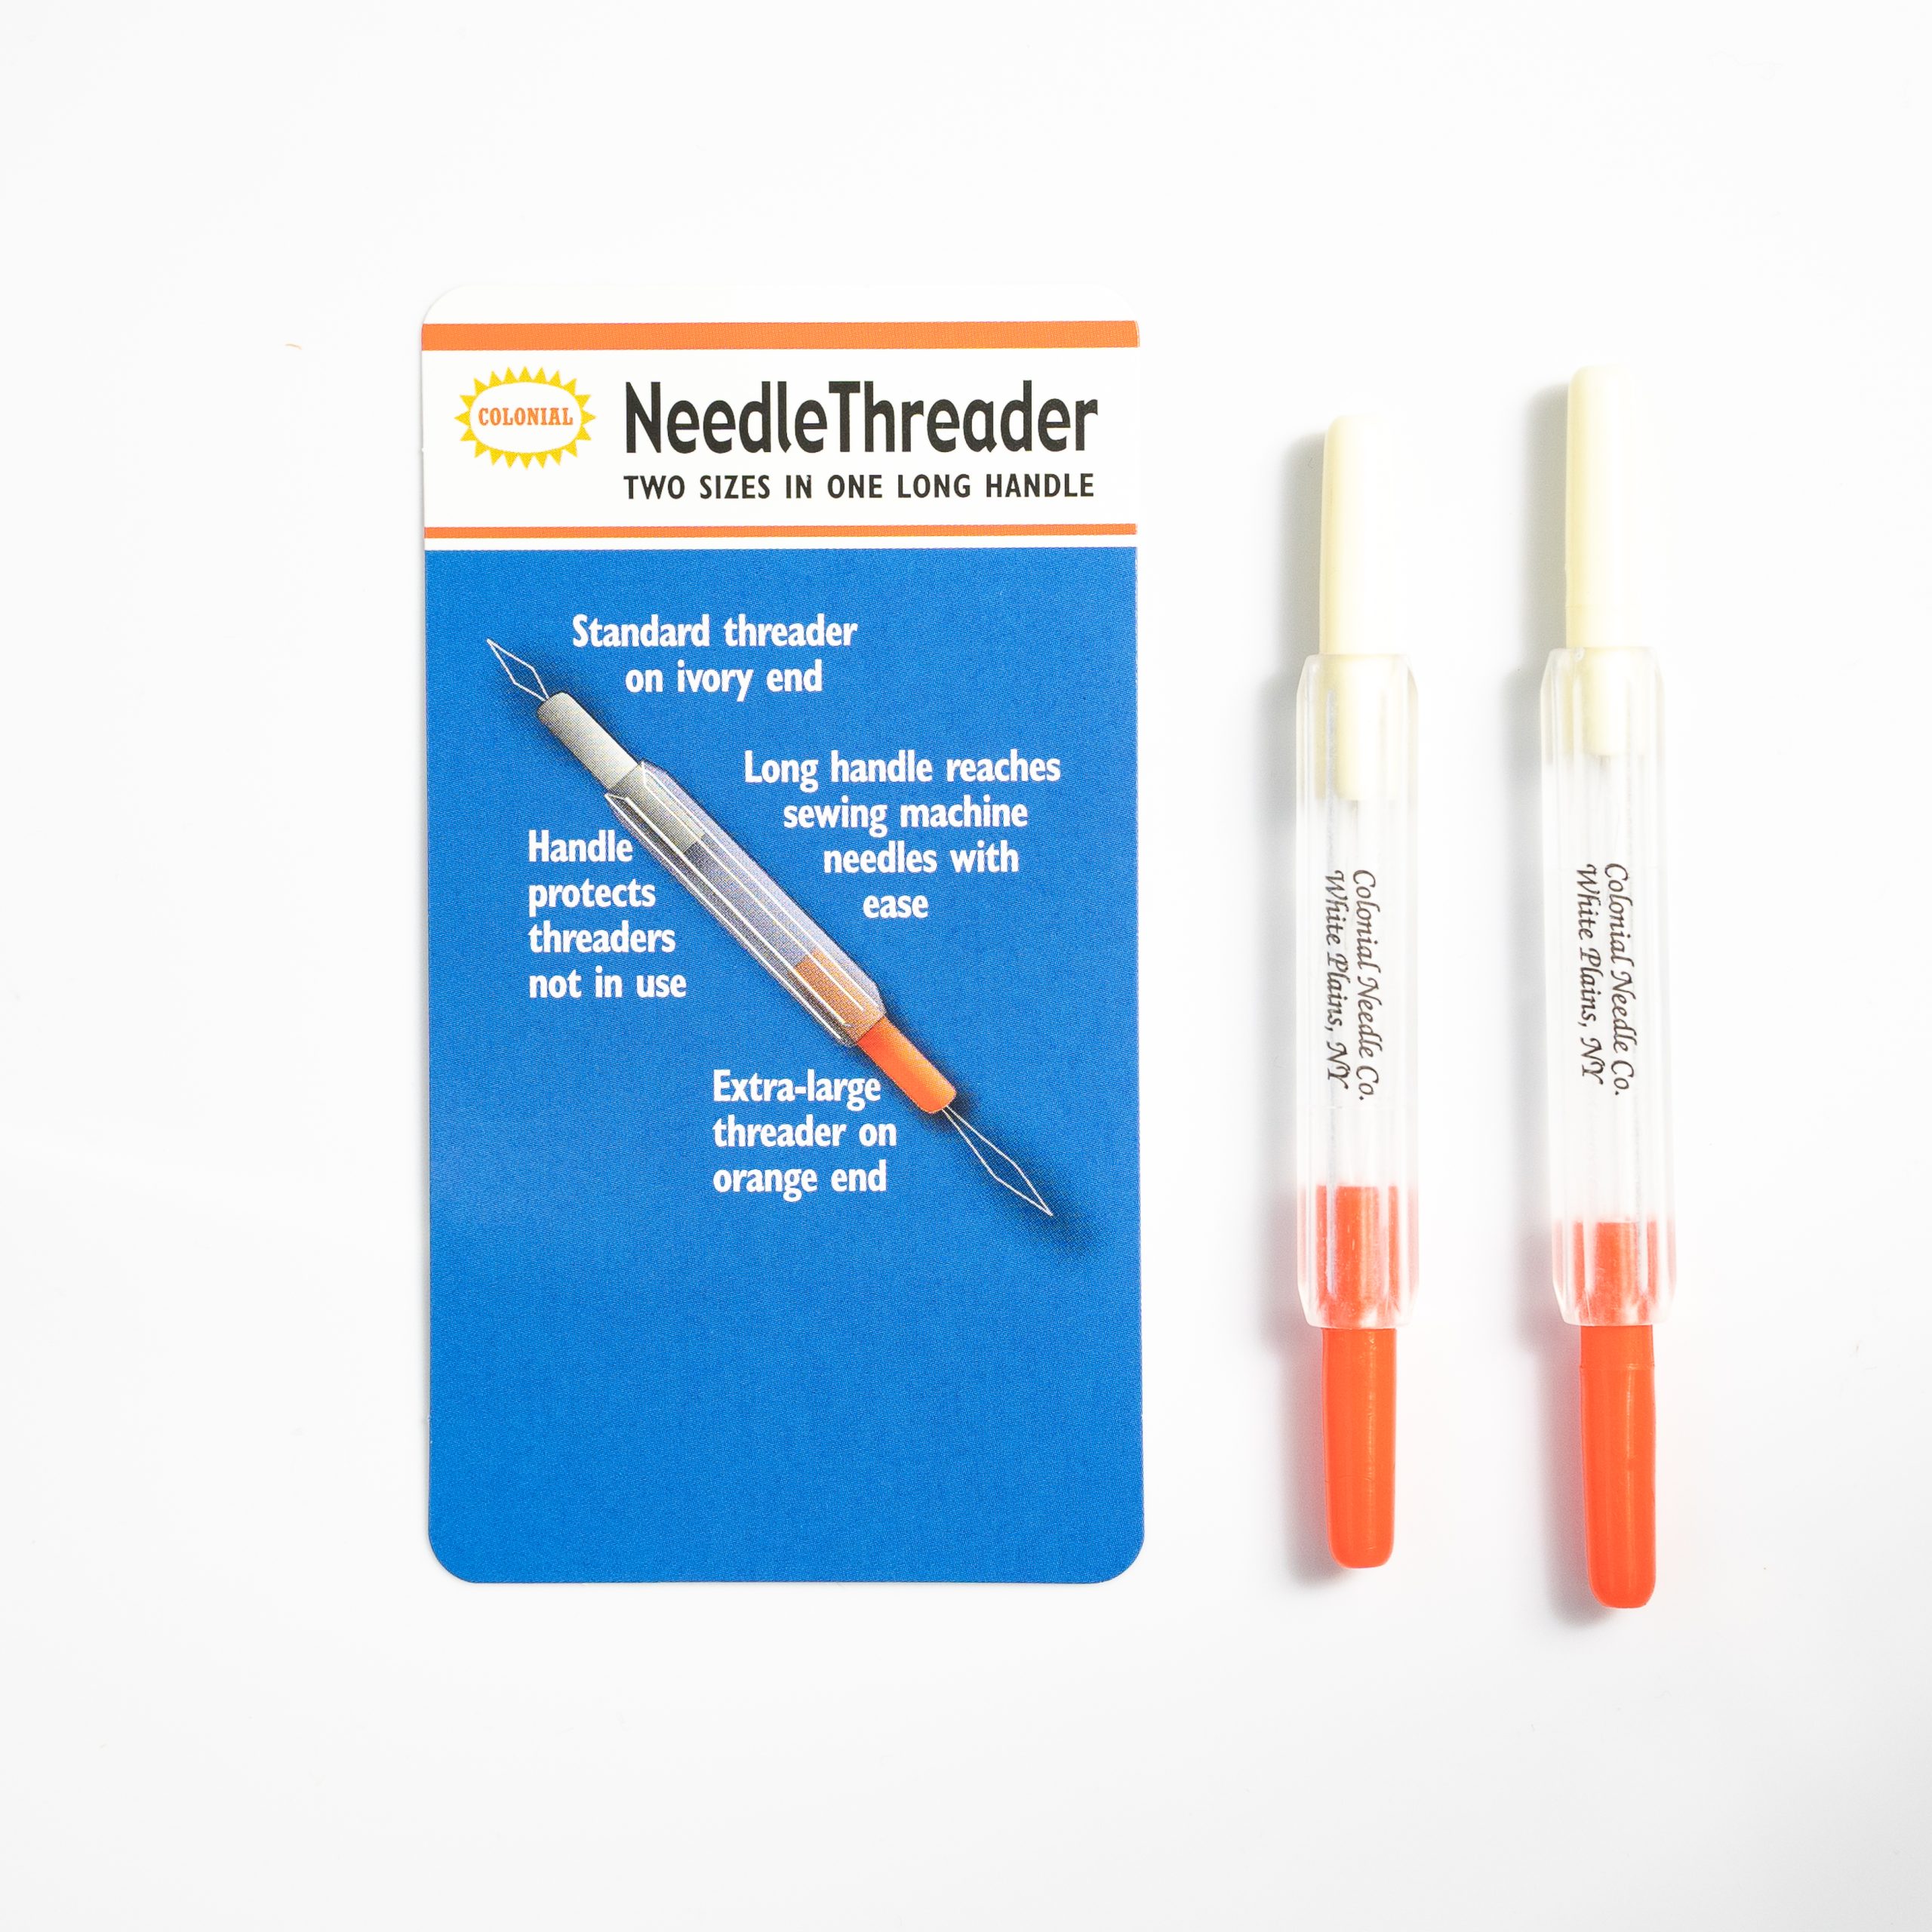
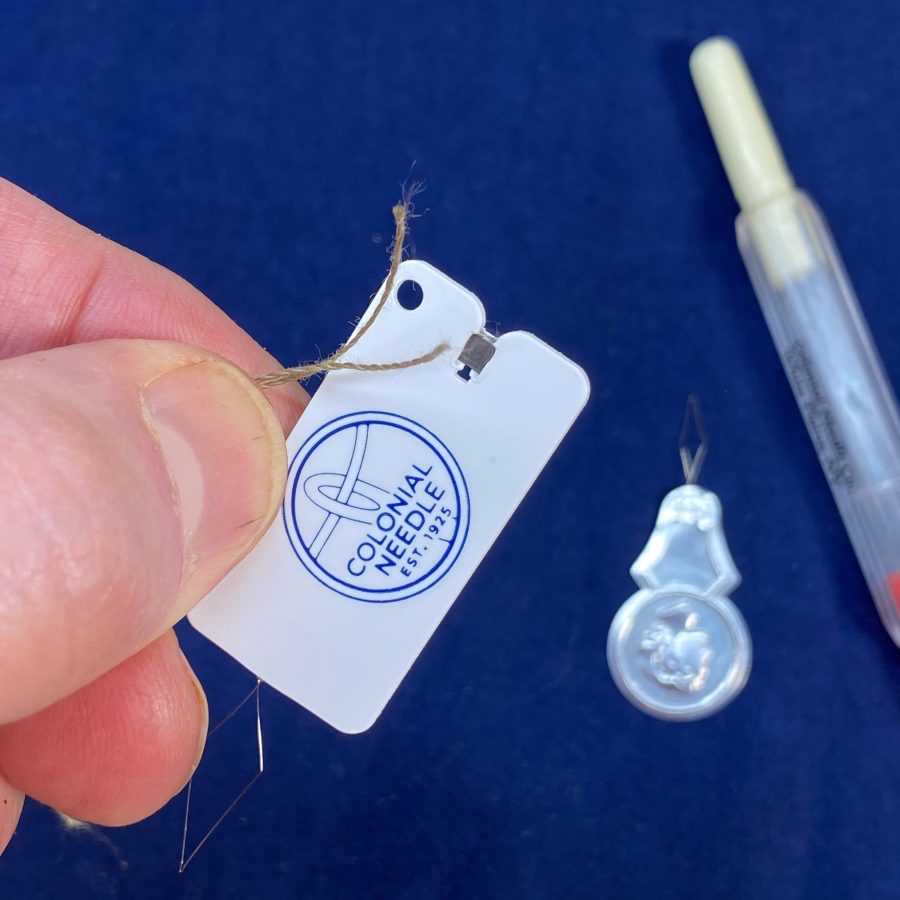
Colonial Dual Threader: This is the one that lives in our sewing machine tray. It features a long handle (perfect for reaching into tight machine spaces) and two different wire sizes: a standard end and an extra-large end for thicker threads or Pearl Cotton
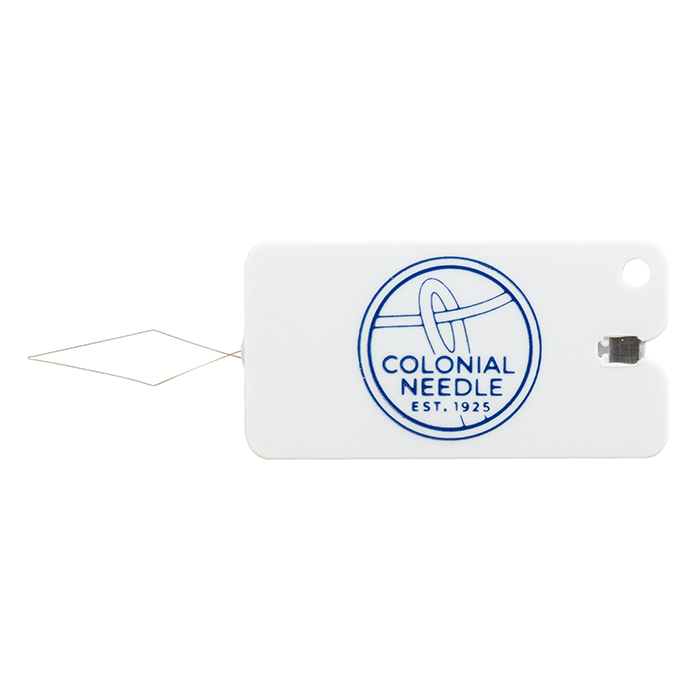
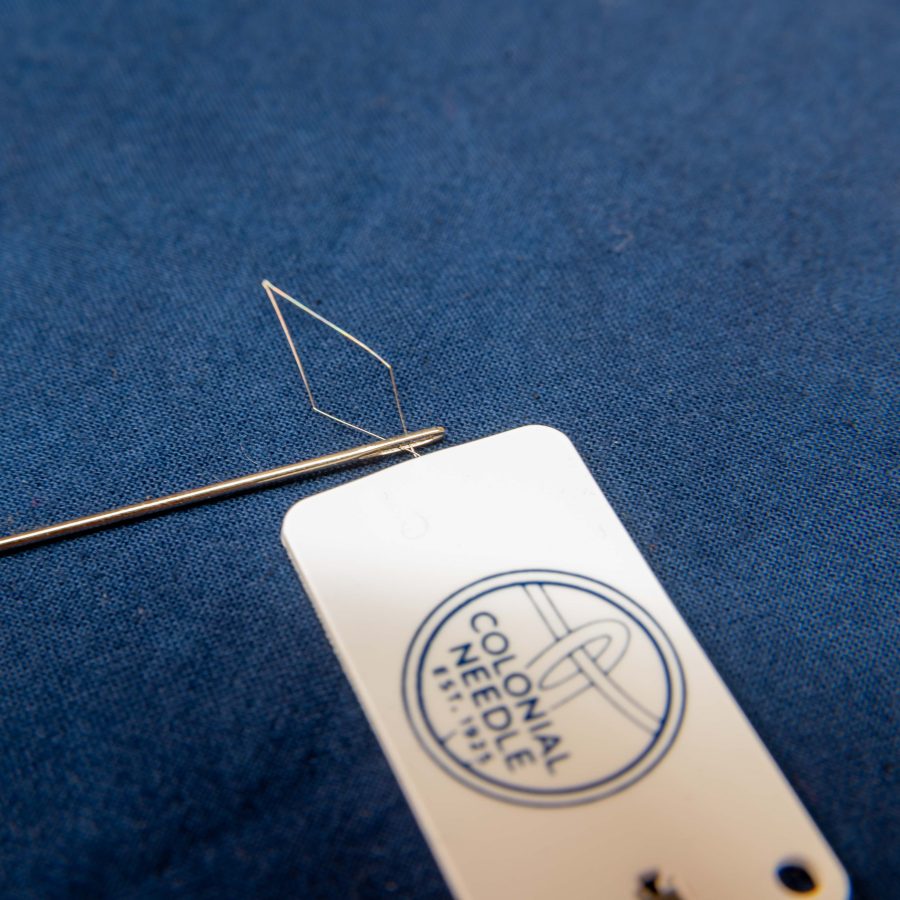
Ultrafine Threader with Cutter: The “must-have” for Sashiko and fine appliqué. The wire is incredibly thin to fit through tiny needle eyes, and the built-in cutter means you don’t have to reach for your scissors every time you finish a strand.
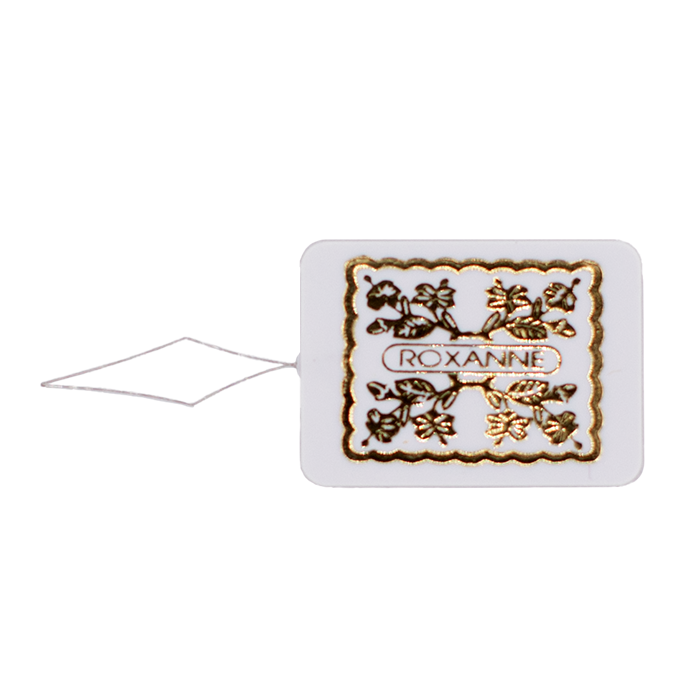
Roxanne Needle Threaders: If you do a lot of hand quilting or beading, these are legendary. They are patented, exceptionally fine, and designed to be sturdy enough for repetitive use without the wire snapping.
John James Threaders: These are the gold standard for traditional hand sewing. They are simple, reliable, and come in various sizes to match your favorite John James needles.
How to Use a Needle Threader (The Correct Way!)
For Hand Sewing:
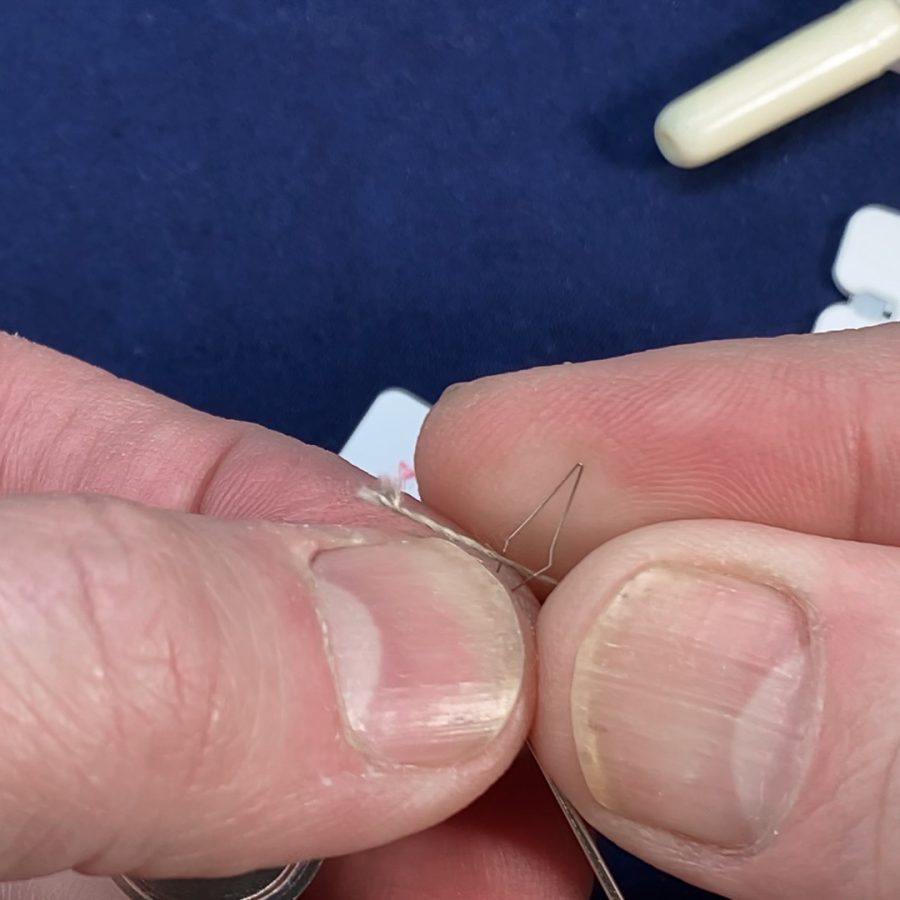
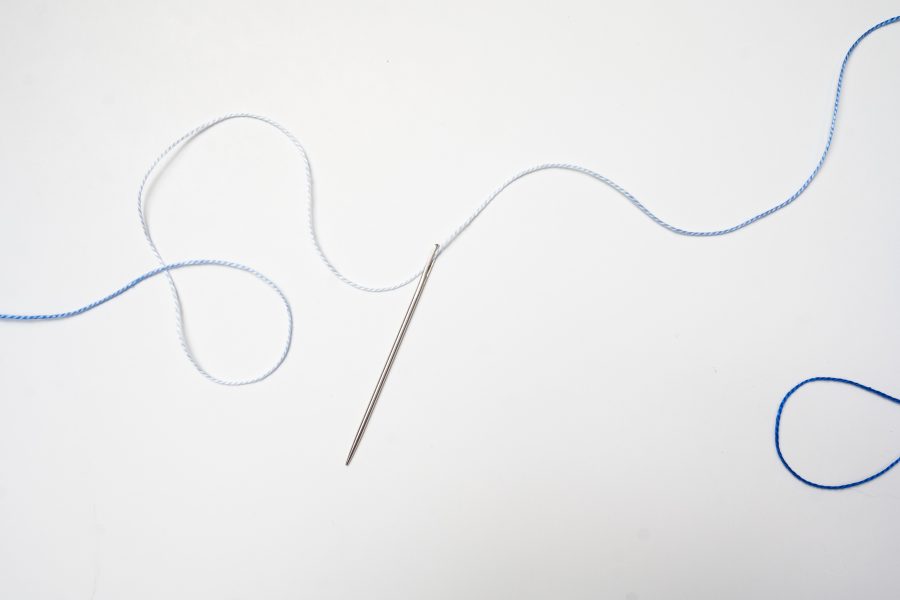
The Insert: Hold the needle threader by the handle and slide the wire loop through the eye of your needle.
The Thread: Pass your thread through the large wire loop (not the tiny needle eye!).
The Pull: Gently pull the wire loop back through the needle eye. The wire will carry the thread right through.
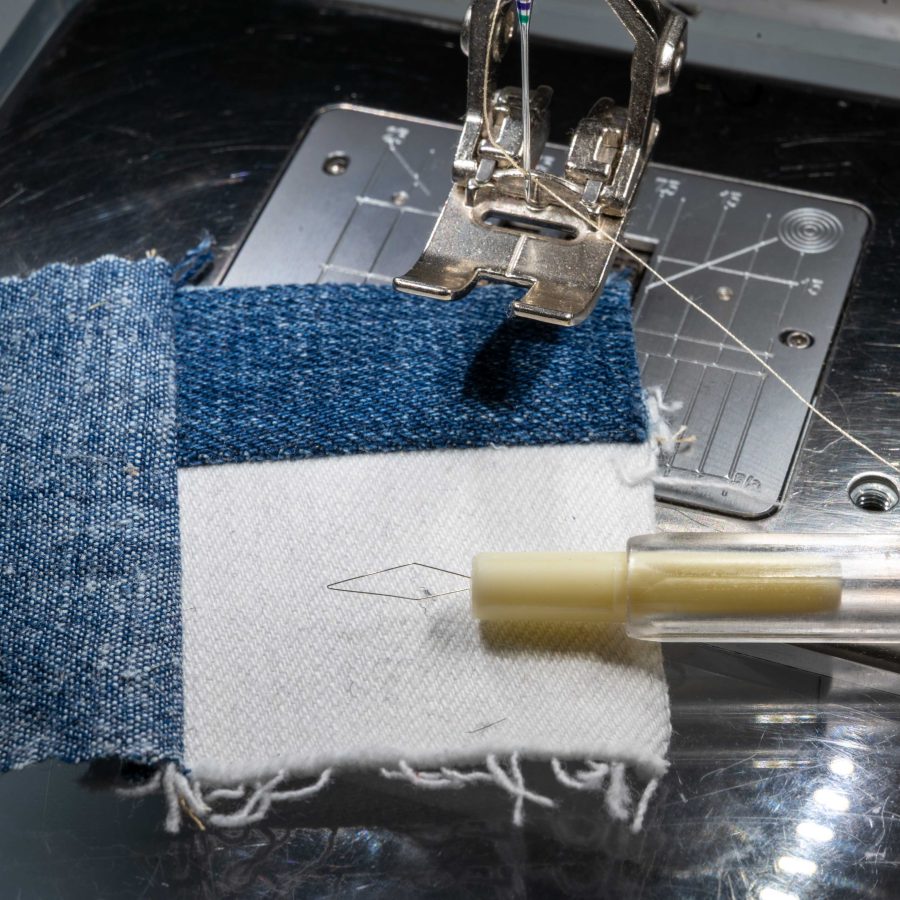
For Machine Sewing:
The Positioning: Ensure your needle is in the highest position.
The Reach: Using the Colonial Dual Threader, insert the wire loop through the needle eye from the back to the front (or side to side, depending on your machine).
The Magic: Place your thread in the loop and pull the threader back through.
Pro Tip: If you’re using the Ultrafine Threader, be gentle! These are high-precision tools. If the wire feels stuck, don’t force it—ensure your thread weight is appropriate for your needle size.
Watch the Step-by-Step
Want to see these in action? We filmed a quick tutorial demonstrating exactly how we use the Ultrafine Threader for Sashiko and the Dual Threader at the machine.
It’s funny how the simplest tools can sometimes be the most intimidating… until someone shows you the trick! Whether you’re a lifelong quilter or just starting your first Sashiko project, there is no shame in reaching for a ‘magic wand’ to save your eyes (and your sanity).
Now we want to hear from you: Is there a tool in your sewing tray that you still aren’t quite sure how to use? Or maybe you have a threading hack of your own? Let’s chat in the comments below!
If you’ve ever watched a professional sewist guide a tiny scrap of fabric toward a needle with terrifying precision, you might have wondered: How are their fingertips still intact?
For a long time, my “secret weapon” was actually a set of long acrylic nails. They were great for tucked pleats and guiding seams, but once I moved away from them, I realized I needed a replacement that was just as precise (and a lot more durable… ever snagged a needle on an acrylic nail? Ugh.).
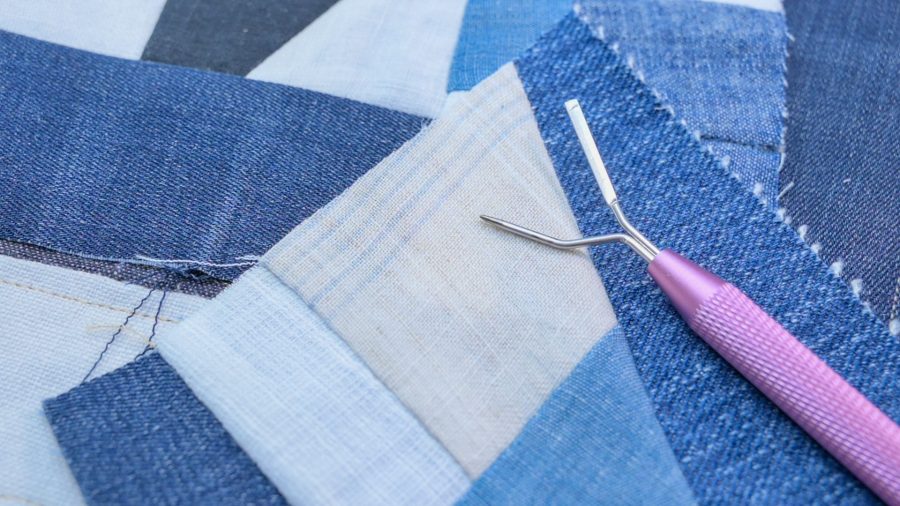
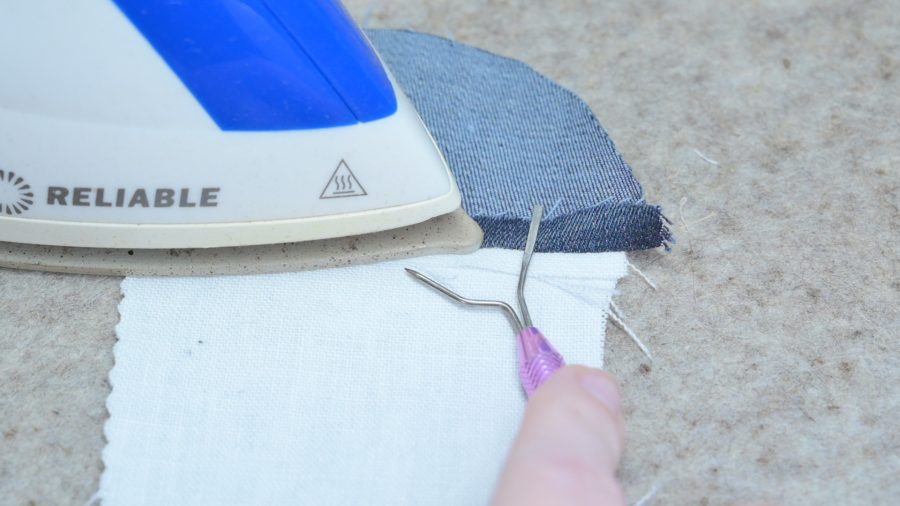
Enter the Sixth Finger Stiletto from Colonial Needle Company. It has officially earned a permanent spot in the tool tray right next to our machines. Here is why this little tool is a total game-changer in our textile studio.
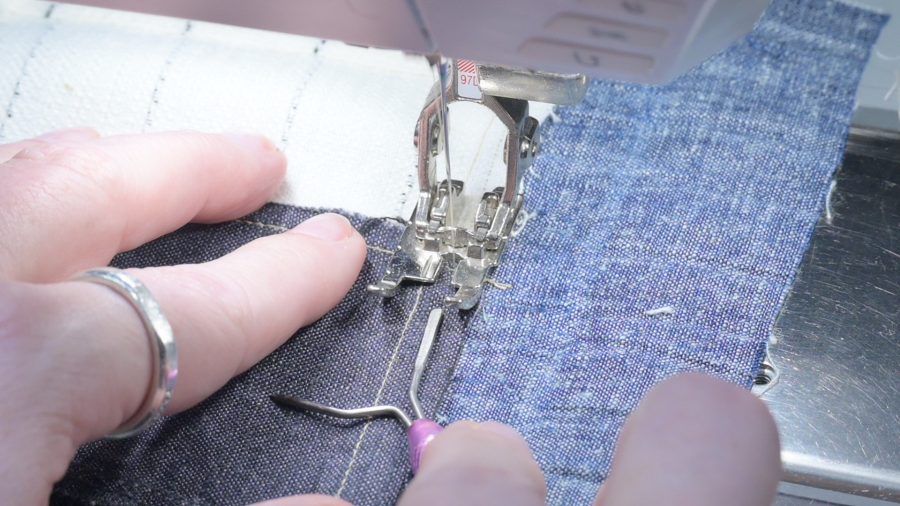
1. Safety Without Sacrificing Precision
The primary job of the Sixth Finger Stiletto is to do exactly what its name suggests: act as an extension of your hand. When you’re feeding fabric into the machine – especially at the very beginning or end of a seam – your fingers can get uncomfortably close to that very sharp, very fast-moving needle. The stiletto gives you ultimate control to nudge, push, and hold fabric flat without putting your actual fingers in harm’s way. Anyone else cringe hard at the memory of a needle-meets-finger moment?
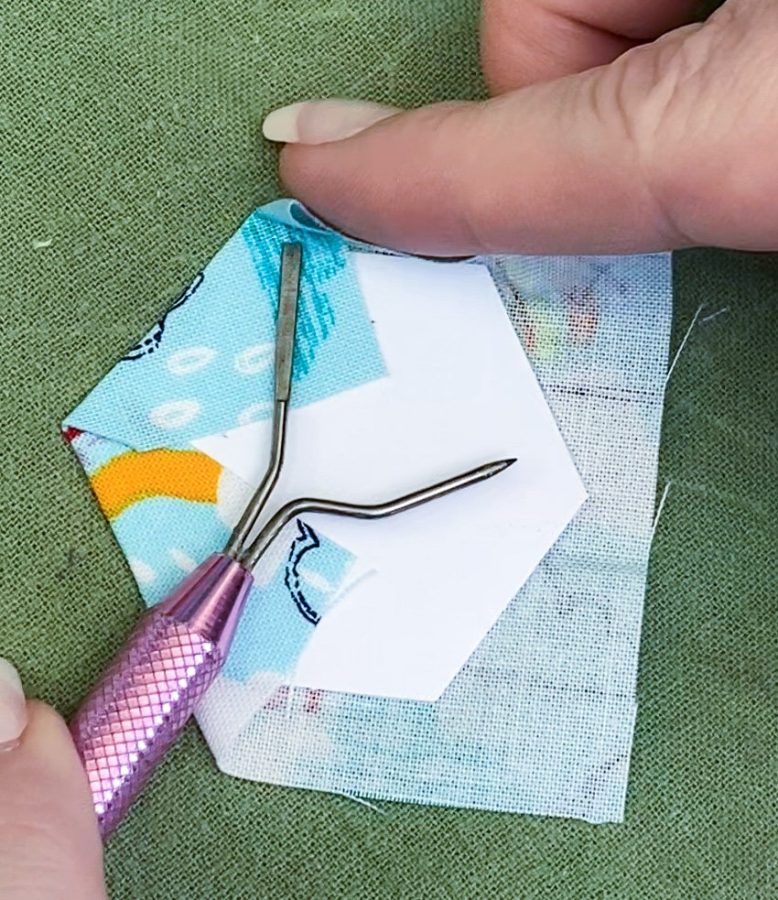
2. The EPP “Glue-Saver” Hack
We discovered a brand-new use for this tool last year that we can’t stop talking about. If you do English Paper Piecing (EPP), you know the struggle of glue-basting:
Glue gets on your fingertips.
Your sticky fingertips then touch the front of your beautiful fabric.
The fabric sticks to you instead of the template.
We started using the flat prong of the Sixth Finger Stiletto to fold the fabric over the edges of the EPP templates. It creates a crisp, tight fold and keeps the glue exactly where it belongs – on the paper, not on your hands! A quick swipe with a damp cloth or a small sponge kept on the side and the prong is clean of glue residue and you are on your way again.
3. It’s Always Within Reach
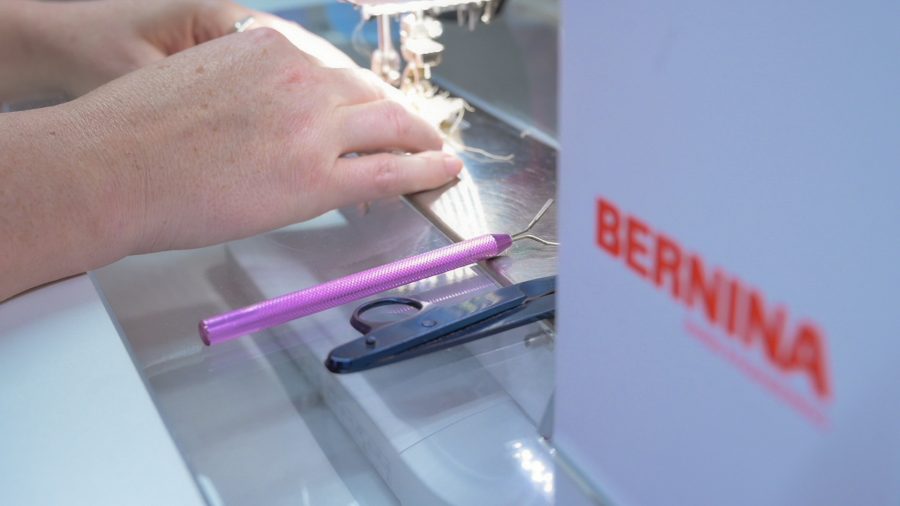
Some tools end up buried in a drawer, but the Sixth Finger is a “front-row” tool. Whether I’m guiding a bulky seam allowance, holding a ribbon in place, or helping a feed dog grab a slippery silk, it’s sitting right there in the tray. It’s simple, ergonomic, and honestly, I feel a little lost sewing without it now.
Bonus: Pressing Tool
Unlike some rounded pressing assist tools, we absolutely love using the flat prong of the Sixth Finger Stiletto to open and then “finger press” a seam open. Even with shorter nails, I don’t like dragging them across my fabric to set a pre-crease so this tool is perfect for that. Then, we hold the flat edge across the seams securing them while pressing the seam open. It slides easily along the seams holding it in place ahead of the tip of the iron. Safety and precision all in one!
Pro Tip: Because it’s made by Colonial Needle Company, the quality is top-notch. It’s sturdy enough to handle heavy denim but precise enough for delicate appliqué and slippery gauze and silks.
What’s Next?
Tune in! Make sure you check our YouTube video demonstration where we show you the Sixth Finger Stiletto in action at the machine and give you a close-up look at our EPP folding technique and all the ways we use this versatile tool in our studio.
Do you use a stiletto in your sewing room, or are you still risking your fingertips? Let us know in the comments!
January is the season of fresh starts—and in the sewing room, that often means returning to the basics. Whether you’re mending a favorite garment, repairing household linens, or trying visible mending for the first time, hand sewing is where many stitchers reconnect with the simple satisfaction of needle and thread.
Yet even the simplest stitch can feel frustrating if the tool in your hand isn’t quite right. Choosing the right needle for hand sewing and mending can make stitches smoother, neater, and more enjoyable—and can even extend the life of the fabric you’re repairing.
Let’s take a closer look at how the right needle supports better hand sewing and mending.
The Stitching Scenario
Everyday hand sewing & mending
This category includes:
Closing seams or hems
Repairing small tears or worn spots
Attaching buttons
Darning socks or sweaters
Visible mending on garments or textiles
These projects often involve a mix of fabrics and threads, which means flexibility matters.
The Common Challenges
Many stitchers struggle with:
Thread fraying or knotting while stitching
Difficulty pulling the needle through fabric
Uneven or bulky stitches
Hand fatigue during longer mending sessions
These issues are often blamed on technique—but just as often, the needle itself is the culprit.
Why the Right Needle Matters
A hand sewing needle may look simple, but small differences make a big impact:
Eye size: Too small, and your thread frays or won’t pass through smoothly. Too large, and stitches can look sloppy.
Shaft thickness: A needle that’s too thick can damage fabric fibers; too thin, and it may bend or break.
Point style: The point determines how the needle enters fabric—cleanly or with resistance.
Length: Longer needles are helpful for basting or running stitches, while shorter needles offer more control for fine repairs.
Matching these qualities to your project improves both stitch quality and comfort.
Our Recommendation: Needles for Hand Sewing & Mending
For most general hand sewing and mending, look for:
Sharps (Sizes 7–9) These are the workhorses of hand sewing. They have:
A sharp point for easy fabric penetration
A medium eye suitable for most sewing threads
Enough strength for woven fabrics and light repairs
Sharps are ideal for hems, seam repairs, and general garment mending.
When in doubt, test your needle on a scrap of the fabric you’re repairing. If the needle glides smoothly without resistance—and the thread passes through without fraying—you’ve found a good match. If you hear fabric “popping” or feel drag, try a finer needle.
Special Considerations for Visible Mending
Visible mending is as much about expression as repair, and needle choice supports that creativity.
Use a larger eye when working with thicker threads or embroidery floss
Choose a slightly longer needle for rhythmic, even stitches
Avoid forcing thick threads through tiny eyes—it weakens both thread and fabric
The goal is durability and beauty.
Reader Takeaway: A Simple Needle Checklist
If you’re hand sewing or mending:
✔ Match needle size to fabric weight
✔ Match eye size to thread thickness
✔ Keep a small assortment on hand
✔ Replace needles that feel rough or bent
A fresh needle truly makes a difference.
Looking Ahead
Hand sewing and mending are foundational skills—and mastering them sets you up for more advanced techniques throughout the year. In our next installment of The Right Tool for the Stitch, we’ll explore needle choices for embroidery on linen and other specialty fabrics.
Until then, may your stitches be smooth, your repairs satisfying, and your sewing basket well-stocked.
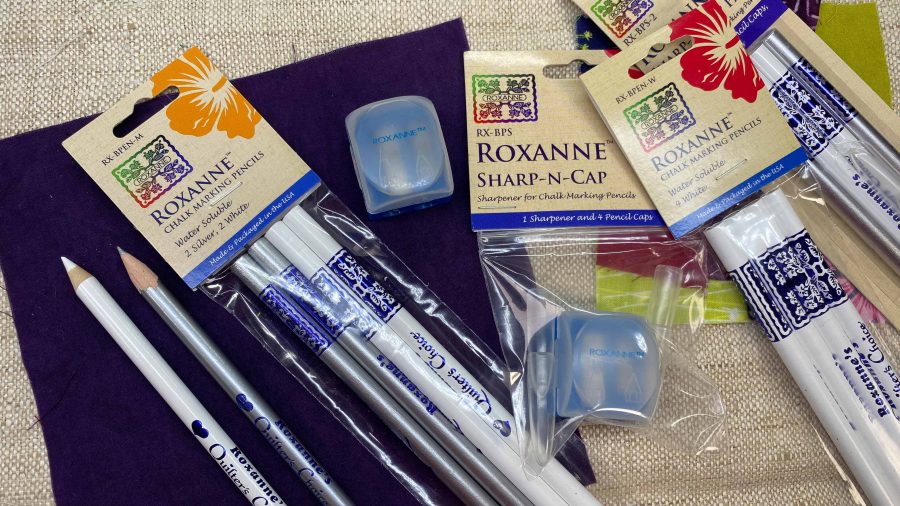
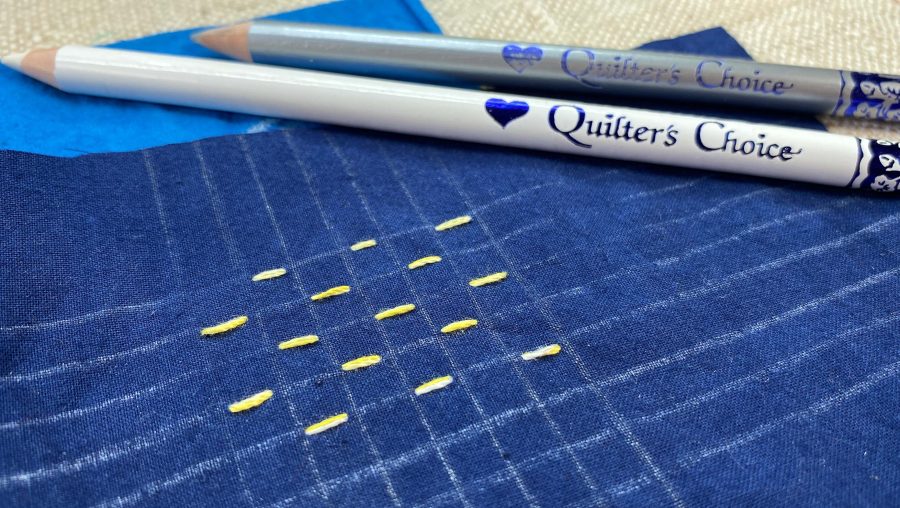
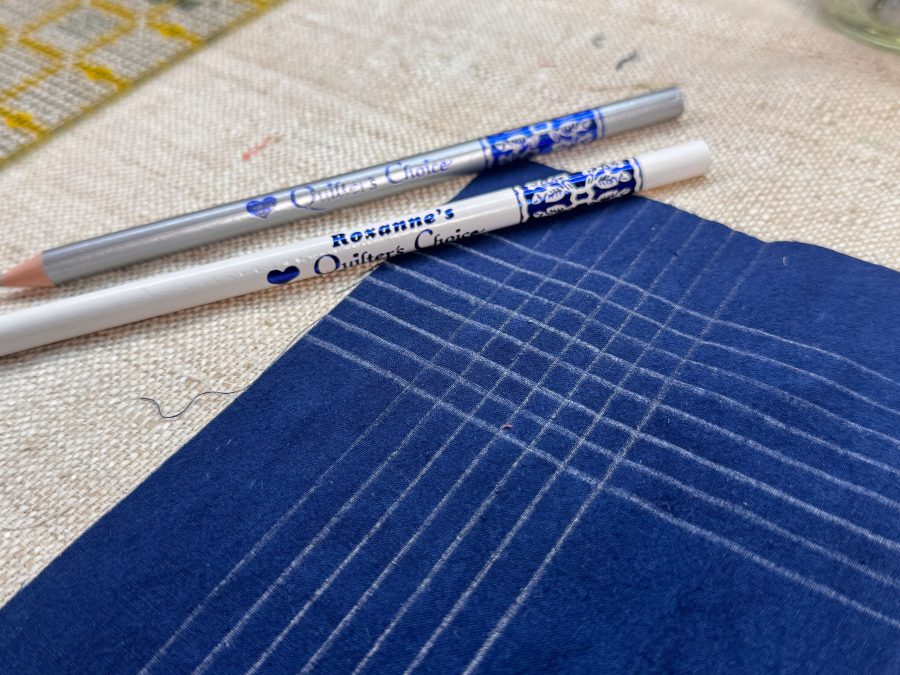
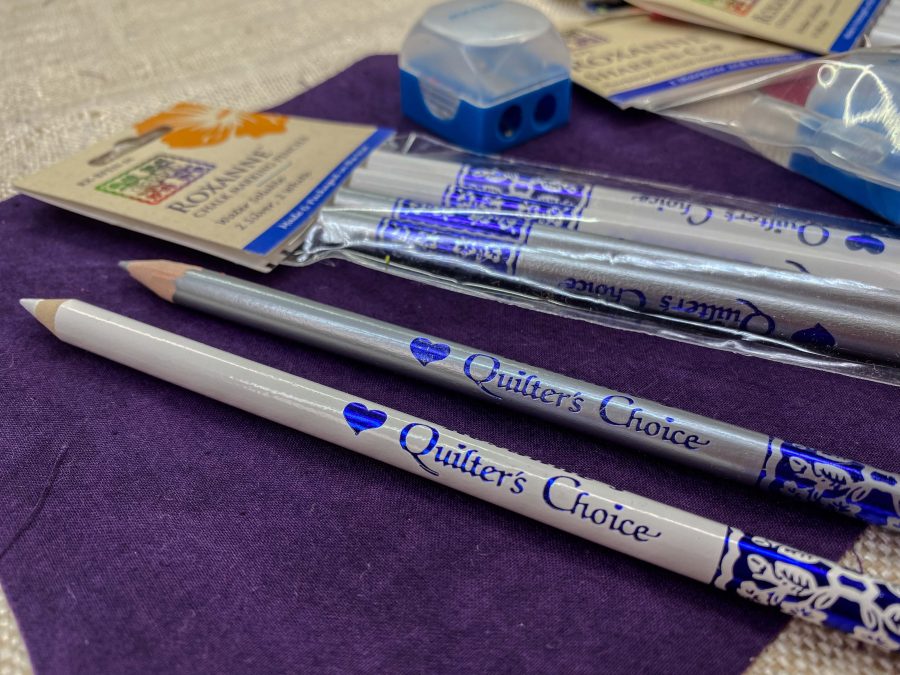
For years, the Roxanne Chalk Marking Pencils sat in our tool kit like wallflowers at a dance—present, but not particularly noticed. We assumed they were just another marking pencil, nothing special, nothing different from the dozens of other chalks and markers cluttering our workspace.
We were so wrong.
It wasn’t until we really dug into what these pencils are made of and why they behave the way they do that we had our revelation. These aren’t just marking tools—they’re problem-solvers, game-changers, and (in the case of that silver pencil) actual unicorns.
Let us explain.
The Problem With Most Marking Tools
If you’ve been making for any length of time, you’ve probably been betrayed by a marking tool. Maybe it was the wax chalk that melted into your quilt when you accidentally hit it with an iron. Or the “disappearing” pen that left a permanent yellow ghost after washing. Or the heat-erasable marker that reappeared the moment your finished project hit cold storage.
We’ve all been there. It’s heartbreaking to spend hours—sometimes days—on a piece, only to have your marking tool leave a permanent scar.
The truth is, most marking tools involve a trade-off:
Wax-based chalks are durable and don’t rub off easily, but they can become permanent if heat is applied, and they’re notoriously difficult to remove completely.
Heat-erasable pens give you fine lines that vanish with an iron, but they often leave white “ghost” shadows or reappear in cold temperatures.
Water-erasable pens are easy to see and precise, but their chemicals can react with detergents to leave permanent yellow or brown stains if not thoroughly rinsed.
It’s a minefield. And for those of us working with precious fabrics, heirloom projects, or pieces destined for exhibition, the stakes are high.
What Makes Roxanne Different: The Chemistry of Clean
Here’s where Roxanne Chalk Marking Pencils break the mold entirely.
Pure Chalk, Zero Wax Unlike most marking pencils, Roxanne pencils contain **no wax binders**. None. This means marks will never “set” into your fabric if you accidentally iron over them. The chalk stays on the surface of the fibers rather than melting into them.
Chemically Inert These pencils are mineral-based, not dye-based. There are no chemicals to react with your detergent, no dyes to oxidize over time, no “chemical roulette” that might leave rust-colored stains months after you thought your project was finished. The marks are just chalk—pure, simple, inert.
100% Water Soluble Because there’s no wax or chemical binder holding the chalk in place, Roxanne marks brush off easily or disappear completely with a damp cloth. When you’re done stitching, the roadmap vanishes—no ghosts, no shadows, no evidence it was ever there.
Archival Quality For textile artists concerned about the longevity of their work, Roxanne pencils are acid-free. Your marks won’t degrade or discolor the fabric over time, making them safe for heirloom quilts, museum-quality pieces, and everything in between.
The “Silver Unicorn” & Why It Changed Everything
If you work with dark fabrics—indigo for sashiko, black cottons, navy solids—you know the struggle. Most marking tools are either invisible on dark fabric or rub off the moment your hand touches the surface.
Enter the **Roxanne Silver Pencil**, which we now affectionately call “the unicorn.”
It Works on Everything The silver pencil uses a light-reflective mineral that creates a metallic sheen on fabric. On dark indigo or black, it glows like a beacon. On light cream or white, it shows as a soft grey. This means you can work across high-contrast patchwork—going from a dark navy sashiko block to bright white cotton—without ever switching tools.
Let that sink in for a moment. One pencil. All your fabrics.
It Survives the Handling For sashiko artists and hand quilters, this is critical. The metallic mineral base “grips” the fiber better than standard chalk, staying crisp and visible through the heavy handling that complex stitching requires. We tested this by aggressively rubbing our hand across marked fabric—the Roxanne line stayed sharp while a standard white chalk line nearby smeared into oblivion.
It Still Disappears Completely Despite its tenacious hold during the stitching process, the moment you’re done, a damp cloth or a quick wash makes it vanish. In the video, you can see the mark literally pop off the fabric with zero effort and zero residue.
It’s magic. Truly.
The Artistic Revelation: Permanent When You Want It
Here’s where things get really exciting for mixed media artists, embroiderers, and textile artists who work freehand.
Because these pencils are water-soluble, you can use them wet—dipping the tip in water and painting directly onto fabric like you would with watercolor pencils or graphite. The effect is soft, blendable, and beautifully artistic.
Once the marks dry, you can heat-set them to make them permanent. Suddenly, these aren’t just marking tools—they’re design tools. You can sketch freehand, shade, blend, and create dimensional effects that become a permanent part of your textile work.
For artists who want to move beyond rigid patterns and embrace spontaneous, organic design, this opens up an entirely new way of working.
The Bottom Line: Confidence in Every Mark
We spent years thinking Roxanne Chalk Marking Pencils were just another option in an overcrowded market. We were wrong.
These pencils solve problems we didn’t even realize we’d been working around:
– The frustration of switching between light and dark fabrics
– The anxiety of wondering if marks will truly disappear
– The heartbreak of accidental permanence
– The limitation of working only from traced patterns
Whether you’re a quilter who needs marks that survive hours of hand-stitching, a sashiko artist working on dark indigo, or a textile artist who wants to sketch and paint directly on fabric, Roxanne Chalk Marking Pencils deliver precision, versatility, and—most importantly—peace of mind.
Mark with confidence. Create with joy. Let Roxanne take care of the rest.
📺Watch the full video demonstration on YouTube to see the silver pencil in action and learn how to use these tools for both temporary marking and permanent artistic effects.
Have you tried Roxanne Chalk Marking Pencils? We’d love to hear about your experience! Share your thoughts in the comments or tag us on social media with your projects.
There are a vast array of reasons to love rotary cutters. From the easy speed they provide, to the clean edge of the cuts they make, to that smooth slicing sound they make when elegantly gliding through a stack of cotton…yea, that sound… rotary cutters are a crafters best friend. But what if your best friend is no longer fast, clean, or smooth. It’s time for a little intervention.
Just like dull knives in the kitchen, dull tools in your sewing room are a recipe for frustration and accidents. A blunt blade can mean skips, and ragged edges which can result in thread snags and pulls and having to take the time to go back and snip those threads and missed cuts when all we really want to do is sew. In addition, when the blade is dull, we usually compensate by applying more pressure which can lead to hand, wrist, and shoulder pain or injury. And none of us has time for that! The solution? Either out swap the blade (in this economy?!?) or give it a spa day and sharpen it. Yeah. That second one.
While we do keep a stash of spare blades “just in case,” there’s an easy, budget-friendly option: Colonial’s Rotary Blade Sharpener. This magical little tool is like a fairy godparent for your rotary blades—no wand required. Carefully remove your blade, pop it into the sharpener, and give it a few gentle twists. Voilà! The dual grit sides work together to turn back the clock on your blade’s dull days, leaving it sharper, shinier, and ready for action.
The result? Your blades work better, live longer, and stop making you question your crafting life choices. Give it a whirl—you’ll thank yourself, and so will your fabric.
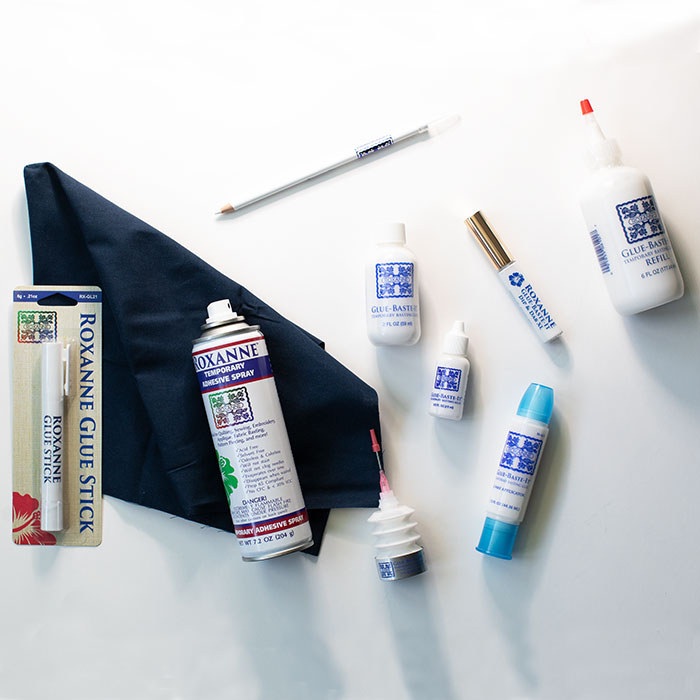
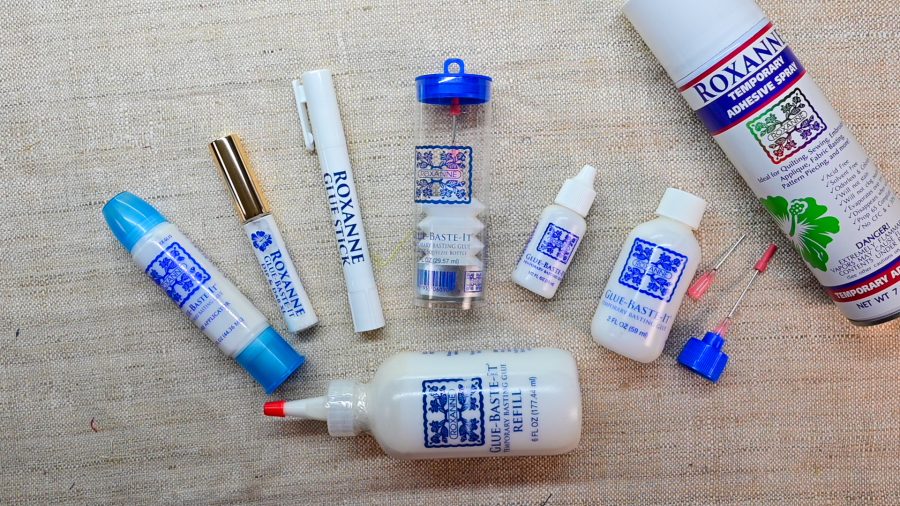
Greetings makers, crafters, and creators! Today, we’re diving into another group of Colonial Needle Company products to cover a sticky subject: glue. Specifically, glue basting with the Roxanne Baste-It family of glue.
Glue basting is a technique where you apply a thin line of water-soluble glue along the seam allowance or cut edges of fabric pieces to hold them in place before sewing. This allows for precise piecing, perfect points, and smooth curves. It is especially useful for boro, finishing quilts, and a manner of appliqué – completely removing the need for pins.
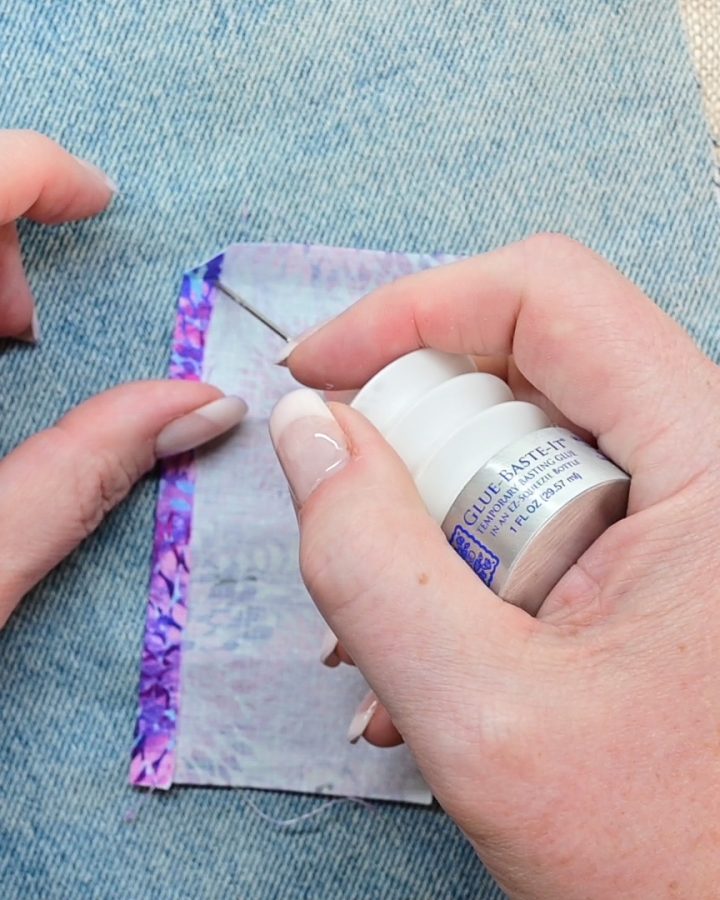
How to use Roxanne Basting Glue in Four Easy Steps:
Simply apply a fine line of glue
Line up the fabric pieces
Press with a hot iron to set (this step is not always required–as you will see in our video)
Then sew as usual.
Key points about glue basting:
Application: Roxanne Baste-It comes in a wide variety of container sizes and shapes to suit any purpose. From the spreadable 2-Way applicator to small pipettes and dab on applicators. And the Roxanne Glue Stick glides on smoooooooooth as silk without gumming up your fabric and needles. You choose which glue is best for your project and where to place it.
Heat setting: Although not required, a hot dry iron can be used to quickly set the glue and further ensure there is no shifting once the placement decisions have been made. Once set, you can easily sew without worrying about shifting seams or fabrics, even when rough handling of the fabric such as for hand quilting, sashiko, and boro.
Portability: Baste-It products come in easy to store and access sizes. You can take your handwork projects with you whether you’re traveling across the city or just to your sofa for the evening
Basting Glue Benefits: Say good-by to pins! Baste-It glues reduce the need for pins and clips, making sewing faster and smoother. Especially hand sewing. No fussing to work around pins and no stuck fingers!
Improves accuracy and precision in piecing, especially for points and curves.
Especially well-suited for appliqué, where you need precise placement of fabric edges.
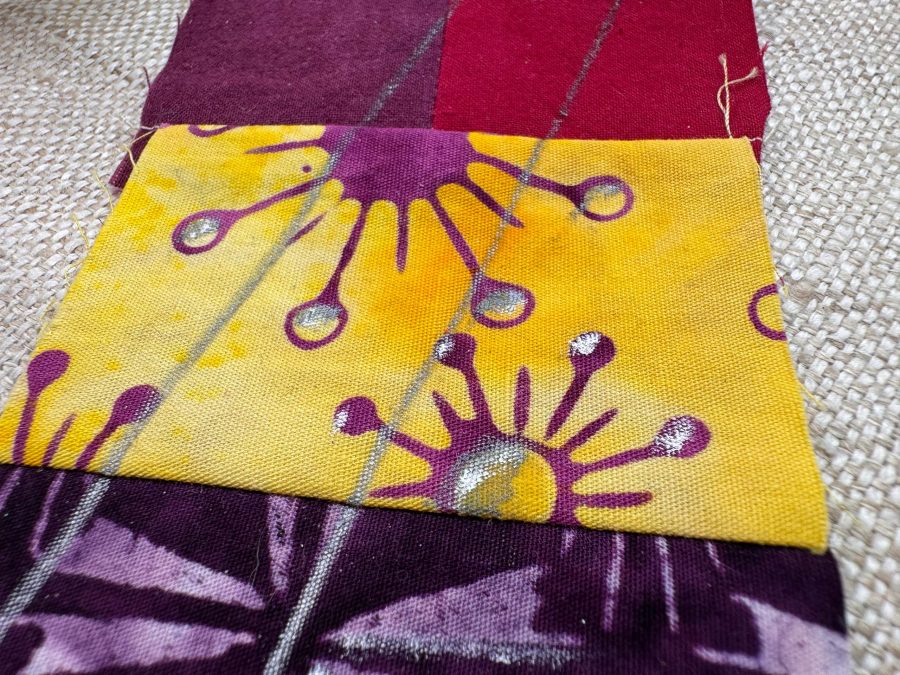
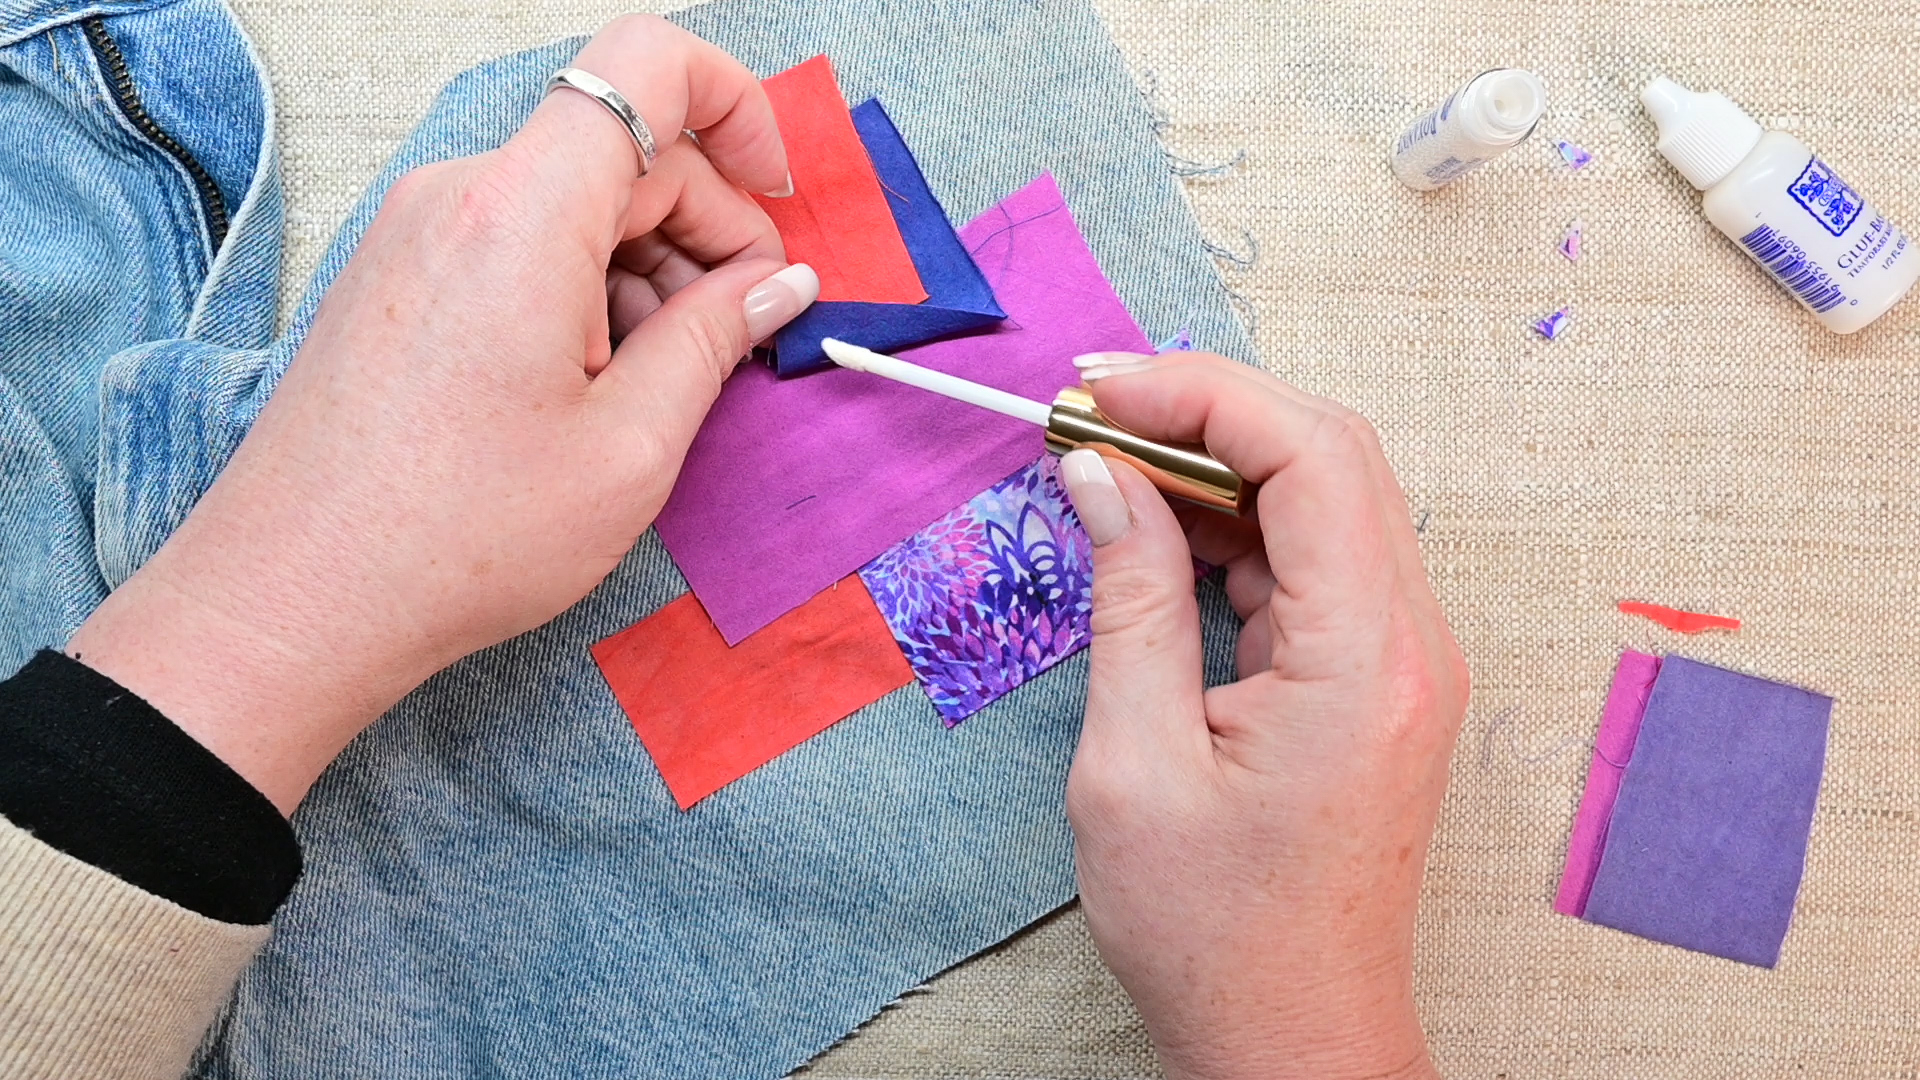
The Roxanne Glue Stick is our go-to for placing boro patches and visible mending patches prior to sewing down. Watch the boro section of our video for how we create boro inspired fabrics as well as some examples of our work.
Baste-It Glue won’t leave a mark on your delicate creations. All of the Roxanne glues are non-staining and wash away completely with ease!
How we use glue basting for different techniques:
Boro and Visible Mending: Apply a thin layer of glue to the patch and adhere to base fabric, adjusting your placement as necessary. Then stitch down. We love the Roxanne Glue Stick because it glides on smoothly and the patches stay where we place them…until we decide we want them someplace else. Or… someplace else again. But then they stay put!
Quilt Binding and Bias Tape: After sewing on your binding to one side of the quilt, fold the fabric over the edge and apply a layer of glue. Press with a hot, dry iron to set, then hand stitch or machine sew the remaining seam down. No clips or pins needed; you don’t have to worry about that binding shifting. Our video features a no worries technique for making fabric tape with Roxanne Basting Glue.
Curved seams: Apply a thin line of glue along the curved edge, carefully folding and shaping the fabric edge.
Appliqué: Glue the edges of your appliqué piece to the base fabric, ensuring smooth edges and precise placement. Then use your favorite visible or invisible appliqué stitch for attaching. Be sure to watch the video for our tip for sharp corners on those appliqué pieces.
That’s all for now! Let us know if you want a recommendation for which glue is best for your project or share your favorites with us. And remember to check back for more about our fav products from Colonial Needle Company as well as projects and tutorials that show how we use this all-encompassing line of products in our studio.
Keep up with the Colonial Needle Company on their social media channels and YouTube.
You can find us at shannonandjason.com and on our Instagram and Facebook pages we are @embracethecreativechaos.
Which CNC products do YOU have questions about? Let us know and we might just feature your question in a future video or post.