Sometimes the smallest details make the biggest difference.
If you’ve ever looked at an embroidery project and thought it needed just a little something more, Seed Stitch might be exactly what you’re looking for. This simple technique uses tiny, scattered stitches to create texture, fill shapes, and bring an extra layer of interest to your work.
It’s also a wonderful stitch for this time of year. Whether you’re putting the finishing touches on a handmade gift, embellishing a small project, or looking for a relaxing way to spend an evening stitching, Seed Stitch proves that you don’t need an elaborate technique to create something beautiful.
What Is Seed Stitch?
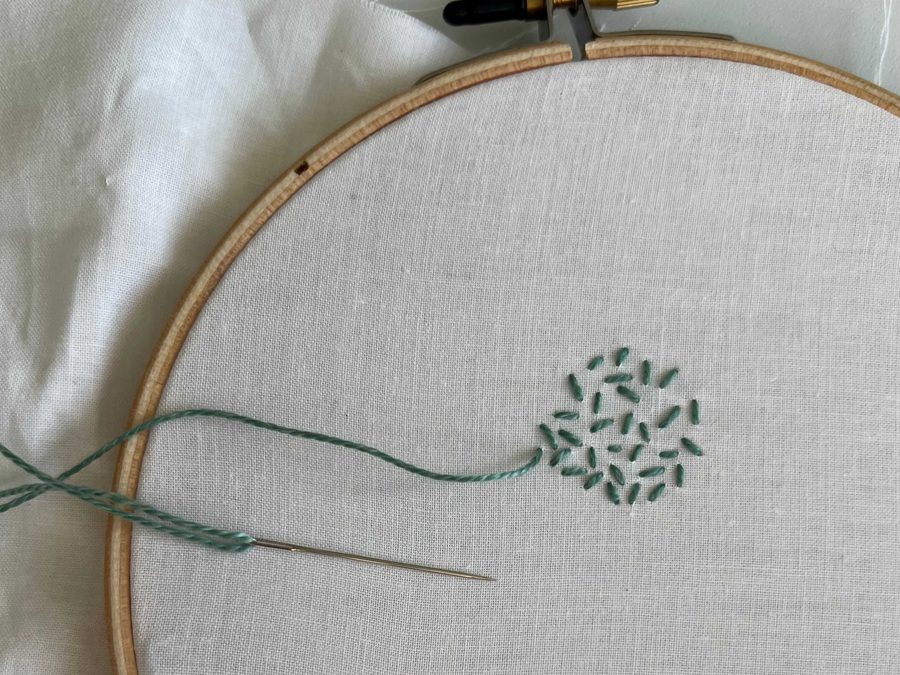
Seed Stitch is a decorative embroidery technique made up of small, individual straight stitches scattered across the fabric.
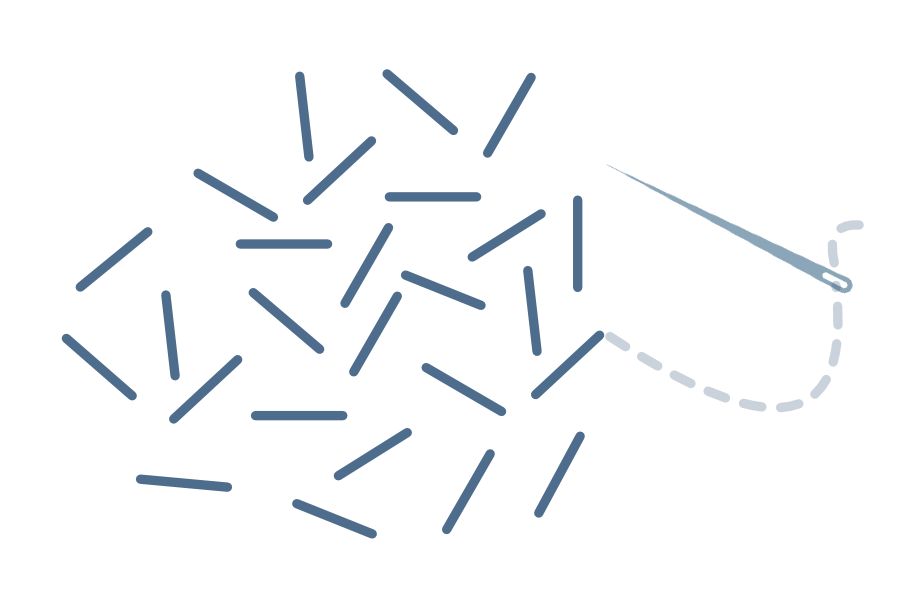
Unlike stitches that create continuous lines or defined outlines, Seed Stitch builds texture through repetition. Each stitch stands on its own, but together they create an interesting surface that can be subtle, dense, orderly, or wonderfully organic.
The stitches can be worked in the same direction or at different angles, depending on the effect you’re trying to achieve.
The beauty of Seed Stitch is its flexibility. You can use just a handful of stitches to add a delicate accent or fill an entire area with texture.
When to Use Seed Stitch
Seed Stitch is especially useful when you want to add texture without creating a heavy or overly structured design.
Try it for:
- Filling embroidered shapes
- Adding texture to leaves, flowers, and botanical designs
- Creating decorative backgrounds
- Embellishing fabric ornaments
- Adding detail to handmade gifts
- Creating subtle shading with different thread colors
- Filling negative space in embroidery designs
Because the stitches are small and independent, you can easily add a few more wherever your design needs them.
What You’ll Need
- Embroidery or crewel needle
- Embroidery floss or fine perlé cotton
- Cotton, linen, or another suitable fabric
- Embroidery hoop
- Small scissors
- Optional fabric marking pencil
Choosing your thread: For delicate texture, try one or two strands of embroidery floss. For a more pronounced effect, experiment with additional strands or a slightly heavier thread.
A sharp embroidery needle is a good choice for creating neat stitches and moving comfortably through the fabric.
How to Sew Seed Stitch
Step 1: Prepare Your Fabric
Place your fabric in an embroidery hoop, keeping it comfortably taut.
If you’re filling a particular shape, lightly mark its outline before beginning.
Step 2: Bring Your Needle Up
Bring the needle from the back of the fabric to the front wherever you’d like your first stitch to begin.
Step 3: Make a Small Straight Stitch
Insert the needle back into the fabric a short distance away, creating a tiny straight stitch.
Step 4: Move to a New Position
Bring the needle up in another location and make another small straight stitch.
You can work your stitches in the same direction or vary their angles for a more organic appearance.
Step 5: Continue Building Texture
Repeat the process, scattering stitches throughout your design.
For an even texture, distribute them relatively consistently. For a more natural effect, vary the spacing and direction slightly.
Step 6: Fill as Desired
Continue until you’ve achieved the amount of coverage you want. Seed Stitch can be worked sparsely or densely, depending on the project.
Secure your thread on the back when finished.
Tips for Beautiful Seed Stitch
Start with fewer stitches. You can always add more, but removing stitches from a densely filled area takes more effort.
Think about spacing. Evenly distributed stitches create a consistent texture, while irregular spacing can give a design a more natural appearance.
Experiment with direction. Stitches worked at different angles can create a softer, more organic effect.
Try multiple colors. Two or three closely related thread colors can add depth without making the design feel busy.
Keep your tension relaxed. Your stitches should rest comfortably against the fabric without pulling or puckering it.
Pay attention to thread travel. When working scattered stitches, avoid carrying your thread long distances across the back, especially on lightweight fabric where those threads may show through.
Seed Stitch vs. French Knots
Both stitches are wonderful for adding texture, but they create very different results.
French Knots form small, raised knots that sit above the fabric surface, creating noticeable dimension.
Seed Stitch, on the other hand, creates flatter texture using tiny straight stitches. It’s especially useful when you want to cover an area without adding much bulk.
You can even combine the two techniques in a single design, using Seed Stitch for background texture and French Knots for more prominent details.
Small Details for Handmade Gifts
November is a wonderful time to put Seed Stitch to work on smaller projects.
Try adding a scattering of stitches to:
- Fabric bookmarks
- Embroidered ornaments
- Handmade needle books
- Small fabric gift bags
- Decorative patches
- Personalized handkerchiefs
- Mini embroidered hoops
Even a few minutes of stitching can make a simple handmade item feel more personal.
A Little Texture Goes a Long Way
One of the most enjoyable things about Seed Stitch is that there really isn’t just one way to use it.
Work it densely to fill a shape, scatter it lightly across a background, combine colors for dimension, or use it to add the finishing touches to something you’ve already made.
Sometimes all a project needs is a handful of tiny stitches to feel complete.
And as we head into the season of handmade gifts and finishing projects, that’s a technique worth keeping close at hand.